


(4) Install inside escutcheon and door position sensor(For automatic
relocking)
(
see Figure J-1, Figure J-2, Figure J-3, Figure J-4 Figure J-5
,Figure J-6, Figure J-7
)
IMPORTANT:
Before installing the batteries, test the mechanical
operation of the lock by using both thumb turn and the key. The
movement of the bolt should be smooth and unobstructed. If
operation is not smooth, review the previous steps to ensure proper
installation.(see
Figure J-5
)
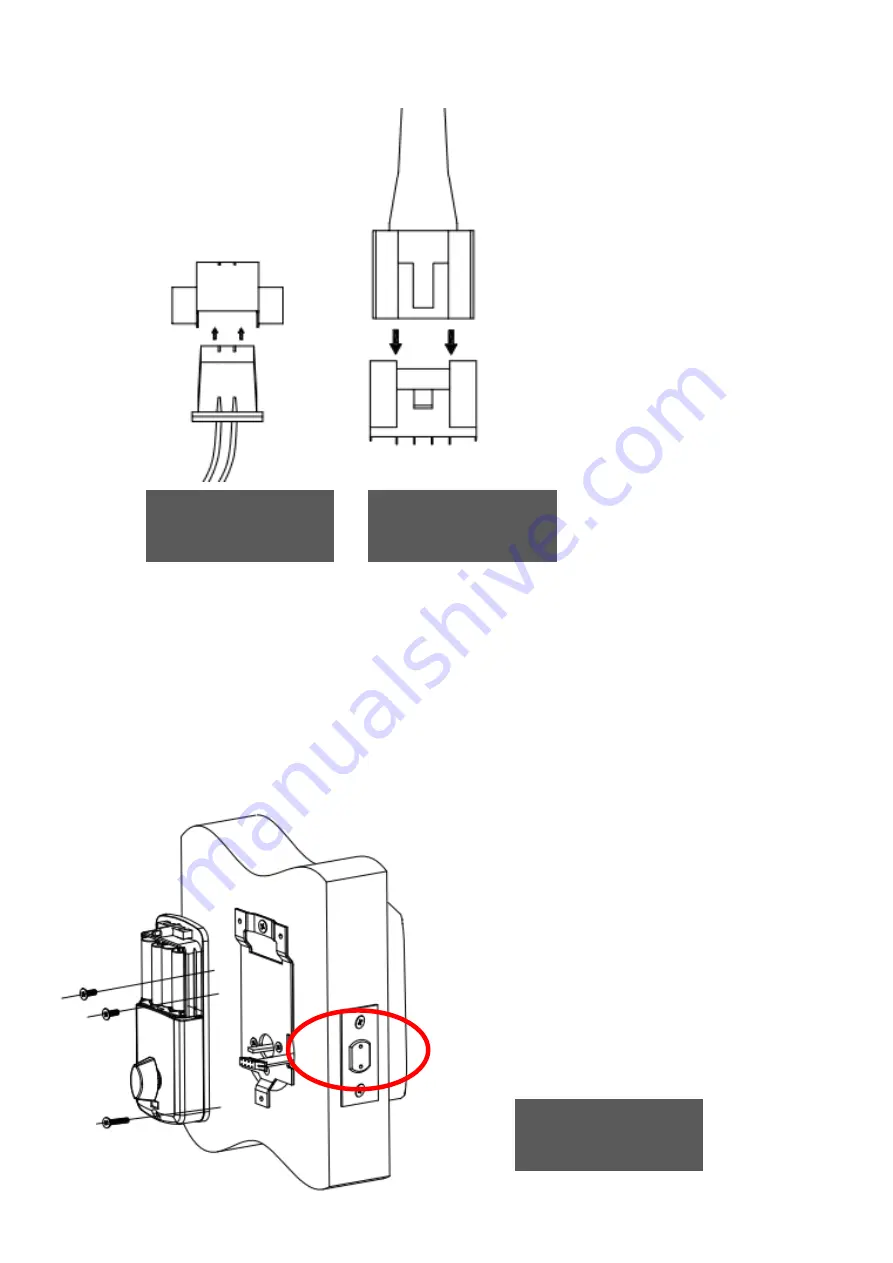
Door Position Sensor
Connector/cable
Outside Escutcheon
Cable/Connector
Install inside escutcheon
on inside mounting plate,
secure with (2) 10mm
machine screw and (1)
25mm,machine screw.
Note: the bolt must be
retracted
Figure I-2
Figure I-3
Figure J-1


