background image

BAHASA INDONESIA      73

 PEMASANGAN

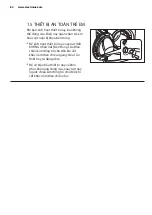
13 .

Jangan sekali-kali menempatkan 
kardus, kayu atau semacamnya di 
bawah mesin untuk mengkompen-
sasi ketidakrataan di lantai.

Perlonggar atau pererat kaki untuk 
disesuaikan dengan kerataan. 
Penyesuaian kerataan mesin 
dengan tepat mencegah getaran, 
kebisingan, dan pergerakan alat 
ketika dioperasikan.

Ketika mesin cuci sudah rata, 
cobalah mengguncangnya dari 
sudut ke sudut. 

Jika guncang, sesuaikan lagi 
kaki-kakinya hingga rata dan tidak 
lagi berguncang.

13.1 Pemosisian

Gunakan waterpas di bagian atas 
dan samping mesin cuci untuk 
memeriksa kerataan.

Jika Anda tidak punya waterpas, 
sebagai panduan gunakan tepi 
kusen pintu, lemari dapur, atau 
meja untuk memeriksa apakah 
mesin cuci sudah rata.

Penting agar mesin cuci Anda 
berdiri kokoh dan rata dengan 
lantai untuk memastikan 
pengoperasian yang benar.

Mesin tidak boleh dipasang di balik 
pintu yang dapat dikunci, pintu 
geser, atau pintu yang ada 
engselnya di sisi yang berlawanan 
dari pintu mesin cuci.

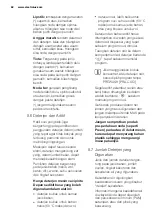
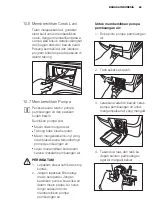
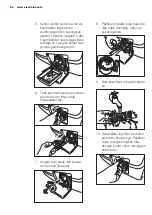
Hubungkan selang masukan air ke 
keran air dengan ulir BSP 
berukuran 3/4".
Gunakan selang yang disertakan 
bersama mesin cuci. JANGAN 
GUNAKAN SELANG LAMA.
Ujung lain dari selang air masuk 
yang terhubung ke mesin dapat 
diputar ke segala arah.
Longgarkan sambungannya, putar 
selang, kemudian kencangkan 
kembali sambungan sambil 
memastikan tidak ada kebocoran air.

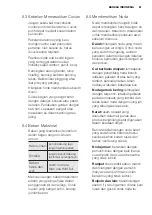
13.2 Masukan Air

Pasang mesin pada lantai yang datar 
dan keras. Pastikan sirkulasi udara di 
sekitar mesin tidak terhalang oleh 
karpet, permadani, dll.
Periksa dan pastikan mesin tidak 
menyentuh dinding atau perangkat 
dapur lainnya.

Summary of Contents for EWW14012

Page 1: ...EWW14012 EN IN VI WASHER DRYER MESIN CUCI PENGERING MÁY GIẶT MÁY SẤY KHÔ PANDUAN BAGI PENGGUNA TÀI LIỆU HƯỚNG DẪN SỬ DỤNG 38 76 USER MANUAL 2 ...

Page 2: ...n can be found on the rating plate Model PNC Serial Number Visit our website to Get usage advice brochures trouble shooter service information www electrolux com Subject to change without notice Warning Caution Safety information General information and tips Environmental information Caution risk of fire SAFETY INFORMATION PRODUCT DESCRIPTION CONTROL PANEL BEFORE FIRST USE DAILY USE WASHING WASHIN...

Page 3: ... Only use the advised quantities of fabric softener and detergent Damage to the fabric or appliance can occur if you overfill Refer to the manufacturer s recommendations of quantities Wash small items such as socks laces washable belts etc in a washing bag or pillow case as it is possible for such items to slip down between the tub and the inner drum This appliance is not intended for use by perso...

Page 4: ...ust the feet in order to allow air to circulate freely Always be sure that there is no water leakage from hoses and their connections after the installation Any plumbing work required to install this appliance should be carried out by a qualified plumber Any electrical work required to install this appliance should be carried out by a qualified electrician This appliance is designed for domestic u...

Page 5: ...aterials can when heated produce fire by spontaneous combustion If it is unavoidable that fabrics that contain vegetable or cooking oil or have been contaminated by hair care products be placed in washer dryer they should first be washed in hot water with extra detergent this will reduce but not eliminate the hazard The cool down cycle of washer dryer is used to reduce the temperature of the items...

Page 6: ...the groove is horizontal If necessary use a coin When you activate this device you cannot close the door This prevents children or pets to be locked in the drum To disable this device and restore the possibility of closing the door rotate the button anti clockwise until the groove is vertical 1 5 CHILD SAFETY DEVICE ...

Page 7: ...lter 7 6 Level Adjustment Feet Front 8 Mains Cable 9 Water Inlet Hose 10 Water Drain Hose 11 Hose Support 12 Level Adjustment Feet Back Transit Bolts To connect the drain hose on the edge of a sink Plastic caps To close the holes on the rear side of the cabinet after the removal of the transit bolts ACCESSORIES Plastic hose guide 14 13 1 2 4 5 6 3 15 8 9 12 7 11 10 ...

Page 8: ...ram icon to select the wash or dry program The relevant light will light up See page 12 3 3 Favourite Touchpad Program settings that are frequently used can be saved e g Cotton 60 C 1200 rpm with Prewash and Rinse Plus To recall the favourite wash program press Favourite button You will get acknowledgement on the screen the Favourite program is loaded You can recall a favourite wash program ONLY w...

Page 9: ...u have set the program and before you press the Start Pause button If you wish to add laundry in the machine during the delay time press Start Pause touchpad to put the machine in pause mode Add laundry close the door and press Start Pause touchpad again You can cancel the delay time at any moment by pressing Delay Start touchpad repeatedly till the display shows delay time then press the Start Pa...

Page 10: ...pad untill the designed time is reached Maximum allowable timed drying changes based on wash program selected The final time value is the total duration of the washing detachment drying cycles At the end of the program the appliance performs the anti crease phase for approx 10 minutes During this time the display will show time remaining and door is locked Press this touchpad to set the level of d...

Page 11: ...ion for heavy soil The indicator of this option comes on When you set this function put the detergent into the compartment Refer page 18 19 This function increases the program duration Select this option to add approximately 45 minutes of tumbling in vapour during the wash cycle Vapour helps open fabric fibers up to allow laundry additives to release tough stains The indicator of this option comes...

Page 12: ...ax load 1 5 kg Wash Rinses Short spin Drying program for cotton items max load 7 kg Dry Refresh Vapour program for White and coloured cotton This cycle removes odours and helps to dewrinkle the laundry max load 1 5 kg 1 2 2 2 Spin Reduction 1200 to 400 rpm No Spin Rinse Hold Extra Silent Cupboard Dry Spin Reduction 1200 to 400 rpm No Spin Rinse Hold Extra Silent 1 Spin Reduction 800 to 400 rpm No ...

Page 13: ...otton with normal soil Set this program to have a good washing results and decrease the energy consumption The time of the washing program is extended max load 10 kg if drying option combined please reduce to 7 kg Spin Reduction 1400 to 400 rpm No Spin Rinse Hold Iron Dry Cupboard Dry Extra Dry 2 Wash Rinses Short spin Dry If drying option combined 1 2 Spin Reduction 1400 to 400 rpm No Spin Spin T...

Page 14: ...owels etc 3 17 Manual Dry Time Option Guides 7 5 2 1400 1400 1400 240 250 120 180 60 Synthetic or mixed fabric items jumpers blouses underwear household linen etc Wool and hand washable wool 3 1 1200 1200 120 180 60 1 1200 120 The drying time can vary according to the final spin speed the required degree of drying Extra Dry or Cupboard Dry or Iron Dry the type of laundry the size of load 3 18 Dura...

Page 15: ... dosage to maximum manufacturer recommendation on the packaging which is the 100 equivalent For the maximum detergent quantity see the detergent manufacturer recommendation on packaging Press to confirm BEFORE FIRST USE 4 Ensure that the electrical and water connections comply with the installation instructions Put 2 litres of water in the detergent compartment for washing phase This activates the...

Page 16: ...2 Touch one of the Program ICONS to choose the wash or dry program you require The relevant light will light up Once you selected a program the program selected will stay at that position for the whole of the cycle The display shows the level of the Time Manager the program duration and the indicators of the phases of the program 5 When these touchpads are pressed the corresponding pilot lights co...

Page 17: ...teps The weight is a general indication that changes with the type of the laundry Maximum load capacity of selected program Load Weight Place the laundry in the drum one item at a time shaking them out as much as possible 3 The weight shown on display is an approximate weight only The display shows these indicators when the door is open Wash bras pantyhose and other delicates in a mesh laundry bag...

Page 18: ...SH This compartment is used for detergent on all programs Detergent flap Flap for powder or liquid detergent Powder or liquid detergent 3 1 PO SITION US ING PO WDE R DE TE RG EN T Position down for liquid detergent Position up for powder detergent factory setting 2 Position down for liquid detergent Position up for powder detergent factory setting Do not use gelatinous or thick liquid detergents D...

Page 19: ...top flashing and a default program duration will be displayed on the screen After approx 15 minutes from the start of a program If you use thick softeners it is recommended to dilute with water To pause press Start Pause The indicator will start flashing Press the Start Pause again The program will continue Changing a running program is possible only by switching off the appliance Press the On Off...

Page 20: ... If you can not open the door but you need to open it you have to switch the machine off by pressing the On Off button to deactivate the appliance After about 5 minutes the door can be opened Pay attention to the water level and water temperature CAUTION 1 3 2 When The Washing Program Is Completed But There Is Water In The Drum The drum turns regularly to prevent the creases in the laundry You mus...

Page 21: ...e On Off button to turn on the machine Put the detergent and the additives in the appropriate compartment Select a wash program Drying Option Press to start the program Press until the display shows one of the dryness level indicator See section 3 16 The time value on the display is the duration of washing approx 20 min of detachment drying cycles calculated on a default load size Load the laundry...

Page 22: ...se phase for approx 10 minutes After anti crease phase finish Some drying level options are not available for some drying programs The display shows a time value based on the default load size If the amount of your laundry is more or less than the default size the appliance will adjust the time value automatically during the cycle The display shows the door locked indicator Press to start the prog...

Page 23: ...the first wash they should therefore be washed separately the first time Button up pillowcases close zip fasteners hooks and poppers Tie any belts or long tapes Remove persistent stains before washing Rub particularly soiled areas with a special detergent or detergent paste Treat curtains with special care Remove hooks or tie them up in a bag or a net Make sure that no metal objects are left in th...

Page 24: ...stains which are not recent since the cellulose structure will already have been damaged and the fabric tends to hole Mould stains treat with bleach rinse well whites and fast coloureds only Grass soap lightly and treat with bleach whites and fast coloureds only Ball point pen and glue moisten with acetone lay the garment on a soft cloth and dab the stain Lipstick moisten with acetone as above the...

Page 25: ...ng inadequate rinsing reduced washing effect Any fabric softener or starching additives must be poured into the compartment marked before starting the wash program Follow the product manufacturer s recommendations on quantities to use and do not exceed the MAX mark in the detergent dispenser drawer The type and quantity of detergent will depend on the type of fabric load size degree of soiling and...

Page 26: ...mperature 30 C DO NOT wash at all Ironing Dry cleaning Drying Flat Tumble dry DO NOT tumble dry High temperature Low temperature On clothes hanger On the line CARE AND CLEANING 10 You must DISCONNECT the appliance from the electricity supply before you can carry out any cleaning or maintenance work The water we use normally contains lime It is a good idea to periodically use a water softening powd...

Page 27: ...erature washes it is possible to get a build up of residues inside the drum We recommend that a maintenance wash be performed on a regular basis 10 4 Maintenance Wash The drum should be empty of laundry Select the hottest cotton wash program Use a normal measure of detergent must be a powder with biological properties To run a maintenance wash 1 2 3 To aid cleaning the top part of the additive com...

Page 28: ... remove the filter while the appliance operates Do not clean the drain pump if the water in the appliance is hot The water must be cold before you clean the drain pump WARNING To clean the drain pump 1 Open the drain pump door 2 Pull the flap down 3 Put a container below the recess of the drain pump to collect the water that flows out 4 Press the two levers and pull forward the drainage duct to le...

Page 29: ... centre 9 Clean the filter under the water tap 1 2 If your water is very hard or contains traces of lime deposit the water inlet filter may become clogged It is therefore a good idea to clean it from time to time 10 8 Cleaning The Water Inlet Filter 10 Put the filter back in the pump into the special guides Make sure that you tighten correctly the filter to prevent leakages 11 Put the flap back an...

Page 30: ... water tap If the machine is exposed to temperatures below 0 C certain precautions should be taken 10 9 The Dangers Of Freezing Turn off the water tap 1 2 Unscrew the inlet hose 3 Put a bowl below the recess of the drain pump to collect the water that flows out 4 Pull forward the drainage duct and that of the inlet hose in a bowl placed on the floor and let water drain out 5 Screw the water inlet ...

Page 31: ... blocked Error code Clean the water inlet hose filter The door is not properly closed Error code Close the door firmly The water tap is closed Error code Open the water tap Close the door firmly Certain problems are due to lack of simple maintenance or oversights which can be solved easily without calling out an engineer Before contacting your local Service Centre please carry out the checks liste...

Page 32: ...appliance The support feet have not been adjusted Check the correct levelling of the appliance The laundry is not evenly distributed in the drum Pause the machine and redistribute laundry manually There is very little laundry in the drum Load more laundry Unstable floors eg wooden floors Refer to relevant paragraph in Positioning section The door lock has not been released Wait about 5 minutes The...

Page 33: ...moved The load may be too small Make sure that the packaging and or the transit bolts are removed Refer to Installation Machines based on modern technology operate very economically using very little water without affecting performance Add more laundry in the drum Pause the machine and redistribute laundry manually Spinning starts late or the machine does not spin The machine makes an unusual nois...

Page 34: ...er Wool Rinse Spin 7 Kg 3 Kg 7 Kg 1 Kg 7 Kg 7 Kg Drying Cottons Drying Mixed 7 Kg 3 Kg 10 Kg 4 Kg 4 Kg 1 5 Kg 10 Kg 1 5 Kg 2 Kg 1 5 Kg 4 Kg 3 Kg 10 Kg 10 Kg To open the door proceed as follows TECHNICAL DATA 12 If you are unable to identify or solve the problem contact our service centre Before telephoning make a note of the model serial number and purchase date of your machine the Service Centre ...

Page 35: ...levelled and does not rock It is important that your washer dryer stands firm and level on the floor to ensure correct operation 13 1 Positioning That the appliance must not be installed behind a lockable door a sliding door or a door with a hinge on the opposite side to that of the washer dryer door is restricted Connect the water inlet hose to a tap with 3 4 BSP thread Use the hose supplied with...

Page 36: ...e must remain hooked on the proper support piece situated on the top part of back side of the appliance In this case make sure the end cannot come unhooked when the machine is emptying 90 cm 60 cm 13 3 Water Drainage The manufacturer declines any responsibility for damage or injury through failure to comply with the above safety precaution Should the appliance power supply cable need to be replace...

Page 37: ...ectly you will help prevent potential negative consequences for the environment and human health which could otherwise be caused by inappropriate waste handling of this product For more detailed information about recycling of this product please contact your local city office your household waste disposal service or the shop where you purchased the product 14 1 Packaging Materials 14 3 Ecological ...

Page 38: ...lih produk yang menghad irkan pengalaman profesional dan inovasi selama beberapa dekade Cerdas dan bergaya didesain dengan memperhatikan Anda Jadi kapan pun Anda menggunakannya Anda dapat merasa tenang bahwa Anda akan mendapatkan hasil yang hebat setiap saat Selamat datang di Electrolux Kami menyarankan penggunaan suku cadang asli Ketika menghubungi Servis pastikan Anda telah menyediakan data beri...

Page 39: ...lum Anda menggunakan alat Jangan memasukkan benda apa pun seperti koin peniti paku sekrup batu atau benda keras dan benda tajam lainnya ke dalam mesin karena dapat menyebabkan kerusakan parah Gunakan pelembut cucian dan deterjen sebanyak yang disarankan saja Dapat terjadi kerusakan pada kain atau alat apabila Anda menggunakannya secara berlebihan Baca rekomendasi jumlah cucian yang dianjurkan oleh...

Page 40: ...mut bulu harus dicuci dikeringkan dalam mesin cuci khusus di toko karena ukurannya besar Tanyakan kepada produsen mengenai item tersebut sebelum mencuci mengeringkannya dalam mesin cuci di rumah Pengguna harus selalu memeriksa dan memastikan bahwa tidak ada pemantik gas api sekali pakai atau lainnya yang tertinggal dalam pakaian mereka Mesin ini berat Berhati hatilah apabila memindahkan mesin Sete...

Page 41: ...ertekstur serupa tidak dapat dikeringkan di dalam mesin cuci pengering dalam pengaturan panas Bahan karet busa jika dipanaskan mengakibatkan api karena pembakaran spontan Jika kain yang terkena minyak sayur atau minyak atau terkontaminasi produk perawatan rambut berada di dalam mesin cuci pengering kain tersebut harus dicuci dulu dalam air panas dengan deterjen ekstra ini akan mengurangi tapi tida...

Page 42: ...k harus diawasi agar mereka tidak bermain main dengan alat ini Komponen pengemas misalnya lapisan plastik polistiren dapat berbahaya bagi anak anak bahaya tercekik karena kurang oksigen Jauhkan benda benda tersebut dari jangkauan anak anak Simpanlah deterjen di tempat yang aman dan jauh dari jangkauan anak anak 1 4 KESELAMATAN ANAK Jangan sampai ada anak kecil atau binatang peliharaan masuk ke dal...

Page 43: ...suaian el Kedataran Depan 8 Kabel Listrik 9 Selang asupan air Water Inlet Hose 10 Selang pembuangan Air Water Drain Hose 11 Penyangga Selang 12 Kaki Penyesuaian el Kedataran Belakang Baut Transit Untuk menghubungkan selang pembuangan air ke pinggir bak cuci Tutup plastik Untuk menutup lubang sisi belakang kabinet setelah mencabut baut sementara AKSESORI Panduan selang plastik 14 13 1 2 4 5 6 3 8 9...

Page 44: ... On Off Hidup Mati digunakan untuk Menghidupkan dan mematikan cuci pengering 3 2 Touchpad Program Tekan ikon program untuk memilih program pencucian atau pengerin gan Lampu yang terkait akan menyala Baca halaman 48 3 3 Papan Sentuh Favorit Pengaturan program yang sering digunakan dapat disimpan mis cotton katun 60 C 1200 rpm dengan Prewash Pracuci dan Rinse Bilas Untuk memanggil kembali program pe...

Page 45: ...ak ada opsi perasan menghapus semua fase perasan dan meningkat kan jumlah bilasna No Spin Tanpa Perasan Siklus pencucian ini sangat senyap dan bisa dipilih di malam hari atau di waktu lain yang tepat Dengan memilih opsi ini air bilasan terakhir tidak dikosongkan dan tabung berputar reguler untuk mencegah kerutan cucian Pintu tetap terkunci dengan air di dalam tabung Untuk melanjutkan siklus Anda h...

Page 46: ...kan waktu tersisa adalah dan pintu terkunci Anda bisa membatalkan waktu penundaan kapan saja dengan menekan touchpad Delay Start Tunda Pelaksanaan berulang ulang hingga layar menampilkan waktu tunda lalu tekan Touch pad Start Pause Mulai Jeda Tambahkan cucian tutup pintu dan tekan lagi touchpad Start Pause Mulai Jeda A Ikon Rinse Hold Tahan Bilasan B Kecepatan Spin Perasan C Suhu Pencucian D Ikon ...

Page 47: ...ungkin tidak terlihat di dalam tabung selama siklus pencucian uap Uap akan terbentuk di awah tabung dan dimungkinkan untuk naik secara alami ke pakaian Pada akhir siklus penguapan pakaian akan menjadi lebih hangat lebih lembut dan terlepas dari tabung Untuk menjalankan program yang dipilih tekan Start Pause Mulai Jeda Untuk menyela program yang berjalan tekan Start Pause Mulai Jeda untuk menjeda m...

Page 48: ...gan untuk item katun beban maks 7 Kg Kering 1 2 2 2 Spin 1200 400 rpm No Spin Rinse Hold Extra Silent Cupboard Dry Spin 1200 400 rpm No Spin Rinse Hold Extra Silent 1 Spin 800 400 rpm No Spin Rinse Hold Iron Dry Cupboard Dry Extra Dry 2 2 1 2 3 14 Opsi Bilas Plus Opsi ini disarankan bagi orang orang yang alergi terhadap deterjen dan untuk daerah daerah yang airnya sangat lunak Untuk mengaktifkan o...

Page 49: ...pengeringan dikombinasikan silakan kurangi ke 1 Kg Spin 1200 400 rpm No Spin Rinse Hold Extra Silent 2 Program Suhu Jenis beban Bobot maks beban Deskripsi siklus Opsi bisa dikombinasikan Cuci Bilas Perasan singkat Kering jika opsi pengerin gan dikombina sikan Cuci Bilas Perasan singkat Bedding Seprai 60 C hingga Air dingin Program khusus untuk selimut sintetis selimut seprai dan seterusnya beban m...

Page 50: ...n dikombinasikan silakan kurangi ke 7 Kg 2 Iron Dry Cupboard Dry Extra Dry 2 Rinse Bilas Untuk membilas dan memeras cucian beban maks 10 kg jika opsi pengeringan dikombinasikan silakan kurangi ke 7 Kg Spin 1400 400 rpm No Spin Rinse Hold Iron Dry Cupboard Dry Extra Dry 2 2 Siklus pencucian wool pada mesin ini telah disetujui oleh The Woolmark Company untuk produk wool yang dapat dicuci dengan mesi...

Page 51: ...ns Katun dan linen kimono mandi handuk mandi dll 3 17 Panduan Opsi Waktu Pengeringan Manual 7 5 2 1400 1400 1400 240 250 120 180 60 Bahan kain sintetis atau campuran jumper blus pakaian dalam linen rumah tangga dan lain lain Wol dan wol yang dapat dicuci tangan 3 1 1200 1200 120 180 60 1 1200 120 Jangka waktu pengeringan dapat berubah sesuai dengan kecepatan perasan akhir tingkat kekeringan yang d...

Page 52: ...chpad Vapour secara bersamaan selama 3 detik dan dengarkan BIP BIP Untuk kembali ke konfigurasi default tekan 2 Touchpad bersamaan selama 3 detik dan dengarkan BIP SEBELUM MENGGUNAKAN PERTAMA KALI 4 Pastikan bahwa sambungan listrik dan air mematuhi petunjuk pemasangan Masukkan 2 liter air ke wadah deterjen untuk fase pencucian Ini akan mengaktifkan sistem pembuangan air 1 2 3 Pilih siklus Cottons ...

Page 53: ...n Touchpad Spin Peras dan suhu berulang ulang untuk mengubah kecepatan perasan dan suhu 1 Tekan tombol On Off untuk menghidupkan cuci pengering Untuk operasi sensor beban yang benar aktifkan alat dan atur program cucian SEBELUM memuat cucian ke tabung 3 Jika Anda ingin cucian diperas atau menggunakan suhu berbeda dari yang diusulkan oleh mesin cuci 4 Tekan Touchpad opsi jika Anda ingin cucian dicu...

Page 54: ...enundaan waktu mesin cuci Langkah 2 Memuat Cucian Taruh cucian di dalam tabung satu per satu dan pastikan cucian terpisah satu sama lain 3 Buka pintu dengan hati hati tarik pegangannya ke arah luar Periksa dan bersihkan benda benda jika ada yang bisa terperangkap di dalam lipatan 2 1 Pastikan Anda mencuci peng umpul tiras secara terpisah dari penghasil tiras PENTING Kancingkan sarung bantal tutup ...

Page 55: ...ikator ini ketika pintu terbuka Pastikan tidak ada cucian tersisa antara seal dan pintu 4 Tutup pintu 5 Langkah 3 Menggunakan Deterjen dan Aditif Laci Dispenser Deterjen 1 Dispenser deterjen dibagi ke dalam tiga wadah Wadah SOFTENER PELEMBUT Wadah PREWASH PRACUCI Wadah ini hanya digunakan untuk deterjen jika Anda memilih Prewash Pracuci Wadah ini digunakan untuk kondisioner kain dan agen kanji Wad...

Page 56: ...ertanda takaran yang digunakan tidak boleh melebihi tanda MAX di laci Tutup laci dengan hati hati Mesin otomatis akan menyesuai kan durasi program yang dipilih menurut jenis dan ukuran beban Layar akan menampilkan durasi program yang disesuaikan Langkah 4 Memulai program Untuk memulai program tekan Touchpad Start Pause Mulai Jeda lampu pilot yang terkait akan berhenti berkedip dan durasi program d...

Page 57: ... bawah pintu atau tabung berputar Jika demikian pintu TIDAK BISA dibuka Jika Anda tidak bisa membuka pintu tapi Anda harus membukanya Anda harus mematikan mesin dengan menekan tombol On Off untuk menonaktifkan alat Setelah sekitar 5 menit pintu bisa dibuka AWAS Perhatikan level air dan suhu air 5 5 Membuka Pintu Alat berhenti secara otomatis Sinyal akustik akan aktif Layar akan menampilkan Indikat...

Page 58: ... mematikan aplikasi yang berjalan untuk menurunkan tingkat komsumsi energy ketika Bila perangkat tidak digunakan dalam waktu 5 menit sebelum tombol Start Pause di tekan Tekan tombol On Off untuk mengaktifkan kembali perangkat yang di gunakan Tekan tombol On Off untuk mengaktifkan kembali perangkat yang di gunakan 5 Menit setelah proses pencucian berakhir Optional AUTO Stand by 5 8 5 9 Fitur Pengam...

Page 59: ...ih rendah daripada tingkat minimum yang diharuskan Jika Anda ingin membuka pintu selama tahap anti kusut atau menghentikannya tekan sembarang tombol kecuali On Off Beberapa opsi level pengeringan tidak tersedia untuk beberapa program pengeringan Tekan tombol On Off untuk meng hidupkan mesin Pilih program pengeringan Layar menampilkan tingkat pengerin gan default Tekan hingga layar menampilkan ting...

Page 60: ...k taplak meja seprai 60 C 50 C 40 C 30 C Dingin Untuk pakaian berwarna yang tak luntur dan kotor biasa misalnya kemeja baju tidur wanita piyama berbahan linen katun atau serat sintetis dan untuk katun putih yang kotor sedikit misalnya baju dalam Untuk cucian halus mis gorden jala jala cucian campuran termasuk serat sintetis dan wol yang ada label pure new wool machine washable non shrink murni wol...

Page 61: ...han one third full 8 4 Beban Maksimal Darah hilangkan noda yang masih baru dengan air dingin Untuk noda yang sudah mengering rendam semalam dalam air dengan deterjen khusus kemudian gosok dengan air dan sabun Cat berbasis minyak lembapkan dengan penghilang noda bensin letakkan pakaian di atas kain yang lembut kemudian tekan tekan nodanya lakukan beberapa kali Noda membandel mungkin tidak dapat dih...

Page 62: ...alus wol katun dll warna suhu pencucian dan tingkat kekotoran Hanya deterjen mesin cuci pintu Depan sedikit busa yang boleh digunakan dalam alat ini 8 6 Deterjen dan Aditif deterjen bubuk untuk semua jenis bahan deterjen bubuk untuk bahan halus 60 C maks dan wol deterjen cair lebih baik untuk program cuci suhu rendah 60 C maks untuk semua jenis bahan atau yang khusus untuk wol Jika menggunakan bub...

Page 63: ...terbaik untuk memperlakukan cucian Anda Beri pemutih di dalam air dingin JANGAN beri pemutih Pemutihan Cuci energik Cuci lembut Cuci tangan Suhu pencucian maksimal 95 C Setrika panas maks 200 C Pencucian kering dalam semua larutan Pencucian kering dalam perkloretilena bensin alkohol murni R 111 R 113 Pencucian kering dalam bensin alkohol murni dan R 113 JANGAN cuci kering Setrika hangat maks 150 C...

Page 64: ...sihkan secara rutin Untuk menjalankan pencucian pemeliharaan Lepaskan laci dengan menekan kaitannya ke bawah lalu tarik keluar Bilas di bawah keran untuk menghilangkan sisa serbuk yang menimbun 10 5 Membersihkan Laci Dispenser Biarkan pintu terbuka selama beberapa saat Ini membantu mencegah penggumpalan dan pembentukan bau stagnan di dalam mesin Membuka pintu setelah selesai mencuci akan membantu ...

Page 65: ... air Layar menampilkan kode alarm karena masalah pembuangan air Periksa secara teratur pompa pembuangan air dan pastikan sudah bersih Bersihkan pompa jika 1 Lepaskan steker listrik dari stop kontak 2 Jangan lepaskan filter selagi mesin beroperasi Jangan bersihkan pompa kruas jika air dalam mesin panas Air harus dingin sebelum Anda membersihkan pompa pembuangan air PERINGATAN Untuk membersihkan pom...

Page 66: ...dari pompa pembuangan air 6 Tarik kembali saluran pembuan gan dan putar filter untuk melepaskannya 7 Angkat bulu halus dan benda dari pompa jika ada 8 Pastikan impeller bisa berputar Jika tidak demikian hubungi pusat layanan 9 Bersihkan filter di bawah keran air 1 2 10 Kembalikan lagi filter ke dalam pemandu khususnya Pastikan Anda mengencangkan filter dengan benar untuk mencegah kebocoran ...

Page 67: ...membersihkan saringan masukan air 1 Tutup keran air 2 Lepaskan selang masukan air dari keran air 3 Bersihkan saringan dalam selang dengan sikat yang kaku 4 Lepaskan selang masukan di belakang mesin 5 Bersihkan filter di dalam katup dengan sikat kaku atau handuk 6 Pasang lagi selang masukan Pastikan pasangannyakuat untuk mencegah kebocoran 7 Buka keran air 45 11 Letakkan lagi sekatnya dan tutup pin...

Page 68: ...operasian mesin mungkin saja lampu pilot Start Pause Mulai Jeda berkedip kedip untuk menandakan bahwa mesin tidak bekerja Jika masalah sudah diatasi tekan tombol Start Pause Mulai Jeda untuk kembali menjalankan program Jika setelah pemeriksaan di atas masih ada masalah hubungi Pusat Layanan setempat Mesin tidak mau berfungsi PEMECAHAN MASALAH 11 Malafungsi Kemungkinan penyebabnya Solusi Jika mesin...

Page 69: ... tampil di layar Buka keran air Mesin tidak mengisiair Mesin mengisi air kemudian langsung membuangnya Mesin cuci tidak dapat dikosongkan dan atau tidak melakukan perasan Opsi Rinse Hold Tahan Bilasan atau No Spin Tanpa Perasan telah dipilih Nonaktifkan opsi Rinse Hold Tahan Bilasan atau No Spin Tanpa Perasan Cucian tidak terbagi rata dalam tabung Jeda mesin dan bagi ratakan cucian secara manual P...

Page 70: ...akan cucian secara manual Mungkin cucian dalam tabung terlalu sedikit Tambah muatan cucian Kaki yang tidak stabil seperti lantai kayu Lihat paragraf yang sesuai di bagian Pemosisian Kunci pintu belum dilepaskan released Tunggu sekitar 5 menit Ada air di dalam tabung Pilih program Spin Peras untuk mengeluarkan air Masalah ini akan menyebabkan gangguan fungsi dari mesin yang digunakan Hubungi Custom...

Page 71: ...kan cucian secara manual Pemerasan lambat memulai atau mesin tidak memeras Bunyi mesin sangat bising dari biasanya Air tidak terlihat di dalam tabung Bila listrik padam atau mesin mengalami gangguan maka pintu akan terkunci Mesin akan melanjutkan proses mencuci bila listrik hidup kembali Bila mesin mengalami gangguan maka pintu akan tetap terkunci dan memungkinkan untuk dibuka dengan menggunakan f...

Page 72: ...g Rinse Spin Cottons Mixed Energy Saver Wool Rinse Spin 7 Kg 3 Kg 7 Kg 1 Kg 7 Kg 7 Kg Drying Cottons Drying Mixed 7 Kg 3 Kg 10 Kg 4 Kg 4 Kg 1 5 Kg 10 Kg 1 5 Kg 2 Kg 1 5 Kg 4 Kg 3 Kg 10 Kg 10 Kg DATA TEKNIS 12 Untuk membuka pintu lakukan langkah berikut Jika Anda tidak dapat menentukan atau mengatasi masalahnya hubungi pusat layanan kami Sebelum menelepon catatlah model nomor seri dan tanggal pembe...

Page 73: ...memeriksa apakah mesin cuci sudah rata Penting agar mesin cuci Anda berdiri kokoh dan rata dengan lantai untuk memastikan pengoperasian yang benar Mesin tidak boleh dipasang di balik pintu yang dapat dikunci pintu geser atau pintu yang ada engselnya di sisi yang berlawanan dari pintu mesin cuci Hubungkan selang masukan air ke keran air dengan ulir BSP berukuran 3 4 Gunakan selang yang disertakan b...

Page 74: ...apat diletakkan dengan tiga cara Dipasang pada sisi bak cuci dengan menggunakan pemandu selang plastik yang disertakan bersama mesin Untuk fungsi mesin yang benar selang pembuangan harus tetap terkait ke bagian penopang yang benar yang ada di bagian atas pada sisi belakang alat Dalam hal ini pastikan ujungnya tidak dapat terlepas ketika mesin sedang mengeluarkan air 90 cm 60 cm 13 3 Pembuangan Air...

Page 75: ... dan kesehatan manusia yang dapat terjadi jika limbah produk ini tidak ditangani secara benar Untuk rincian informasi mengenai daur ulang produk ini hubungi kantor pemda setempat layanan pembuangan limbah rumah tangga atau toko tempat Anda membeli produk ini 14 1 Bahan Kemasan 14 3 Petunjuk Ekologis 14 2 Mesin Lama KEPEDULIAN LINGKUNGAN 14 Cucian yang kotornya normal dapat dicuci tanpa pra cuci un...

Page 76: ... thiết bị này đượcthiết kế dành bạn Vì vậy bất cứ khi nào bạn sử dụng thiết bị này bạn có thể yên tâm rằngbạn sẽ luôn có được kết quả tuyệt vời Chào mừng bạn đến với Electrolux Chúng tôi đề nghị sử dụng các linh kiện dự phòng gốc Khi liên hệ với bộ phận Dịch Vụ đảm bảo là bạn có sẵn dữ liệu sau đây Có thể tìm thấy thông tin trên biển thông số Model PNC Số Sê ri Hãy truy cập trang web của chúng tôi...

Page 77: ...n và không được bỏ vào máy Chỉ sử dụng lượng chất làm mềm vải và bột giặt theo khuyến nghị Nếu bạn cho quá nhiều các chất này vải hoặc thiết có thể bị hỏng Hãy tham khảo khuyến nghị số lượng của hãng sản xuất Giặt những đồ vật nhỏ chẳng hạn như vớ dây buộc dây lưng giặt được v v trong túi giặt hoặc bao gối vì những đồ vật đó có thể trôi xuống giữa bồn và trống bên trong Thiết bị này không dành cho...

Page 78: ... và mặt bàn không đè lên dây điện Nếu máy được đặt trên sàn trải thảm hãy điều chỉnh các chân để cho không khí lưu thông tự do Hãy luôn đảm bảo rằng không có nước rò rỉ từ các ống dây và các đầu nối sau khi lắp đặt Bất kỳ công việc lắp ống nào cần để lắp đặt thiết bị này cũng phải được tiến hành bởi một thợ ống nước có năng lực Bất kỳ công việc điện nào cần để lắp đặt thiết bị này cũng phải được t...

Page 79: ... bọt cao su có thể sinh ra lửa do bị đốt cháy một cách tự nhiên Nếu không thể tránh được việc đồ vải có dính dầu thực vật hoặc dầu ăn hoặc đã bị nhiễm các sản phẩm chăm sóc tóc bị đặt vào máy giặt máy sấy khô thì chúng cần được giặt trước bằng nước nóng với nhiều bột giặt hơn việc này sẽ làm giảm nhưng không loại bỏ được nguy cơ Chu kỳ làm mát của máy giặt máy sấy khô được sử dụng để làm giảm nhiệ...

Page 80: ...khấc nằm theo chiều ngang Nếu cần thiết hãy sử dụng nêm Khi bạn kích hoạt thiết bị này bạnkhông thể đóng cửa Điều này ngăn chặn trẻ em hoặc vật nuôi bị khóa bên trong Để vô hiệu hóa thiết bị này và khôi phục khả năng đóng cửa xoay nút này ngược chiều kim đồng hồ cho đến khi vết khấc nằm theo chiều dọc 1 5 THIẾT BỊ AN TOÀN TRẺ EM ...

Page 81: ...a 14 Biển Thông Số 15 Bộ Lọc Bơm Xả 7 6 ĐiềuChỉnh Mức Độ chân trước 8 Dây Điện 9 Ống Nạp Nước 10 Ống xã 11 Giá Đỡ Ống 12 Điều chỉnh Mức độ chân sau Bulông Vận Chuyển Để treo ống xả trên mép bồn Nắp nhựa Để đóng các lỗ trên mặt sau của tủ sau khi tháo các bulông vận chuyển PHỤ KIỆN 15 Thanh treo ống nhựa 14 13 1 2 4 5 6 3 8 9 12 7 11 10 ...

Page 82: ... 3 2 Bấm biểu tượng chương trình để chọn chương trình giặt hay sấy khô Đèn tương ứng sẽ sáng Xem trang 86 Các Phím Điều Khiển Chương Trình 3 3 Bàn điều khiển cảm ứng hay dùng Có thể lưu các cài đặt chương trình thường xuyên sử dụng ví dụ Vải sợi bông 60 C 1 200 vòng phút với chế độ xử lý trước khi giặt và vắt Để đặt chương trình đặt lại chương trình hay dùng bằng lựa chọn của riêng bạn và lưu chươ...

Page 83: ...Tạm Dừng Nếu bạn muốn thêm đồ giặt vào máy trong khoảng thời gian trì hoãn hãy nhấn phím điều khiển Start Pause Bắt Đầu Tạm Dừng để đặt máy ở chế độ tạm dừng Tùy chọn không vắt loại bỏ tất cả các giai đoạn vắt và tăng số lần xả No Spin Không Vắt Bằng cách chọn tùy chọn này máy sẽ không xả nước của lần giũ cuối cùng để tránh làm nhăn quần áo giặt Mọi giai đoạn vắt đều bị chặn hoạt động Chu kỳ giặt ...

Page 84: ...u kỳ giặt và sấy khô giặt tách rời đố sấy khô Khi chương trình kết thúc thiết bị sẽ tiến hành chu trình chống nhàu trong khoảng 10 phút Trong thời gian này màn hình sẽ hiển thị thời gian còn lại là và cửa máy giặt được đóng lại A Biểu tượng Rinse hold giữ xả B Tốc độ vắt C Nhiệt độ giặt D Biểu tượng nước lạnh E Biểu tượng khóa cửa F Công suất giặt tối đa của chương trình đã chọn G Trọng lượng đồ c...

Page 85: ... 3 13 Chỉ báo của tùy chọn này phát sáng Hơi nước không nhất thiết thấy được bên trong thùng giặt trong chu kỳ giặt bằng hơi nước Hơi nước được tạo ra bên dưới thùng giặt và được phép bốc hơi tự nhiên vào trong quần áo Cuối chu kỳ Vapour Hơi Nước quần áo sẽ ấm hơn mềm hơn và tách ra khỏi thùng giặt Để bắt đầu chương trình đã chọn nhấn Start Pause Bắt Đầu Tạm Dừng Phím Điều Khiển Start Pause Bắt Đầ...

Page 86: ... khối lượng tối đa 1 5 kg Giặt Xả Vắt nhanh Chương trình sấy khô cho đồ vải bông trọng tải tối đa 7 Kg Sấy Khô Refresh Làm Mới Chương trình Vapour Hơi Nước dành cho vải bông Trắng và nhuộm màu Chu kỳ này loại bỏ mùi hôi và giúp làm giảm vết nhăn đồ giặt khối lượng tối đa 1 5 kg 1 2 2 2 Spin 1200 400 rpm No Spin Rinse Hold Extra Silent Cupboard Dry Spin 1200 400 rpm No Spin Rinse Hold Extra Silent ...

Page 87: ...anh bị bẩn thông thường khối lượng tối đa 4 kg Đồ trắng và bền màu vải bông bị bẩn thông thường Đặt chương trình này để có kết quả giặt tốt và giảm điện năng tiêu thụ Thời gian của chương trình giặt được lâu hơn khối lượng tối đa 10 kg nếu tùy chọn sấy khô được kết hợp vui lòng giảm xuống 7 Kg Spin 1400 400 rpm No Spin Rinse Hold Iron Dry Cupboard Dry Extra Dry 2 1 2 Spin 1400 400 rpm No Spin Spin...

Page 88: ...khăn tắm v v 3 17 Hướng dẫn Tự chọn thời gian sấy 7 5 2 1400 1400 1400 240 250 120 180 60 Đồ vải tổng hợp hoặc hỗn hợp áo len chui đầu áo choàng đồ lót lanh mặc ở nhà v v Len và len giặt bằng tay được 3 1 1200 1200 120 180 60 1 1200 120 Thời gian sấy khô có thể thay đổi theo tốc độ vắt cuối cùng mức độ sấy khô yêu cầu Extra Dry Sấy Khô Thêm hoặc Cupboard Dry Dùng Cho Vải Bông hoặc Iron Dry Sấy Khô...

Page 89: ...n thanh chữ Nhấn lặp đi lặp lại để đặt liều lượng chất giặt tẩy tới mức khuyến nghị tối đa của nhà sản xuất trên bao bì tương đương với 100 Để biết lượng chất giặt tẩy tối đa xem khuyến nghị của nhà sản xuất về chất giặt tẩy trên bao bì Nhấn để xác nhận TRƯỚC KHI SỬ DỤNG LẦN ĐẦU 4 Đảm bảo rằng các kết nối điện và nước phù hợp với các hướng dẫn lắp đặt Cho 2 lít nước vào ngăn bột giặt cho giai đoạn...

Page 90: ...đặc biệt Có thể kết hợp các chức năng khác nhau tùy thuộc vào chương trình đã chọn 2 Chạm vào một trong số các BIỂU TƯỢNG Chương Trình để chọn chương trình giặt mà bạn yêu cầu Đèn tương ứng sẽ phát sáng Sau khi bạn chọn chương trình giặt chương trình được chọn sẽ ở vị trí đó trong toàn bộ quá trình giặt Màn hình hiển thị mức của Trình Quản Lý Thời Gian thời lượng chương trình và chỉ báo cho các gi...

Page 91: ...ọn Trọng Lượng Đồ Cho Vào Bước 2 Bỏ Đồ Giặt Vào Máy Cho đồ giặt vào thùng giặt từng chiếc một rũ chúng ra càng nhiều càng tốt 3 Mở cửa bằng cách kéo cẩn thận tay cầm cửa ra phía ngoài Kiểm tra và loại bỏ các vật thể nếu có có thể bị mắc kẹt trong hốc 2 Trọng lượng hiển thị trênmàn hình hiển thị chỉ là trọng lượng xấp xỉ Màn hình hiển thị các chỉ báo này khi cửa mở Đảm bảo rằng bạn giặt đồ tích bụi...

Page 92: ...IẶT CHÍNH Ngăn này được sử dụng cho bột giặt ở tất cả các chương trình Cửa nạp chất tẩy rửa Cửa nạp cho bột giặt hoặc nước giặt Bột giặt hoặc nước giặt 3 1 PO SITION US ING PO WDE R DE TE RG EN T 2 Đặt xuống đối với dung dịch tẩy rửa Đặt lên đối với bột giặt cài đặt tại nhà máy Không sử dụng bột giặt dạng lỏng gel hoặc đặc Không cho dung dịch nước giặt tẩy nhiều hơn mức tối đa Không đặt DELAY STAR...

Page 93: ...ause Bắt Đầu Tạm Dừng Chỉ báo sẽ bắt đầu nhấp nháy Nhấn lại Start Pause Bắt Đầu Tạm Dừng Chương trình sẽ tiếp tục Chỉ có thể thay đổi chương trình đang chạy bằng cách tắt thiết bị Nhấn nút On Off Bật Tắt để huỷ chương trình và tắt thiết bị 5 2 Gián Đoạn Chương Trình 5 3 Thay Đổi Chương Trình Có thể thay đổi chỉ một tùy chọn nào đó sau khi đã bắt đầu chương trình Bây giờ bạn có thể đặt một chương t...

Page 94: ...m tốc độ Vắt Chọn chương trình Spin Vắt 4 Nhấn nút On Off Bật Tắt để vô hiệu hóa thiết bị 5 5 5 Mở Cửa 5 7 Thiết bị tự động dừng Tín hiệu âm thanh sẽ hoạt động Màn hình hiển thị sẽ hiển thị Chỉ báo của phím điều khiển Start Pause Bắt Đầu Tạm Dừng tắt Chỉ báo khóa cửa tắt Lấy đồ giặt ra khỏi thiết bị Đảm bảo rằng không còn gì trong Lồng giặt Để cửa khép hờ để ngăn nấm mốc và mùi hôi Tắt vòi nước 5 ...

Page 95: ...ng của chu kỳ giặt và sấy khô giặt tách rời đố sấy khô Màn hình hiển thị giá trị thời gian sấy khô đã đặt ví dụ giá trị Chỉ báo cửa bị khóa hiện lên Giặt Sấy Khô Hẹn Giờ 6 3 Sẽ có tín hiệu âm thanh phát ra Khi chương trình vắt khô kết thúc 6 4 Để đạt được kết quả sấy khô tốt nhất thiết bị sẽ không cho phép bạn đặt tốc độ vắt thấp hơn tốc độ tối thiểu được yêu cầu 5 9 Thiết bị của bạn được cung cấp...

Page 96: ... trị thời gian Xem mục 3 17 Bấm để khởi động chương trình Màn hình hiển thị chỉ báo cửa bị khóa Đảm bảo rằng vòi nước được mở và ống xả nước được cho vào bồn rửa hoặc nối với ống thoát nước CẢNH BÁO Nếu bạn chỉ đặt sấy khô 15 phút thiết bị sẽ chỉ thực hiện giai đoạn làm nguội Đèn báo khóa cửa vẫn sáng Thiết bị sẽ thực hiện chu trình chống nhàu trong khoảng 10 phút Màn hình sẽ hiển thị lần lượt Cyc...

Page 97: ...ết ố khó giặt trước khi giặt Chà những chỗ bị bẩn đặc biệt bằng bột giặt chuyên dụng hoặc bột giặt Xử lý cẩn thận với màn cửa Tháo móc hoặc buộc chúng chặt lại trong túi hoặc lưới Đảm bảo không có vật kim loại còn sót lại trong đồ giặt ví dụ như kẹp tóc ghim an toàn ghim quần áo 8 3 Trước Khi Bỏ Đồ Giặt Vào Máy Khối lượng khuyến nghị được nêu trong bảng chương trình Các quy tắc chung Việc giặt khố...

Page 98: ...hóa hoặc benzen sau đó chà với bột giặt Hiệu quả giặt tốt cũng phụ thuộc vào việc lựa chọn bột giặt và sử dụng khối lượng phù hợp để tránh lãng phí và bảo vệ môi trường Mặc dù có thể phân hủy sinh học nhưng bột giặt gồm phần lớn các chất có thể phá vỡ sự cân bằng dễ bị tổn hại của tự nhiên Việc lựa chọn bột giặt sẽ phụ thuộc vào loại vải vải dễ hỏng len vải bông v v màu sắc nhiệt độ giặt và độ bẩn...

Page 99: ...ảm Loại và khối lượng bột giặt sẽ phụ thuộc vào loại vải kích cỡ khối lượng độ bẩn và độ cứng của nước được sử dụng Lượng Chất Giặt Tẩy Cần Được Sử Dụng Thông tin về độ cứng của nước trong khu vực của bạn có thể có được từ công ty cấp nước liên quan hoặc từ chính quyền địa phương của bạn Làm theo các hướng dẫn của nhà sản xuất sản phẩm về khối lượng sử dụng Độ cứng của nước được phân loại theo độ ...

Page 100: ...ộ giặt tối đa 40 C Nhiệt độ giặt tối đa 30 C KHÔNG giặt tại tất cả các trường hợp Là Vệ sinh khô Sấy Làm Phẳng Sấy Khô KHÔNG sấy khô Nhiệt độcao Nhiệt độthấp Trên mắc treo quần áo Trên dây BẢO TRÌ VÀ VỆ SINH 10 Bạn phải NGẮT thiết bị khỏi nguồn điện trước khi bạn có thể thực hiện bất kỳ công việc vệ sinh hoặc bảo trì nào Nước chúng ta thường dùng đều chứa vôi Nên sử dụng bột làm mềm nước theo định...

Page 101: ...độ giặt thấp có thể hình thành cặn lắng bên trong lồng giặt Chúng tôi khuyến nghị thực hiện giặt bảo trì thường xuyên 10 4 Giặt Bảo Trì Lồng giặt cần phải không còn đồ giặt Chọn chương trình giặt vải bông nóng nhất Sử dụng tách đo bột giặt thông thường phải là bột giặt có các đặc tính sinh học Để chạy máy giặt bảo trì 1 2 3 Để hỗ trợ việc làm sạch phần trên cùng của ngăn chất phụ gia cần được tháo...

Page 102: ... phích cắm ra khỏi ổ cắm điện 2 Không tháo bộ lọc ra trong khi thiết bị hoạt động Không vệ sinh bơm xả nếu nước trong thiết bị còn nóng Nước phải lạnh trước khi bạn vệ sinh bơm xả CẢNH BÁO Để vệ sinh bơm xả 1 Mở cửa bơm xả 2 Kéo cửa nạp xuống 3 Đặt vật đựng dưới hốc bơm xả để hứng nước chảy ra 4 Nhấn hai cần gạt và kéo về phía ống xả để cho nước chảy ra 5 Khi đồ chứa đầy nước đặt lại ống xả và làm...

Page 103: ...hệ với trung tâm dịch vụ 9 Vệ sinh bộ lọc dưới vòi nước 1 2 Nếu nước rất cứng hoặc chứa các vết cặn vôi thì bộ lọc nạp nước có thể bị tắc nghẽn Do đó thỉnh thoảng nên vệ sinh bộ lọc 10 8 Vệ Sinh Bộ Lọc Nạp Nước 10 Đặt lại bộ lọc trong bơm vào trong các ống dẫn đặc biệt Chắc chắn rằng bạn siết chặt bộ lọc một cách phù hợp để ngăn rò rỉ 11 Đặt lại cửa nạp và đóng cửa bơm xả ...

Page 104: ...g nạp nước ra 3 Đặt một cái tô bên hốc bơm xả để hứng nước chảy ra 4 Kéo về phía ống xả và ống xả của ống nạp nước trong tô đặt trên sàn nhà và cho phép nước chảy ra 5 Vặn ống cửa nước vào lại và đặt lại ống xả Khi bạn có ý định khởi động lại máy chắc chắn rằng nhiệt độ phòng trên 0 C Tháo phích cắm ra khỏi ổ cắm điện 45 Vệ sinh bộ lọc trong ống nạp nước bằng bàn chải cứng Vệ sinh bộ lọc trong van...

Page 105: ...ách chắc chắn Vòi nước đóng Mã lỗi Mở vòi nước Đóng cửa lại một cách chắc chắn Một số vấn đề là do thiếu bảo trì đơn giản hoặc sơ suất mà có thể được giải quyết dễ dàng mà không cần gọi kỹ sư Trước khi liên hệ với Trung Tâm Dịch Vụ địa phương của bạn vui lòng thực hiện việc kiểm tra nêu bên dưới Trong suốt quá trình hoạt động của máy có thể đèn dẫn hướng Start Pause Bắt Đầu Tạm Dừng màu đỏ nhấp nh...

Page 106: ...Mất cân bằng máy Kiểm tra việc lắp đặt thiết bị phù hợp Các chân đỡ chưa được điều chỉnh Kiểm tra mức bằng phù hợp của thiết bị Đồ giặt không được phân bố đều trong lồng giặt Tạm dừng máy và dùng tay phân bố lại đồ giặt Có rất ít đồ giặt trong trống Cho thêm đồ giặt vào máy Sàn nhà bấp bênh như sàn gỗ Tham khảo đoạn liên quan trong mục Định Vị Khóa cửa chưa được nhả ra Đợi khoảng 5 phút Có nước tr...

Page 107: ...g Tạm dừng máy và dùng tay phân bố lại đồ giặt Bắt đầu quay muộn hoặc máy không quay Máy phát ra tiếng ồn bất thường Không thấy nước ở trong lồng giặt Trong trường hợp lỗi của nguồn điện hoặc lỗi của thiết bị cửa sẽ bị khoá lại Chương trình giặt vẫn tiếp tục hoạt động khi có điện trở lại Nếu cửa vẫn bị khoá trong trường hợp bị lỗi chúng ta vẫn có thể mở cửa bằng cách sử dụng mở khoá khẩn cấp Trước...

Page 108: ...ra 6 Đóng cửa bộ lọc Các Kích Thước Chiều Rộng Chiều Cao Chiều Sâu Khối lượng tối đa Tốc độ vắt Tối đa Tối thiểu 1400 rpm 400 rpm 59 6 X 84 8 X 66 5 cm Nguồn điện Điện áp Tần suất Tổng điện hấp thụ Áp lực nguồn nước Tối đa Tối thiểu 0 8 MPa 0 05 MPa 220 240 V 50 Hz 60 Hz đối với PHI LÍP PIN 2200 W 2000 W đối với PHI LÍP PIN Cầu chì bảo vệ tối thiểu 10 A Giặt Tùy Chọn Giặt Sấy Khô Sấy Cottons Mixed...

Page 109: ...ưởng làm hướng dẫn hãy sử dụng mép khung cửa tủ hoặc băng ghế để kiểm tra xem máy giặt có đang được đặt bằng phẳng không Điều quan trọng là máy giặt của bạn cần đứng vững chắc và nằm trên sàn nhà để đảm bảo vận hành đúng cách Việc thiết bị không được lắp đặt sau cửa khóa được cửa trượt hoặc cửa có bản lềở bên đối diện với cửa máy giặt bị hạn chế Nối ống nạp nước với vòi có ren BSP 3 4 Sử dụng ống ...

Page 110: ...tấm giã đỡ phù hợp đặt trên mặt trên cùng của mặt sau thiết bị Trong trường hợp này chắc chắn rằng đầu này không thể bị tuột móc khi máy đang làm cạn 90 cm 60 cm 13 3 Xả Nước Nguồn điện không thích hợp có thể vô hiệu hóa bảo hành của bạn Kiểm tra việc lắp đặt điện gia dụng có thể chịu được khối lượng tối đa theo yêu cầu 2 2 kW hoặc 2 0 kW đối với PHI LÍP PIN vì thế nên xem xét bất kỳ thiết bị nào ...

Page 111: ... tử Bằng cách chắc chắn sản phẩm này được thải bỏ đúng cách bạn sẽ giúp ngăn các hậu quả tiềm ẩn đối với môi trường và sức khỏe con người mà việc xử lý chất thải sai quy cách gây ra Để biết thêm thông tin chi tiếtvề việc tái chế sản phẩm này vui lòng liên hệ văn phòng thành phố địa phương của bạn cơ quan phụ trách vứt bỏ rác thải sinh hoạt hoặc cửa hàng nơi bạn mua sản phẩm 14 1 Vật Liệu Đóng Gói ...

Page 112: ...www electrolux com G0005538 002 A02377303 452014 ...

Reviews: