background image

10. Clean and dry the inside of the appli-

ance.

11. Connect the mains plug into the mains

socket.

12. Switch on the appliance.

Technical data


Dimension


Height

1600 mm


Width

600 mm


Depth

630 mm

Rising Time


21 h

The technical information are situated in the
rating plate on the internal left side of the ap-
pliance and in the energy label.

Installation

Read the "Safety Information" carefully
for your safety and correct operation of
the appliance before installing the
appliance.

Location

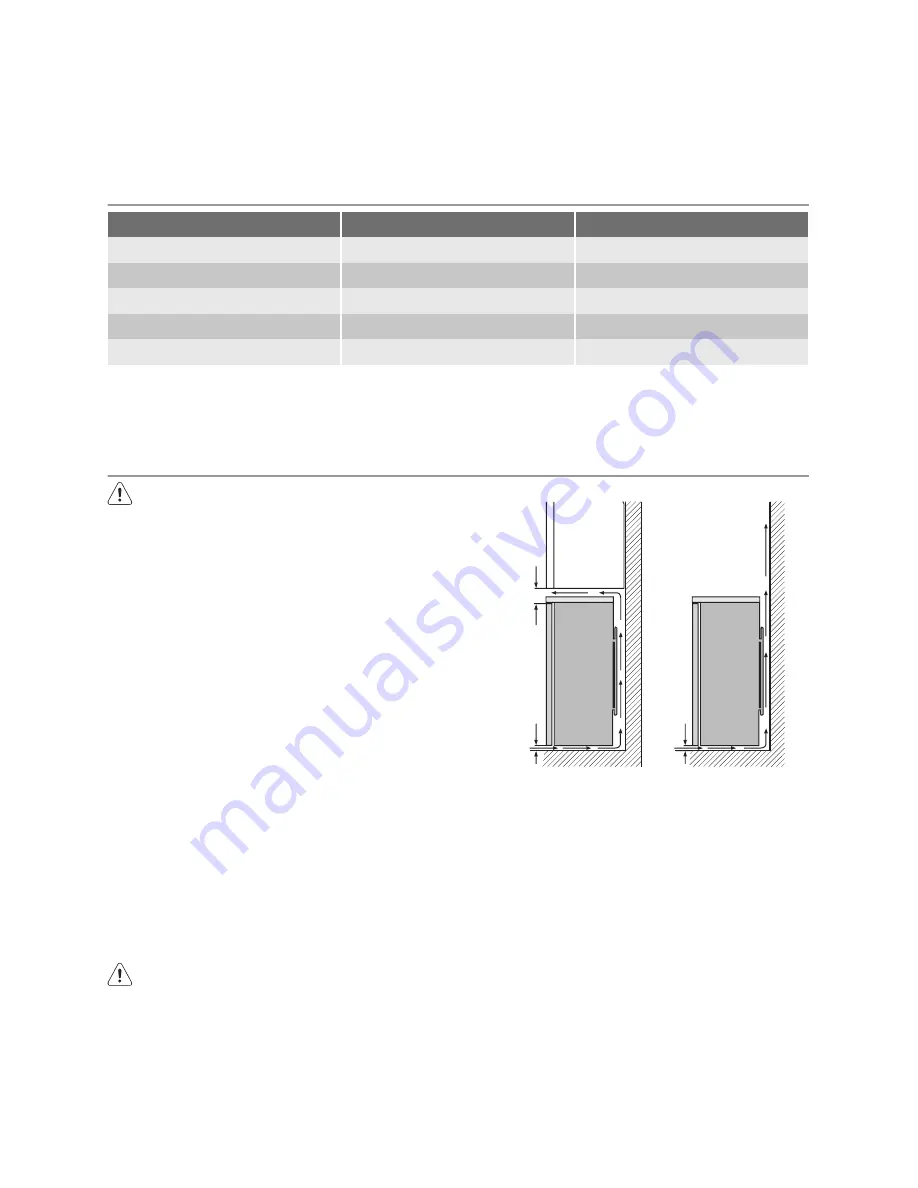
The appliance should be installed well away
from sources of heat such as radiators, boil-
ers, direct sunlight etc. Ensure that air can
circulate freely around the back of the cabi-
net. To ensure best performance, if the ap-
pliance is positioned below an overhanging
wall unit, the minimum distance between the
top of the cabinet and the wall unit must be
at least 100 mm . Ideally, however, the ap-
pliance should not be positioned below over-
hanging wall units. Accurate levelling is en-
sured by one or more adjustable feet at the
base of the cabinet.
If the cabinet is placed in a corner and the
side with the hinges facing the wall, the dis-
tance between the wall and the cabinet must
be at least 10 mm to allow the door to open
enough so that the shelves can be removed.

Warning!

 It must be possible to

disconnect the appliance from the mains
power supply; the plug must therefore
be easily accessible after installation.

10mm

10mm

100mm

Electrical connection

Before plugging in, ensure that the voltage
and frequency shown on the rating plate cor-
respond to your domestic power supply.
The appliance must be earthed. The power
supply cable plug is provided with a contact
for this purpose. If the domestic power sup-
ply socket is not earthed, connect the appli-
ance to a separate earth in compliance with
current regulations, consulting a qualified
electrician.
The manufacturer declines all responsibility if
the above safety precautions are not ob-
served.
This appliance complies with the E.E.C. Di-
rectives.

10 

 electrolux

Summary of Contents for EUF22390W

Page 1: ...user manual Freezer EUF22390W ...

Page 2: ... do not play with the appliance Keep all packaging well away from chil dren There is risk of suffocation If you are discarding the appliance pull the plug out of the socket cut the connection cable as close to the appliance as you can and remove the door to prevent play ing children to suffer electric shock or to close themselves into it If this appliance featuring magnetic door seals is to replac...

Page 3: ...compartment as it creates pressure on the container which may cause it to explode resulting in damage to the appliance Ice lollies can cause frost burns if con sumed straight from the appliance Care and cleaning Before maintenance switch off the appli ance and disconnect the mains plug from the mains socket Do not clean the appliance with metal ob jects Do not use sharp objects to remove frost fro...

Page 4: ...button B Temperature regulation button E Confirmation button C Temperature and function indicator Display Eco Mode is activated Temperature alarm Action Freeze is activated Drinks Chill is activated Negative Temperature sign Child Lock is activated Temperature Switching on Insert the plug into the power outlet If the display is not illuminated press button A to start the appliance For optimal food...

Page 5: ... Drinks Chill function is to be used as a safety warning when placing bottles in the freezer compartment It is activated by pressing key D several times if necessary until the corresponding icon appears You must confirm the choice by pressing key E within few seconds You will hear the buz zer and the icon remains lighted In this condition it operates a timer with a de fault value of 30 min and it ...

Page 6: ... placed in the com partment Difference until 5 C inside the compartment are quite normal During normal functioning the indicator shows the warmest temperature inside the compartment Storage of frozen food When first starting up or after a period out of use before putting the products in the com partment let the appliance run at least 2 hours on the higher settings If large quantities of food are t...

Page 7: ...o not exceed the storage period indica ted by the food manufacturer Care and cleaning Caution Unplug the appliance before carrying out any maintenance operation This appliance contains hydrocarbons in its cooling unit maintenance and re charging must therefore only be carried out by authorized technicians Periodic cleaning The equipment has to be cleaned regularly clean the inside and accessories ...

Page 8: ...lution The appliance is noisy The appliance is not supported properly Check if the appliance stands sta ble all feet and wheels should be on the floor Refer to Levelling The cushion spacers located be tween the back of the cabinet and the pipes come loose Put them back in place again The buzzer sounds The Alarm icon flashing The temperature in the freezer is too high Refer to High Temperature Alar...

Page 9: ...ance to the mains socket Check fuse Contact a qualified electri cian The door has been open to long Close the door A large quantity of drops ice covers the top com partment inside the appli ance There is too much frost and ice on the evaporator of the appliance the door was open for too long time Refer to Cleaning the evaporator As much as the advice does not lead to result call the nearest brand ...

Page 10: ...ositioned below over hanging wall units Accurate levelling is en sured by one or more adjustable feet at the base of the cabinet If the cabinet is placed in a corner and the side with the hinges facing the wall the dis tance between the wall and the cabinet must be at least 10 mm to allow the door to open enough so that the shelves can be removed Warning It must be possible to disconnect the appli...

Page 11: ...r person that will keep a firm hold on the doors of the appliance during the opera tions Open the door with the appliance in the upright position Unscrew the screws and remove the upper door plastic trim Remove the little plastic cover from the door plastic trim and refit on the opposite side d Lay down the appliance back side down d d Remove both covers of the hinge 3 Unscrew the upper hinge and ...

Page 12: ... Warning After having reversed the opening direction of the doors check that all the screws are properly tightened and that the magnetic seal adheres to the cabinet If the ambient temperature is cold i e in Winter the gasket may not fit perfectly to the cabinet In that case wait for the natural fitting of the gasket Lay down the appliance back side down Environmental concerns The symbol on the pro...

Page 13: ...electrolux 13 ...

Page 14: ...14 electrolux ...

Page 15: ...electrolux 15 ...

Page 16: ...212719441 00 16122009 www electrolux com ...

Reviews: