19
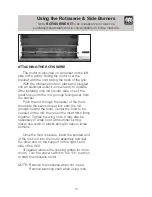
ATTACHING THE ROTISSERIE
The motor is mounted on a bracket on the left
side of the grill by sliding the motor over the
bracket with the cord facing the back of the grill.
With the rotisserie motor in place and plugged
into an electrical outlet it is now ready to operate.
After installing rotis rod handle, slide one of the
meat forks onto the rod. (prongs facing away from
the handle)
Push the rod through the center of the food,
then slide the second meat fork onto the rod.
(prongs toward the food). Center the food to be
cooked on the rod, then push the meat forks firmly
together. Tighten the wing nuts. It may also be
necessary to wrap food with butcher’s string,
(never use nylon or plastic string) to secure loose
portions.
Once the food is secure, insert the pointed end
of the rotis rod into the motor assembly and rest
the other end on the support on the right-hand
side of the Grill.
(If needed remove the cooking grates for more
room.). Turn the power switch to the “On” position
to start the rotisserie motor.
NOTE: Remove the rotisserie when not in use.
Remove warming shelf when using rotis.
Using the Rotisserie & Side Burners
Note:
ROTISSERIE KIT
is an accessory and must be
purchased separately and is only available on some markets.


