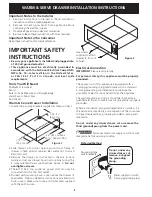
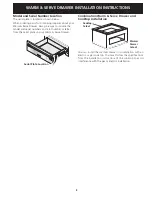
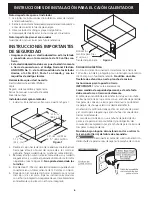
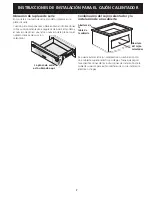
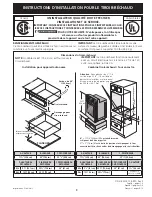
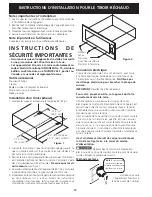
Electrolux 318201810, Installation Instructions Manual
The Electrolux 318201810 is a high-performance kitchen appliance that promises convenience and efficiency. Ensure a hassle-free setup with the detailed Installation Instructions Manual, available for free download on our website. Simplify your life and maximize the potential of your Electrolux appliance with this essential manual.
Share
Download


Reviews:
No comments
Related manuals for 318201810
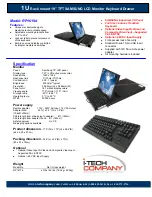
RP1619D
Brand: I-Tech Pages: 1

RP1150 Series
Brand: Acnodes Pages: 12

Rackview LCD Panel Mount 19"
Brand: Rose electronics Pages: 24

T1500
Brand: Raritan Pages: 31

HRKP115
Brand: I-Tech Pages: 1

FMD1
Brand: Panduit Pages: 4

Rangemaster ECL14WDBL/BL
Brand: AGA Pages: 16

RackView RV1-LCD15
Brand: Rose electronics Pages: 2

RackView RV1-CAKVT21L/DVI/Kn
Brand: Rose electronics Pages: 28

VEWD172
Brand: Viking Range Pages: 4

B021-000-17TAA
Brand: Tripp Lite Pages: 2

WOLF ICB
Brand: Sub-Zero Pages: 34


