background image

5

Unpacking the EMC 1UP

Immediately upon receipt of the EMC 1UP CD player, inspect the carton for
possible damage during shipment. The carton and packaging have been
designed to provide the safest possible protection for transport of your
EMC 1UP. Unpack the unit carefully. Save all packaging materials for future
shipment.

The contents of the carton

1 pcs Electrocompaniet: EMC 1UP CD player.
1 pcs AC mains cord.
1 pcs inspection card.
1 pcs CD clamp.
1 pcs self-adhesive felt ring for placement of the CD clamp when not in use.
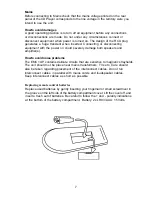
1 pcs spirit (bubble) level for leveling of the CD player.
2 pcs Allen keys for securing of the Electro Mechanical Cancellation System.
1 pcs remote control
2 pcs batteries.

Important Notice

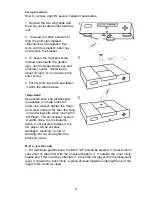
The transport screw must be removed for proper operation. When moving the
CD player. Always re-insert and tighten the transport screw to avoid severe dam-
age to the unit!

For optimal sonic performance, the EMC 1UP should be burned in for a mini-
mum time of 72 hours. The easiest way to burn in your EMC 1UP is to put a disc
in REPEAT mode with the rest of your system turned off. In daily operation, switch
off the CD player by using the STANDBY button on the remote. If the CD player
has been switched off, allow two hours of warm-up to optimize sonic performance.
Due to high class A operation in all Electrocompaniet designs, it is normal for the
CD player to feel warm. Proper ventilation is important. The CD player should by
no means be completely covered. A good rule of thumb is to allow at least 3 - 5
cm (1 - 2 inches) of air sidewise, and 5 - 8 cm  (2 - 3 inches) above the CD player.
Please refer to Owners Manual for removal of the CD transport screw.

Summary of Contents for EMC 1UP

Page 1: ...EMC 1UP Owner s Manual UK UK UK...

Page 2: ...emc1up_v1 1_knekkt...

Page 3: ...ck do not expose this appliance to rain or moisture Verify line voltage before use Do not remove cover No user serviceable parts inside Refer servicing to qualified service personnel The warranty is v...

Page 4: ...e legendary 25 watt amplifier It was the first commercial transistor amplifier to use this new design approach The amplifier was immediately recognised as dramatically more musical than any other tran...

Page 5: ...screw must be removed for proper operation When moving the CD player Always re insert and tighten the transport screw to avoid severe dam age to the unit For optimal sonic performance the EMC 1UP shou...

Page 6: ...len keys and all transport necessities in a safe place for future use Always tighten the trans port screw ontopp first then the wing nut and wing bolts when moving the CDPlayer The cancellation system...

Page 7: ...speakers and amplifier s How to avoid noise problems The EMC 1UP contains delicate circuits that are sensitive to magnetic strayfields The unit should not be place near mains transformers TVs etc Care...

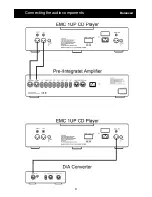
Page 8: ...8 Connecting the audio components Balanced...

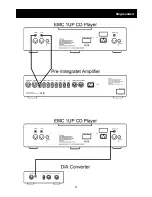
Page 9: ...9 Single ended...

Page 10: ...10...

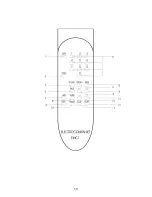
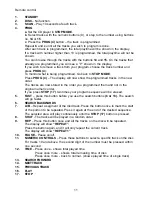
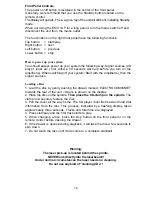
Page 11: ...ed them and not in the original numeric order If you press STOP 17 two times your program sequence will be erased 5 FAST press this button before you use the search buttons 6 or 13 The search will go...

Page 12: ...lifier s then the signal sources Loading a Disc 1 Load the disc by gently pushing the drawer marked ELECTROCOMPANIET towards the rear of the unit Open is shown on the display 2 Place the disc on the s...

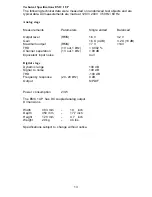
Page 13: ...6 X 4 dB 3 2 X 10 dB Maximum output RMS 7 V 14V THD 1 V out 1 kHz 0 002 Channel separation 1 V out 1 kHz 90 dB Equivalent input noise 4 uV Digital stage Dynamic range 100 dB Signal to noise 100 dB THD...

Page 14: ...electrocompaniet no Web www electrocompaniet com The end user is responsible for all shipping charges insurance re importation and duty charges When shipping a product to the factory for service alway...

Reviews: