Electro Industries Shark ST40 Quick Start Manual Download Page 5


Doc

#    

E183703   V.1.01     


             QS - 5

                    Shark

®


ST40 Meter Quickstart

Electro 

Industries/GaugeTech

Powered by Innovation™

Example CT Settings:


200/5 Amps:           set the Ct-n value as 200, Ct-S value as 1.

   800/5Amps:            set the Ct-n value as 800, Ct-S value as 1.

   2000/5 Amps:         set the Ct-n value as 2000, Ct-S value as 1

   10,000/5 Amps:      set the Ct-n value as 1000, Ct-S value as 10.


Example PT Settings:


14400/120 Volts:     set the Pt-n value as 1440, Pt-d value as 120, Pt-S value as 10.

   138000/69 Volts:     set the Pt-n value as 1380, Pt-d value as 69, Pt-S value as 100.

   345000/115 Volts:   set the Pt-n value as 3450, Pt-d value as 115, Pt-S value as 100.

   345000/69 Volts:     set the Pt-n value as 0345, Pt-d value as 69, Pt-S value as 1000.

For additional programming instructions for the faceplate buttons, see Chapter 5 in the 

Shark® ST40 

Meter Installation and Operation Manual

, (see page QS-1 for the download link).

In addition to faceplate programming, you can program the meter using CommunicatorPQA

TM

 soft-

ware. Use either the RS485 port or the USB port to make the physical connection to your PC. Note that 

your meter will have either RS485 OR Ethernet; it will always have a USB port. For Ethernet communi-

cation, connect first via the USB port and then see the ST40 User Manual for instructions on setting up 

Ethernet communication.

Connect through the RS485 Port:

The ST40 meter’s RS485 port uses standard 2-wire, 

half duplex architecture. When the meter is powered 

up, for 10 seconds you can connect to it using the fac-

tory default settings - this is one way you can always 

connect to the meter. The factory default settings are: 

Device Address:1

Baud Rate:9600

Protocol:Modbus RTU

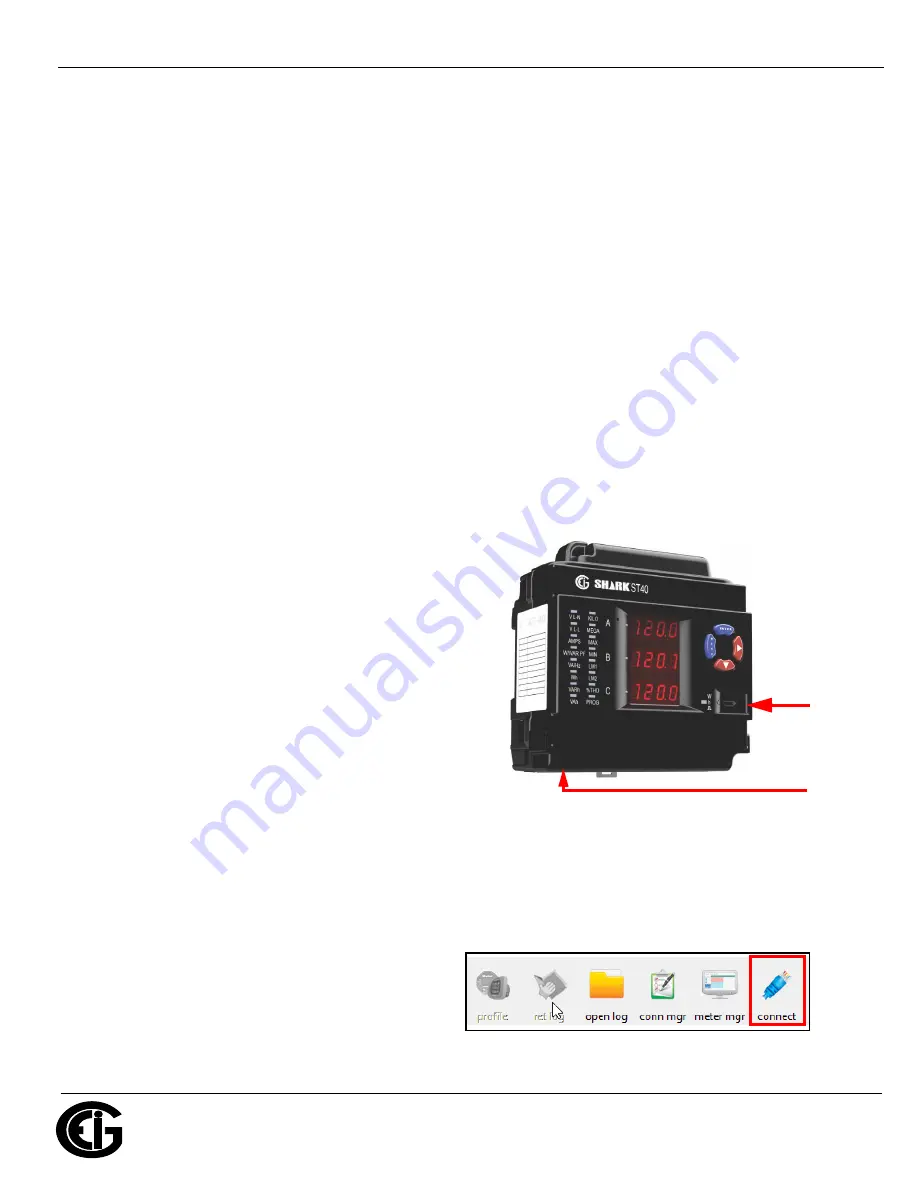
Connect through the USB Port:

The ST40 meter has a standard Micro USB port. Con-

nect the meter to the PC, using the USB cable. The meter’s connection uses a Micro USB plug. 

Connect to CommunicatorPQA

TM

 Software:

Once you make a physical connection between the meter and your PC, you can connect to the soft-

ware. 

1.Open CommunicatorPQA

TM

 software (see page QS-1 for download link). 

2. Click 

Connect

 in the Icon Bar. 

RS485 or 

USB

port

Ethernet

port

Summary of Contents for Shark ST40

Page 1: ...w NOTE This Quickstart Guide gives basic installation wiring and programming instructions For additional meter operation and programming information refer to your meter s Installation and Operation Manual and the Communicator PQATM MeterManagerPQATM and EnergyPQA comTM Software User Manual on EIG s website User Manual https www electroind com products st40 From the webpage click Technical Document...

Page 2: ... 5 63 7 216 25 32 5 6833 5 7 1 9 WYE Delta 4 wire 3 PTs 3 CTs DUWK URXQG DUWK URXQG 2 2 2 1 1 9 5 9 9 9 6HUYLFH HOWD LUH ZLWK 1R 37V 7V 86 6 1 2 9 9 9 9 9 7 6KRUWLQJ ORFN 6 7 5 5 72 6 257 1 2 16758 7 216 72 33 6 2576 9 86 RU UDWLQJV VHH 9ROWDJH XVHV RQ SDJH 1 1 875 5 5 72 0 7 5 63 7 216 25 32 5 6833 5 7 1 1 1RW FRQQHFWLRQ WR PHWHU Delta 3 wire No PTs 2 CTs DUWK URXQG DUWK URXQG 2 2 2 1 1 9 5 9 9 9...

Page 3: ...minator screen CT d This setting is display only it can t be changed 6 Press the ENTER button to go to the CT Scaling setting screen CT S The current Scaling is shown in the second line Press the DOWN ARROW to choose another value You can choose 1 10 or 100 7 Press the ENTER button to go to the PT numerator setting screen Pt n The current PT numerator is shown in the second line To change the sett...

Page 4: ...600 choose this for RS485 connection 19 2 19200 38 4 38400 or 57 6 57600 If you have the Ethernet option keep this as 57 6 13 Press the ENTER button to go to the meter Protocol setting screen Prot The meter s current Protocol is shown in the second and third lines Press the DOWN ARROW to choose another communication Protocol You can choose Mod rtU Modbus RTU choose this for RS485 or Ethernet conne...

Page 5: ...mmunicatorPQATM soft ware Use either the RS485 port or the USB port to make the physical connection to your PC Note that your meter will have either RS485 OR Ethernet it will always have a USB port For Ethernet communi cation connect first via the USB port and then see the ST40 User Manual for instructions on setting up Ethernet communication Connect through the RS485 Port The ST40 meter s RS485 p...

Page 6: ...he Device Status screen and then click the Profile icon in the Icon Bar 5 The meter s Device Profile screen opens giving you access to the programmable settings for the meter NOTE A few basic settings are explained here Refer to the CommunicatorPQATM MeterManagerPQA and EnergyPQA com Software User Manual see page QS 1 for the download link or click Help Con tents from the top of the CommunicatorPQ...

Page 7: ...ersal for any phase This feature is useful if a CT is wired the wrong way and you do not want to or cannot change the wiring This setting is only available for a three element WYE hookup For any other hookup this setting will be ignored Program Communications Setting 1 From the Device Profile screen double click General Settings Communications one of the listed ports The settings shown here are fo...

Page 8: ...ch meter individually since the meter name is used to name the log databases when logs are downloaded IMPORTANT When you have made changes to the meter s Device Profile click Save Profile at the bottom left of the Device Profile screen to send the new settings to the meter The meter will reboot and then you can reconnect to it Shark is a registered trademark of Electro Industries GaugeTech EIG Com...

Reviews: