


6
STAND INSTALLATION
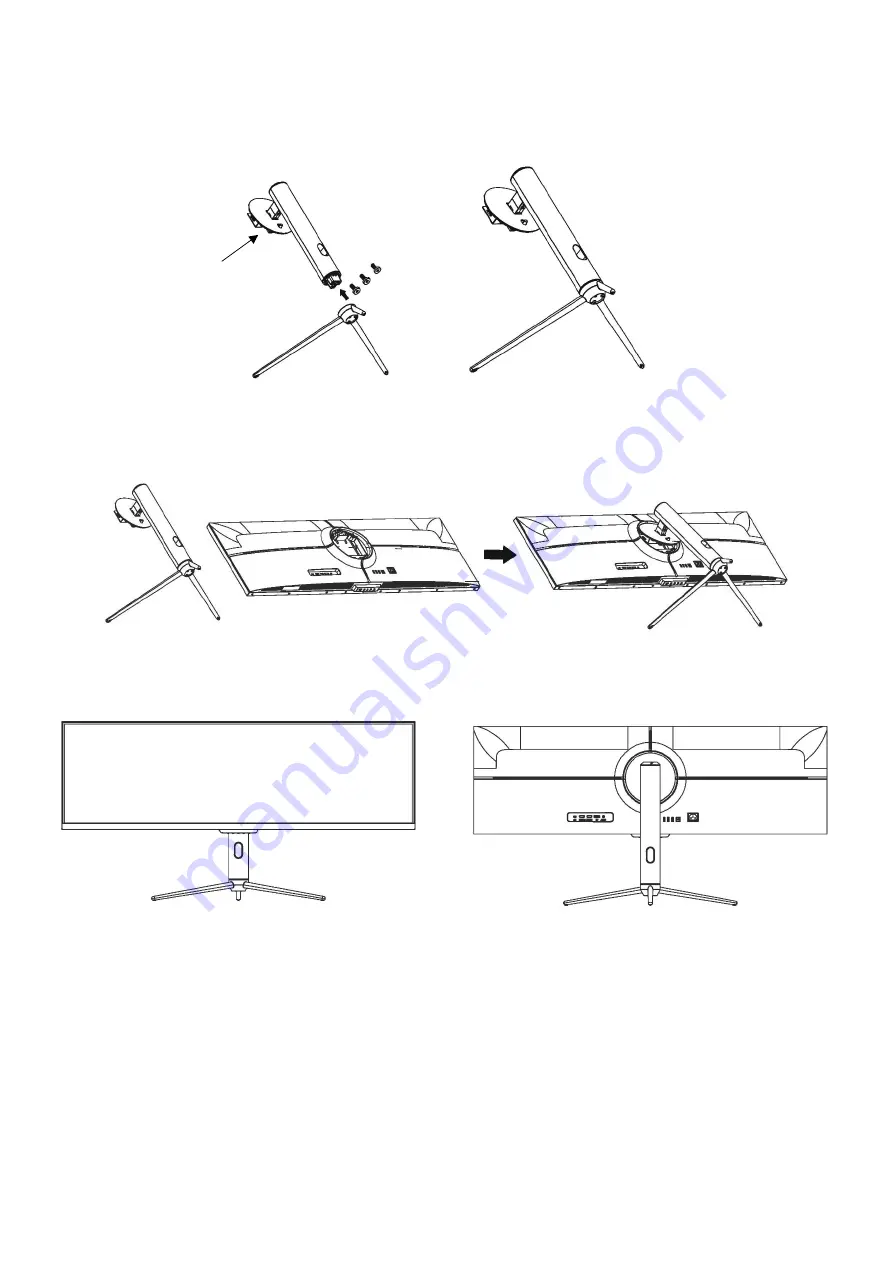
1.
Open the packing box, take out the bracket and the base, and use three bolts (A) to attach the base
of the stand to the upright section, as shown below:
2.
Attach the stand onto the rear of the monitor by locating the top of the upright section into
position on the rear of the monitor before clipping in the bottom of the mounting plate. Ensure the
mounting plate is fully located.
3.
Use 4 x Bolts (B) to secure the mounting plate to the rear of the monitor.
4.
Use both hands to stand the assembled monitor on a flat desktop.
NOTES:
•
Due to the heavy weight and dimensions of the LCD screens and their fragile nature, we recommend
that they are unpacked and assembled by 2 people.
•
electriQ and its distributors and dealers are not liable or responsible for damage or injury caused by
improper installation, improper use or failure to observe these safety instructions. In such cases any
guarantee will expire.
•
The stand can be removed from the rear of the monitor by pressing the quick release button on the
rear of the monitor.
Bolts x 3
Mounting
Plate