background image


INPUT / OUTPUT TERMINALS 
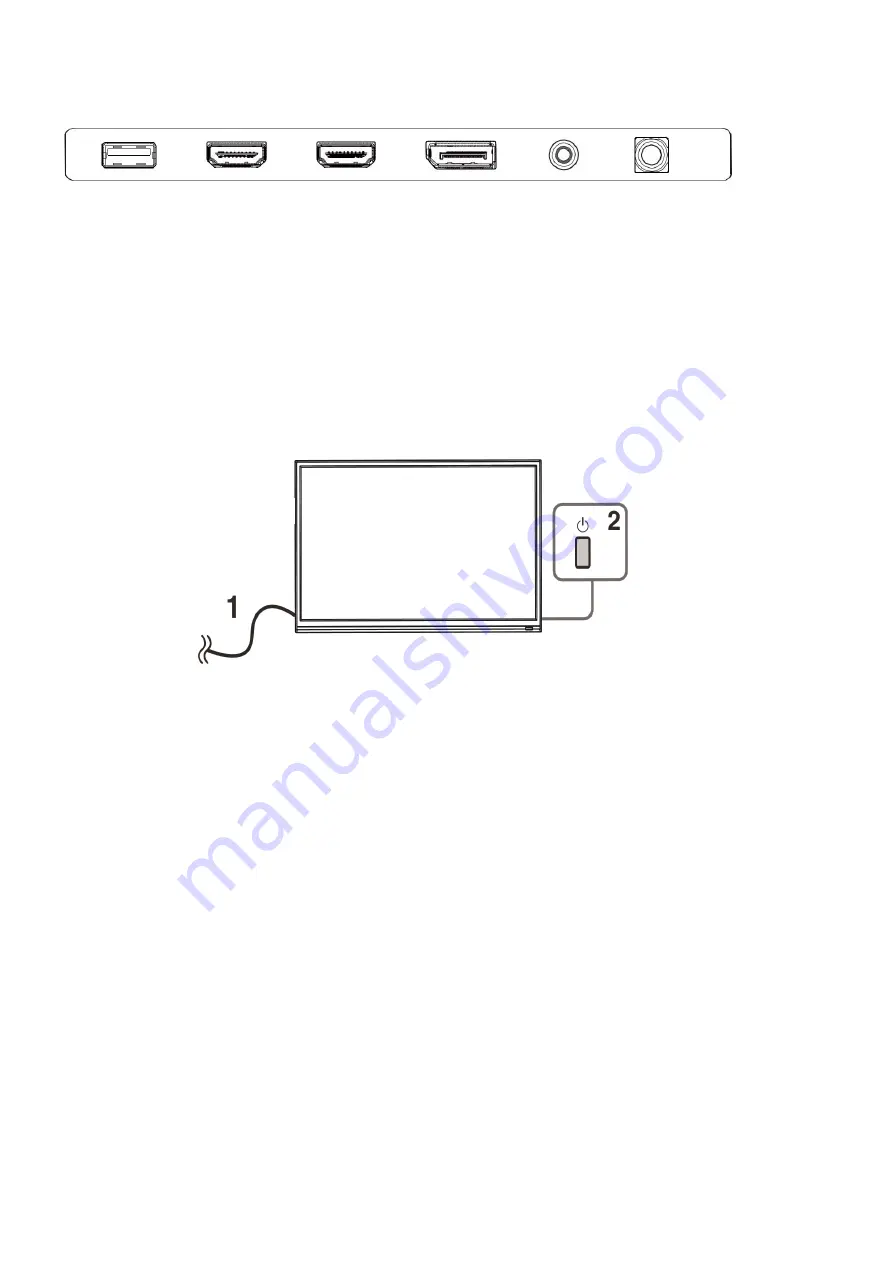


INITIAL SETUP


Connect the monitor to a power outlet.


1. 

Press the POWER button on the monitor or to turn it on (The indicator will be blue)


2. 

Connect the relevant cable to the corresponding input on the monitor. The source will 
be automatically detected.


3. 

To change between the inputs, see the Quick menu on the previous Page.


MENU OPTIONS


The menu for the monitor can be accessed by selecting it within the Quick menu (See 
previous page). This menu is separated into the following sub menus: Picture Settings, 
Image Settings, Colour Temperature, OSD Settings, Reset, and Miscellaneous options, 
details of each menu can be found in the following sections


USB 

For 

Firmware 

Updates 

HDMI 2 

Supports: 

HDMI 1.4 

75Hz 

Freesync 

HDMI 1 

Supports: 

HDMI 2.0 

144Hz 

Freesync 

DISPLAY 

PORT 

(DP) 

Supports: 

DP 1.2 

144Hz 

Freesync 

AUDIO 

OUT 


DC IN 


Summary of Contents for eiQ-32Q75HDR

Page 1: ...USER MANUAL 32 QHD LED MONITOR eiQ 32Q75HDR Please read this manual thoroughly before use and keep it handy for future reference...

Page 2: ...UNTING 6 ATTACHING THE STAND 7 BUTTON FUNCTIONS 7 INPUT OUTPUT TERMINALS 8 INITIAL SETUP 8 MENU OPTIONS 8 INPUT SOURCE 9 BRIGHTNESS CONTRAST 9 COLOUR SETTINGS 10 PICTURE QUALITY SETTINGS 11 DISPLAY 11...

Page 3: ...vicing to qualified personnel Servicing is required when the apparatus has been damaged in any way such as power supply cord or plug is damaged liquid has been spilled or objects have fallen into the...

Page 4: ...place the monitor on cloth or other materials that may be located between the monitor and the supporting furniture Educate children about the dangers of climbing on furniture to reach the monitor or i...

Page 5: ...ng or cabinet Ensure the monitor is positioned close to the wall to avoid it falling when pushed When twisting the monitor do not hold by the top you should twist from the base When lifting the monito...

Page 6: ...them Wall mounting is optional If you do not understand the instructions or are unsure how to install this product please contact a professional for assembly advice and assistance Careful considerati...

Page 7: ...1 to select the function required Button Control Function 1 Quick Menu Press to enter the Quick Menu 2 Aspect Ratio Repeatedly press to change aspect ratio 3 Volume Reduces the output volume 4 Brightn...

Page 8: ...ick menu on the previous Page MENU OPTIONS The menu for the monitor can be accessed by selecting it within the Quick menu See previous page This menu is separated into the following sub menus Picture...

Page 9: ...tween DisplayPort DP HDMI 1 and HDMI 2 BRIGHTNESS CONTRAST Brightness Adjust the brightness of the display between 0 and 100 Contrast Adjust the contrast of the display between 0 and 100 DCR Turn the...

Page 10: ...Temperature Change the Color Temperature of the display to 6500k 7500k 9300k or User When the User Mode is selected the Red Green and Blue values can be adjusted independently between 0 and 100 Hue Ch...

Page 11: ...ture On or Off Dynamic Noise Reduction Select the Noise Reduction Value between Low Middle High or Off Super Resolution Change the Super Resolution value between 0 and 5 Dynamic Luminance Control Turn...

Page 12: ...OSD Menu display language OSD H Position Change the horizontal position of the OSD Menu OSD V Position Change the vertical position of the OSD Menu Menu Transparency Change the transparency value of...

Page 13: ...THER FreeSync Mode Turn FreeSync On or Off HDR Turn HDR On requires HDMI 2 0 input Firmware Update Update the monitor firmware with proper firmware Using the USB port Reset Restore factory default set...

Page 14: ...this equipment will be further handled during the recycling process so please be considerate when depositing your equipment Please contact the local council for details of your local household waste...

Page 15: ...on lamp or other possible interference sources Image colour or quality deteriorates Check that all the video settings are adjusted appropriately such as brightness contrast colour etc For more informa...

Reviews: