background image

R

50

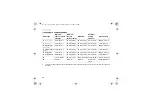
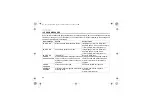
17.6 SEPARATE MINIATURE FERROUS PROBES

Probe Type

Minimum 
convex 
surface 
diameter

Minimum 
concave 
surface 
radius

Minimum 
sample 
diameter

Minimum 
access 
height

Minimum 
access 
width

Overall length 
(headroom)

F, Straight,
45 mm (1.77”)

1.5 mm (0.06”)

6.5 mm (0.26”)

3 mm (0.12”)

6 mm (0.24”)

150 mm (5.91”)

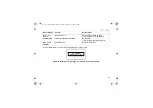
F, Straight,
150 mm (5.9”)

1.5 mm (0.06”)

6.5 mm (0.26”)

3 mm (0.12”)

6 mm (0.24”)

260 mm (10.24”)

F, 45°,
45 mm (1.77”)

1.5 mm (0.06”)

6.5 mm (0.26”)

3 mm (0.12”)

18 mm (0.71”)

7 mm (0.28”)

145 mm (5.71”)

F, 45°,
150 mm (5.9”)

1.5 mm (0.06”)

6.5 mm (0.26”)

3 mm (0.12”)

18 mm (0.71”)

7 mm (0.28”)

250 mm (9.84”)

F, 90°,
45 mm (1.77”)

1.5 mm (0.06”)

6.5 mm (0.26”)

3 mm (0.12”)

16 mm (0.63”)

7 mm (0.28”)

140 mm (5.51”)

F, 90°,
150 mm (5.9”)

1.5 mm (0.06”)

6.5 mm (0.26”)

3 mm (0.12”)

16 mm (0.63”)

7 mm (0.28”)

245 mm (9.64”)

Op_456_3_English.book  Page 50  Thursday, January 22, 2009  7:58 PM

Summary of Contents for 456 3

Page 1: ...English Elcometer 456 3 Coating Thickness Gauge Basic Models Operating Instructions Op_456_3_English book Page 1 Thursday January 22 2009 7 58 PM ...

Page 2: ... are registered trademarks of Elcometer Ltd All other trademarks acknowledged Copyright Elcometer Ltd 2004 2009 All rights reserved No part of this Document may be reproduced transmitted transcribed stored in a retrieval system or otherwise or translated into any language in any form or by any means electronic mechanical magnetic optical manual or otherwise without the prior written permission of ...

Page 3: ... 6 2 Getting started 7 2 1 Fitting the batteries 7 2 2 Battery condition 7 2 3 Fitting probes 8 2 4 The controls 9 2 5 Switching the gauge on 9 2 6 Switching the gauge off 10 2 7 The screen 10 2 8 Selecting a language 11 2 9 Interfaces 12 3 Taking a reading 12 3 1 Before you start 12 3 2 Procedure 13 Op_456_3_English book Page 1 Thursday January 22 2009 7 58 PM ...

Page 4: ...d menu on 18 5 Calibration adjustment 22 5 1 Calibration method 22 5 2 Calibration foils and standards 23 5 3 Calibration adjustment procedure 24 6 Statistics 29 6 1 Enlarge stats 30 6 2 Stats on LCD 30 6 3 Clear stats 30 6 4 Select stats 31 6 5 Set NDFT 31 6 6 Display 32 Op_456_3_English book Page 2 Thursday January 22 2009 7 58 PM ...

Page 5: ...nce 36 11 Statistics terminology 38 12 Technical data 39 13 Accessories 40 14 Related equipment 43 15 Fitting the wrist harness 43 16 Probe measurement performance 44 17 Probe capabilities 45 18 Error messages 52 19 Index 54 Op_456_3_English book Page 3 Thursday January 22 2009 7 58 PM ...

Page 6: ...ting Thickness Gauge is a handheld gauge for fast and accurate measurement of the thickness of coatings on metal substrates The gauge is available in three versions Basic Standard and Top This manual describes the operation of the Elcometer 4563 Basic All versions of the gauge feature an easy to use menu driven graphical interface which guides the user through tasks such as gauge configuration and...

Page 7: ...and International Standards FERROUS F ASTM B 499 ASTM D 1186 B ASTM G 12 BS 3900 C5 BS 5411 11 DIN 50981 IMO MSC 215 82 84 ISO 1461 ISO 2063 ISO 2808 7C ISO 2808 12 ISO 19840 NF T30 124 SSPC PA2 2004 NON FERROUS NF ASTM D 1400 BS 3900 C5 BS 5411 3 BS 5599 DIN 50984 ISO 2360 ISO 2808 7D ISO 2808 12 FERROUS AND NON FERROUS FNF AS 2331 1 4 AS 3894 3 B AS NZS 1580 108 1 ASTM D 7091 ASTM E 376 ECCA T1 ...

Page 8: ...include images of Elcometer 4563 screens with units set to microns µm Similar screens will be seen when the gauge is set to other units such as mils or inches 1 5 QUICK START To quickly configure the gauge and start taking readings 1 Fit batteries see page 7 2 Fit probea see page 8 3 Switch on see page 9 4 Select language see page 11 5 Try taking a reading see page 12 6 Adjust calibration see page...

Page 9: ...e batteries can be used but they will only have 25 to 30 of the life of alkaline batteries Figure 2 Fitting batteries ensure correct battery polarity 2 2 BATTERY CONDITION Symbol Battery condition action required 100 66 to 100 33 to 66 replacement recommended 16 to 33 replacement required 16 gauge beeps every 10 seconds and symbol flashes immediate replacement required 5 loud beeps gauge switches ...

Page 10: ...onnector locks automatically Note The design of the probe connector allows some movement between the probe and the gauge This is intentional and does not affect measurement performance To release the probe Grasp knurled section and pull gently away from the gauge The connection will unlock and the probe will release To fit the PINIP Twist the PINIP until the connector locates Taking care not to cr...

Page 11: ...Indicates when readings pass or fail the 90 10 rule see page 31 Figure 3 Elcometer 4563 control keys 2 5 SWITCHING THE GAUGE ON Note Before switching the gauge on for the first time read Selecting a language on page 11 Softkeys On Off key LED Gauges with separate and PINIP probes Press key to switch on gauge Gauges with integral probes Press key to switch on gauge or place the probe on a surface R...

Page 12: ... information Measurement information Menus to configure the gauge and control functions Help and miscellaneous information When the gauge is switched on a welcome information screen may be displayed briefly Figure 4 Figure 4 Typical Elcometer 4563 welcome screen The screen where measurement values and statistics are displayed is called the Reading Screen The character size of the measurement value...

Page 13: ...language The screen displays an Elcometer 4563 welcome screen Figure 4 followed by the reading screen Figure 5 The gauge operates in the new language until changed AT ANY TIME 1 Switch gauge off 2 Press and hold left hand softkey 3 Press key to switch on gauge The display will show language selection screen with current language highlighted by cursor 4 Release left hand softkey Follow the instruct...

Page 14: ...page 35 or transfer individual readings and a statistical summary Figure 7 RS232 interface 3 TAKING A READING 3 1 BEFORE YOU START Are you using the correct type of probe See Probes on page 33 Is the probe calibrated See Calibration adjustment on page 22 Do you require statistics See Statistics on page 29 What units of measurement do you want to use See UNITS on page 20 RS232 5 pin connector Op_45...

Page 15: ...upon the type of measurement being made and how the gauge is set up Figure 10 Example of reading screen with smooth surface calibration method selected CAL Operates selected calibration adjustment method MENU This opens the main MENU of the gauge and provides access to user selectable features see page 18 R Separate probe Integral probe R CAL DATA STATS MENU 09 30 09 10 2000 F1 F 456 Automatic swi...

Page 16: ...n page 18 Figure 12 Typical Elcometer 4563 menu Some screens allow the status of a feature to be changed e g on to off or select or deselect etc A tick box indicates this type of feature A tick against a menu item indicates the function is activated or selected SEL softkey selects the option displayed and in some cases toggles the status of a tick box off on Up Down softkeys Ï Ð move the cursor to...

Page 17: ...STATS softkey is activated These give access to more advanced functions such as statistics calibration method print output setup etc 4 3 MAIN MENU EXTENDED MENU OFF Figure 13 Main menu extended menu off BACKLIGHT Switches backlight on and off Toggle tick box to activate deactivate With BACKLIGHT activated the display is illuminated for approximately 5 seconds when a reading is taken or a key press...

Page 18: ...SET Selects Factory Calibration or Gauge resets The RESET menu option Figure 15 allows one of three gauge resets to be selected FACTORY CAL Returns gauge to calibration settings created at time of manufacture of the probe Factory calibration will not necessarily restore precise calibration values The calibration of the gauge should be adjusted before use or at least checked to ensure that it has b...

Page 19: ...rmat and imperial units Figure 15 Reset menu A confirmation screen will be displayed Press YES to reset NO to cancel c USA settings can also be activated at switch on Press and hold softkey 4 and switch on gauge Op_456_3_English book Page 17 Thursday January 22 2009 7 58 PM ...

Page 20: ...R 18 4 4 MAIN MENU EXTENDED MENU ON To toggle EXTENDED MENU on off select MENU EXTENDED MENU SEL Op_456_3_English book Page 18 Thursday January 22 2009 7 58 PM ...

Page 21: ...O softkey to include reading in statistical summary or YES softkey to delete reading If there is no reading to delete the gauge displays Figure 17 Delete last reading not available screen Press OK to return to Delete menu CAL METHOD Allows selection of calibration method from list of options see Calibration method on page 22 for more details SETUP Used to select change or activate gauge features S...

Page 22: ...niprinter on page 42 for sales part number of this optional accessory OUTPUT Selects baud rate Figure 18 and activates data output via the RS232 interface see Interfaces on page 12 Figure 18 OUTPUT screen BAUD RATE can be set at values from 1200 to 19200 The default value is 9600 baud RS232 BIT IMAGE Toggle tick box to activate deactivate When activated readings are sent to the RS232 interface as ...

Page 23: ...rom the reading screen 5 seconds after the reading screen has been displayed or 5 seconds after pressing any key To view the functions again press any one of the four softkeys Softkey functions are always visible in menus OPENING SCREEN Disables the opening welcome screens so that the gauge switches on to display the reading screen If a personalised welcome screen has been downloaded into the gaug...

Page 24: ...nd is indicated on the screen by a symbol Figure 21 Figure 21 CAL METHOD screen SMOOTH Smooth surface calibration where the gauge is set to zero on the uncoated surface and a known thickness above the expected thickness of the coating 2POINT Calibration on a thin value and a thick value either side of the expected thickness This enhances the accuracy of the gauge over the thickness range defined b...

Page 25: ...on required screen If the NO softkey is pressed the CAL softkey symbol on the Readings Screen will flash to warn that calibration adjustment is still required If the YES softkey is pressed the calibration adjustment procedure is activated see Calibration adjustment procedure on page 24 5 2 CALIBRATION FOILS AND STANDARDS Calibration adjustment should be carried out with the appropriate probe on th...

Page 26: ...alibrate 5 mm 200 mils and 13 mm 500 mils range gauges it will be necessary to stack the foils Figure 23 Care must be taken to avoid errors due to placing the foil labels between the foils Figure 23 Stacking foils to increase thickness COATED STANDARDS Thickness standards using typical substrate materials coated with hardwearing materials and measured using techniques independent of the gauge Coat...

Page 27: ...il depends on the calibration method chosen but the calibration is in two steps The following example is for a Smooth Calibration adjustment Step 1 1 Hold probe in air and press CAL softkey Figure 24 Figure 24 Step 1 on thickness standard ESC softkey returns the gauge to the Reading Screen from the Calibration Procedure without making any changes TEST softkey allows the user to take readings to ve...

Page 28: ...elative to the thickness standard use the Up Down softkeys 4 Press SET softkey to accept the value Note indicates over range Figure 26 Taking a reading within range clears this screen Figure 26 Over range reading Step 2 1 Place probe on uncoated standard or zero plate The gauge will take and display a reading 2 Lift probe and then replace on uncoated standard or zero plate Gauge displays the avera...

Page 29: ...the display Figure 28 Figure 28 Zero the display 4 Press SET softkey to accept this value The gauge will display the option to test the calibration of the gauge Figure 29 TEST READINGS screen 5 Either press NO softkey to complete the calibration adjustment procedure and return the gauge to the reading screen or proceed to take test readings see Taking test readings below First reading Second readi...

Page 30: ...reen Other calibration methods For the 2 POINT ROUGH and SPECIAL SUBSTRATE calibration methods Step 2 requires readings to be taken on a thin standard value instead of on an uncoated base Figure 31 Step 2 On thin standard Repeating the reading will display the average This is particularly useful for rough surfaces as it allows variations in the surface to be accounted for in the calibration adjust...

Page 31: ...ept value 7 Remove thickness standard from end of PINIP probe 8 Proceed with Step 2 see page 26 6 STATISTICS The Elcometer 4563 Basic has a Simple Statistics feature STATS which calculates and displays a statistical analysis of readings as they are taken When EXTENDED MENU is active press STATS softkey to access STATS MENU Figure 33 Figure 33 Stats menu The statistics available are Number of Readi...

Page 32: ...eight characters The example screens Figure 34 appear when all the statistical values are selected The Up Down softkeys can be used to move through the list OK softkey returns to the Reading Screen Figure 34 Enlarged statistics 6 2 STATS ON LCD Activates the presentation of the chosen statistical values on the reading screen Figure 35 Reading screen with all statistics 6 3 CLEAR STATS Resets to ze...

Page 33: ...elect SET NDFT use the Up Down softkeys Ï Ð to adjust the value and then press OK If any readings have been taken in immediate mode a screen will be displayed warning that the statistics will be cleared Press YES to continue to change the NDFT value or NO to escape and leave the value unchanged ABOUT PSPCH READINGS Your gauge is capable of displaying PSPC readings according to the 90 10 rule as de...

Page 34: ...reen flash Fail 90 3 beeps Green flash Fail 0 9xNDFT 3 beeps Red flash 6 6 DISPLAY Only applies when using dual function probes Allows selection of the types of readings used in the statistical calculation when a dual function probe is connected Probe Options FNF F N or F and N combinedj F1 2 F1 F2 or F1 and F2 combinedj SUBSTRATE NDFT 0 9 x COATING NDFT At least 90 of all readings must be in this...

Page 35: ...aint plastic galvanising enamel powder paint hard chrome and other coatings such as electro less nickel applied to steel or iron 7 2 NON FERROUS N PROBESK N probes measure the thickness of non metallic coatings on non magnetic metals They can be used on anodising paint plastic coatings powder paint etc applied to aluminium brass non magnetic stainless steel etc 7 3 DUAL FERROUS NON FERROUS FNF PRO...

Page 36: ...e Type F N FNF FERROUS F1 9 8 9 F2 9 8 9 F1 2 9 8 9 F3 9 8 9 F1 right angle 9 8 9 F2 right angle 9 8 9 F1 2 right angle 9 8 9 F1 telescopic 9 8 9 F2 telescopic 9 8 9 F1 PINIP 9 8 9 F2 PINIP 9 8 9 F1 2 PINIP High Temp 9 8 9 F3 PINIP 9 8 9 FM3 miniature straight 9 8 9 FM3 miniature 45 9 8 9 FM3 miniature 90 9 8 9 NON FERROUS N1 8 9 9 N2 8 9 9 N1 right angle 8 9 9 N1A anodiser s 8 9 9 N1 PINIP 8 9 9 ...

Page 37: ... steel see Calibration adjustment on page 22 Care must be taken to ensure that the calibration conditions are not affected by changes in the zinc or aluminium coating thickness This can be determined by checking the zero over an area of the galvanised or metal coated steel Metal coatings on steel above 50 µm 2 mil thou should be consistent enough to obtain a stable zero on the layer of metal 3 Tak...

Page 38: ...d Crystal Display LCD If the display is heated above 50 C 120 F it may be damaged This can happen if the gauge is left in a car parked in strong sunlight Always store the gauge in its carrying pouch when it is not being used Remove the batteries from the gauge and store them separately if the gauge is to remain unused for a long period of time This will prevent damage to the gauge in the event of ...

Page 39: ...umber of measurements taken and how abrasive the coating is Probe life can be prolonged by careful positioning of the probe on the surface Replacement separate and PINIP probes can be fitted by the user without the need to return the gauge for service Gauges with an integral probe have to be returned for re programming or replacement if the probe becomes worn or damaged Op_456_3_English book Page ...

Page 40: ...e mode the Number of Readings is the number of values recorded not the total number of readings taken STD DEVIATION Standard Deviation A statistical measure of the spread of values in a group of readings PERCENT GREATER OR EQUAL TO NDFT The percentage of readings greater than or equal to the value of NDFT see Set NDFT on page 31 PERCENT BETWEEN 90 AND 100 NDFT The percentage of readings less than ...

Page 41: ... PROBE OPERATING TEMPERATURE Separate ferrous probes 150 C 300 F High temperature PINIP probes 250 C 480 F Miniature probes without outer sleeve 150 C 300 F All other probes 80 C 176 F 12 4 PHYSICAL 12 5 POWER SUPPLY Internal batteries 2 x LR03 AAA alkalinel dry batteries or rechargeablem equivalents Battery life 30n hours to 40 hours continuous use with alkaline dry batteries 15 000 to 20 000 rea...

Page 42: ...supplier At time of ordering please quote the sales part number which follows the description of each accessory 13 1 PROBES Full details of the extensive range of 456 probes can be obtained from Elcometer your local Elcometer supplier or the Elcometer website www elcometer com l Alkaline batteries must be disposed of carefully to avoid environmental contamination Please consult your local environm...

Page 43: ...TE 13 6 PROBE PLACEMENT JIG To aid probe positioning on small components a probe placement jig is available and an adapter suitable for use with the full range of miniature probes is also available as an accessory 13 7 PROBE ADAPTERS 2 2 mm 85 mils 8 pieces T9904199F 1 3 mm 51 mils 3 pieces T9904199G 5 5 mm 220 mils 4 pieces T9904199J 15 mm 595 mils 4 pieces T9904199K Ferrous Standard 4 Values T99...

Page 44: ...ertain PC RS232 ports V Adapter for pipes FNF probes T99913133 230V UK Plug X4569964B 230V European Plug X4569964C 110V US Plug X4569964D 456 to printer connection cable 25 pin T45616267 Ribbon Cassettes Pack of 5 T9769992 Paper Rolls Box of 20 T9999993 Integral Probe Version T45616161 Integral Separate Probe Version T45616162 456 to PC Connection Cable 9 pin T99916217 Op_456_3_English book Page 4...

Page 45: ... Uncured powder thickness gauges Coatings analyser Inspection management software Mechanical coatings thickness gauges Appearance testers Adhesion testers For further information contact Elcometer your local Elcometer supplier or visit www elcometer com 15 FITTING THE WRIST HARNESS 1 Pass harness round pin 2 Pass harness through loop 3 Pull tight Op_456_3_English book Page 43 Thursday January 22 2...

Page 46: ... to 200 mils F3 0 mm to 13 mm 1 to 3 or 0 05 mm 1 0 µm 10 µm 0 mm to 1 99 mm 2 mm to 13 mm 0 mil to 500 mils 1 to 3 or 2 0 mils 0 1 mil 1 mil 0 mil to 99 9 mils 100 mils to 500 mils FM3 NM3 0 µm to 500 µm 1 to 3 or 2 5 µm 0 1 µm 1 0 µm 0 µm to 99 9 µm 100 µm to 500 µm 0 mil to 10 mils 1 to 3 or 1 0 mil 0 01 mil 0 1 mil 0 mil to 3 99 mils 4 mils to 10 mils F6 0 mm to 25 mm 1 to 3 or 0 1 mm 10 µm 10...

Page 47: ...nditions F1 or F1 2 set for F1 operation 4 mm 0 16 25 mm 0 98 130 mm 5 1 4 mm 0 16 250 µm 10 mil F1 2 set for F2 operation 4 mm 0 16 25 mm 0 98 135 mm 5 3 8 mm 0 32 1 mm 40 mil F3 15 mm 0 59 40 mm 1 57 150 mm 5 9 14 mm 0 55 2 5 mm 100mil N1 N 35 mm 1 38 25 mm 0 98 130 mm 5 1 6 mm 0 24 250 µm 10 mil FNF1 N 38 mm 1 50 25 mm 0 98 135 mm 5 3 8 mm 0 32 250 µm 10 mil FNF1 F 4 mm 0 16 25 mm 0 98 135 mm 5...

Page 48: ...l F1 2 set to F2 4 mm 0 16 25 mm 0 98 89 mm 3 50 8 mm 0 32 1 mm 40 mil F1 Right Angle or F1 2 set to F1 4 mm 0 16 25 mm 0 98 28 mm 1 10 4 mm 0 16 250 µm 10 mil F1 2 Right Angle set to F2 4 mm 0 16 25 mm 0 98 32 mm 1 26 8 mm 0 32 1 mm 40 mil F1 Telescopic 4 mm 0 16 25 mm 0 98 32 mm 1 26 4 mm 0 16 250 µm 10 mil F1 2 Telescopic 4 mm 0 16 25 mm 0 98 36 mm 1 42 8 mm 0 32 1 mm 40 mil F3 15 mm 0 59 40 mm...

Page 49: ...the specified accuracy under these measurement conditions N1 35 mm 1 38 25 mm 0 98 85 mm 3 35 6 mm 0 24 250 µm 10 mil N1 Right Angle 35 mm 1 38 25 mm 0 98 28 mm 1 10 6 mm 0 24 250 µm 10 mil N1A Anodiser s Probe 35 mm 1 38 25 mm 0 98 85 mm 3 35 6 mm 0 24 250 µm 10 mil N2 100 mm 3 97 150 mm 5 90 85 mm 3 35 14 mm 0 55 1 mm 40 mil N6 Flat surface 400 mm 160 mm 58 mm Any Op_456_3_English book Page 47 T...

Page 50: ...to achieve the specified accuracy under these measurement conditions FNF1 N 38 mm 1 50 25 mm 0 98 88 mm 3 46 8 mm 0 32 250 µm 10 mil FNF1 F 4 mm 0 16 25 mm 0 98 88 mm 3 46 4 mm 0 16 250 µm 10 mil FNF1 Right Angle N 38 mm 1 50 25 mm 0 98 34 mm 1 34 8 mm 0 32 250 µm 10 mil FNF1 Right Angle F 4 mm 0 16 25 mm 0 98 34 mm 1 34 4 mm 0 16 250 µm 10 mil Op_456_3_English book Page 48 Thursday January 22 200...

Page 51: ...tions F1 or F1 2 set to F1 4 mm 0 16 60 mm 2 36 155 mm 6 10 4 mm 0 16 250 µm 10 mil F1 2 set to F2 4 mm 0 16 60 mm 2 36 159 mm 6 25 8 mm 0 32 1 mm 40 mil F3 15 mm 0 59 45 mm 1 77 169 mm 6 65 14 mm 0 55 2 5 mm 100mil N1 35 mm 1 38 50 mm 1 97 155 mm 6 09 6 mm 0 24 250 µm 10 mil FNF1 N 38 mm 1 50 55 mm 2 17 156 mm 6 15 8 mm 0 32 250 µm 10 mil FNF1 F 4 mm 0 16 55 mm 2 17 156 mm 6 14 4 mm 0 16 250 µm 1...

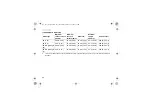
Page 52: ...mm 5 91 F Straight 150 mm 5 9 1 5 mm 0 06 6 5 mm 0 26 3 mm 0 12 6 mm 0 24 260 mm 10 24 F 45 45 mm 1 77 1 5 mm 0 06 6 5 mm 0 26 3 mm 0 12 18 mm 0 71 7 mm 0 28 145 mm 5 71 F 45 150 mm 5 9 1 5 mm 0 06 6 5 mm 0 26 3 mm 0 12 18 mm 0 71 7 mm 0 28 250 mm 9 84 F 90 45 mm 1 77 1 5 mm 0 06 6 5 mm 0 26 3 mm 0 12 16 mm 0 63 7 mm 0 28 140 mm 5 51 F 90 150 mm 5 9 1 5 mm 0 06 6 5 mm 0 26 3 mm 0 12 16 mm 0 63 7 m...

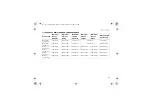
Page 53: ... 5 91 NF Straight 150 mm 5 9 3 mm 0 12 25 mm 0 98 4 mm 0 16 6mm 0 24 260 mm 10 24 NF 45 45 mm 1 77 3 mm 0 12 25 mm 0 98 4 mm 0 16 18 mm 0 71 7 mm 0 28 145 mm 5 71 NF 45 150 mm 5 9 3 mm 0 12 25 mm 0 98 4 mm 0 16 18 mm 0 71 7 mm 0 28 250 mm 9 84 NF 90 45 mm 1 77 3 mm 0 12 25 mm 0 98 4 mm 0 16 16 mm 0 63 7 mm 0 28 140 mm 5 51 NF 90 150 mm 5 9 3 mm 0 12 25 mm 0 98 4 mm 0 16 16 mm 0 63 7 mm 0 28 245 mm...

Page 54: ... from probe Integral gauge return to Elcometer Separate gauge try new probe If error persists return to Elcometer 3 PROBE Internal error Return to Elcometer PROBE UNSUPPORTED a Probe is dual FNF but gauge is ferrous only or non ferrous only See page 33 b Old gauge software does not support new probe a Gauge model F and gauge model N cannot be used with a dual FNF probe b Return to Elcometer for so...

Page 55: ...UE TOO LARGE Numerical error Switch gauge off then on again If error persists contact Elcometer CALIBRATION Incorrect calibration calculation Re calibrate If error persists return to Elcometer LANGUAGE MEMORY Software error Return to Elcometer Error message Causes Action to take Op_456_3_English book Page 53 Thursday January 22 2009 7 58 PM ...

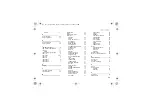
Page 56: ...ocking 15 Methods 22 Shims 24 Calibration Adjustment 24 Procedure 2Point 28 Procedure Rough 28 Procedure Smooth 25 Procedure Special substrate 28 Calibration certificates 41 Calibration methods 2 POINT 22 ROUGH 22 SET OFFSET 23 SPECIAL SUB 22 ZERO OFFSET 23 Character size 10 Coated thickness standards 24 Spares 41 Coatings On galvanised steel 35 On metallised steel 35 Coefficient of Variation 38 C...

Page 57: ...SPLAY 32 ENLARGE STATS 30 EXTENDED MENU 18 FACTORY CAL 16 GAUGE INFORMATION 16 HELP 16 INTL GAUGE 16 LANGUAGES 21 LARGE FONTS 21 OPENING SCREEN 21 OUTPUT 20 PRINT OUTPUT 19 PROBE 20 PROBE INFORMATION 16 RESET 16 ROUGH 22 RS232 BIT IMAGE 20 RS232 PLAIN TEXT 20 SELECT STATS 31 SET NDFT 31 SET OFFSET 23 SETUP 19 SMOOTH 22 SOFTKEYS LOCKED 21 SPECIAL SUB 22 STATISTICS 19 STATS MENU 29 STATS ON LCD 30 U...

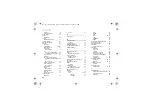
Page 58: ...ace 12 S Scale selection F1 F2 20 Screen Welcome information 10 Screen symbols Battery condition 7 Definition of 16 Screen symbols explanation of 16 Set offset 23 Setting up the gauge 19 Shims 24 Ordering 41 Simple menu Turning on off 16 Smooth calibration method 22 SMS 6310 081 015 5 Softkey BACK 15 CAL 13 28 Flashing 14 Procedure 24 ESC 25 MENU 13 SEL 14 SET 26 27 TEST 25 UP DOWN 14 ZERO 27 Spec...

Page 59: ... Units Automatic setting of 20 Manual setting of 20 Up Down 14 US gauge settings 17 US NAVY NSI 009 32 5 US NAVY PPI 63101 000 5 W Weight 39 Welcome screen Creating 35 Disabling 21 Wrist harness fitting of 43 Z Zero offset calibration method 23 Op_456_3_English book Page 57 Thursday January 22 2009 7 58 PM ...

Reviews: