background image

15

Chapter 3 No-Picture Problem

Chapter 3  No-Picture Problem

Problem

Possible cause and remedy

1.  No picture

 • Power indicator does not light.

 • Check whether the power cord is connected properly.
 • Press  .

 • Power indicator lights green.

 •

Increase "Brightness", "Contrast", or "Gain" in the Setting 

menu. For details, refer to the Installation Manual (on the 
CD-ROM).

 • Power indicator is lighting orange.

 • Switch the input signal with  . For details, refer to the 

Installation Manual (on the CD-ROM).

 • Move the mouse or press any key on the keyboard.
 • Check whether the PC is turned on.
 • This problem may occur when the PC is connected via the 

DisplayPort connector. Reconnect the power cord of the 
monitor, or reboot the PC.

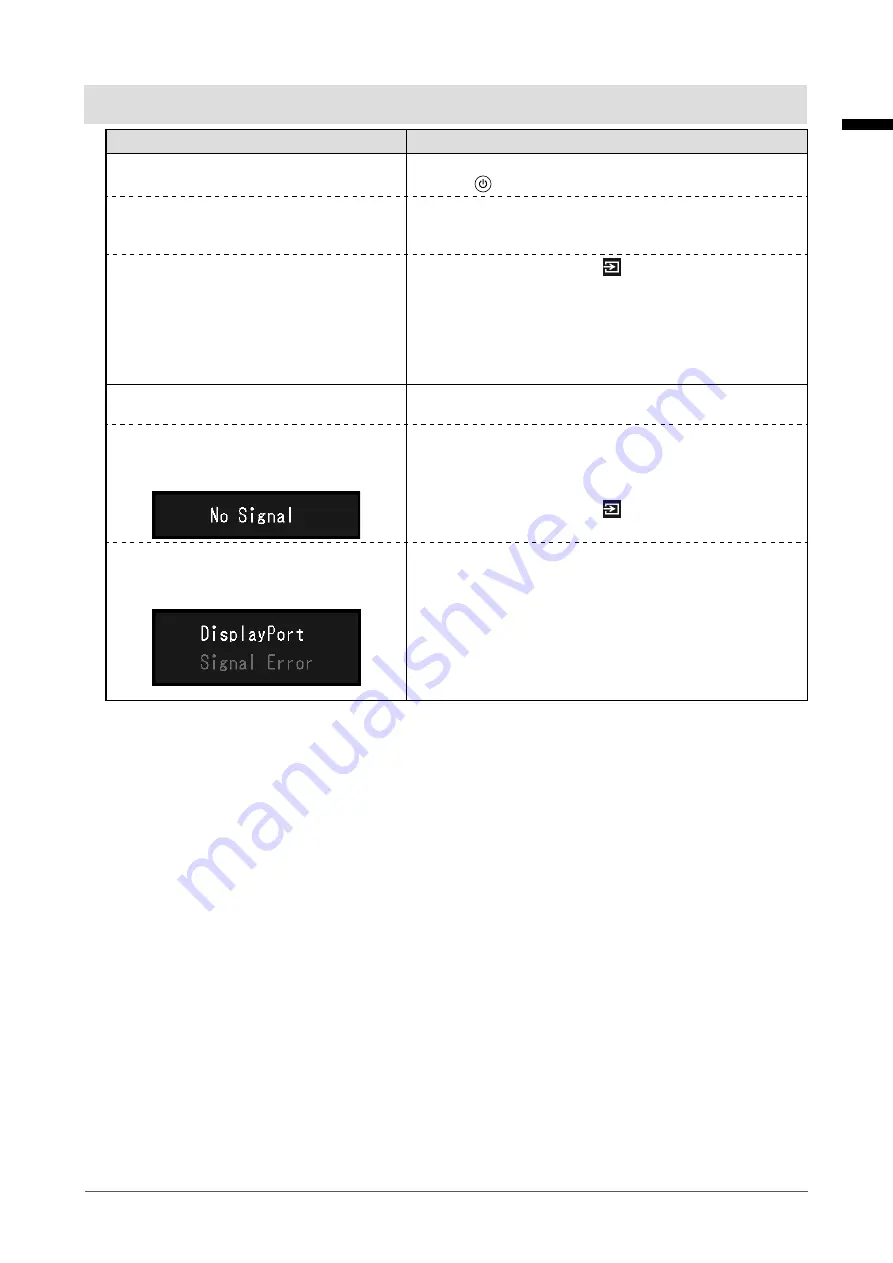
2.  The message below appears.

This message appears when the signal is not input correctly 
even when the monitor functions properly.

 • This message appears when no signal is 

input.  
Example:

 • The message shown left may appear, because some PCs do 

not output the signal soon after power-on.

 • Check whether the PC is turned on.
 • Check whether the signal cable is connected properly.
 • Switch the input signal with  . For details, refer to the 

Installation Manual (on the CD-ROM).

 • The message indicates that the input signal 

is out of the specified frequency range. 

Example:

 •

Check whether the PC is configured to meet the resolution 
and vertical scan frequency requirements of the monitor (see 

“4-2. Compatible Resolutions” (page 17)).

 • Reboot the PC.
 • Change to the appropriate setting using the graphics board's 

utility. For details, refer to the User's Manual of the graphics 
board.

English

Summary of Contents for RadiForce MX194

Page 1: ...urself with safe and effective usage Please retain this manual for future reference For monitor adjustment and settings refer to the Installation Manual For the latest product information including th...

Page 2: ...unit This product has been adjusted specifically for use in the region to which it was originally shipped If operated outside this region the product may not perform as stated in the specifications N...

Page 3: ...n of the Caution Statements Symbols on the unit Symbol This symbol indicates Power button Press to turn the monitor s power on or off Alternating current Alerting electrical hazard CAUTION Refer to SA...

Page 4: ...not place in any form of transportation ships aircraft trains automobiles etc Do not place in dusty or humid environments Do not place in locations where water may be splashed on the screen bathrooms...

Page 5: ...and install the unit securely Otherwise the unit may become detached resulting in injury and or equipment damage Before installation make sure that desks walls or any other installation surface has a...

Page 6: ...tall the unit in a place with poor ventilation or inadequate space Do not use the unit laid down or upside down Blocking the ventilation slots prevents proper airflow and may result in fire electric s...

Page 7: ...even after a short time period has elapsed depending on the displayed image If this occurs changing the image or leaving the power off for a few hours may solve the problem The backlight of the LCD p...

Page 8: ...ng change Using the monitor with the control buttons locked is recommended after adjusting the screen of the monitor For details on how to set refer to the Installation Manual on the CD ROM Cleaning P...

Page 9: ...and Functions 11 Chapter 2 Installation Connection 12 2 1 Before Installing the Product 12 Installation Requirements 12 2 2 Connecting Cables 13 2 3 Turning On the Power 14 2 4 Adjusting the Screen He...

Page 10: ...l position for easy operation and minimizing fatigue Tilt 30 up 0 down swivel 35 right 35 left adjustable height 100 mm 1 2 Package Contents Check that all of the following items are included in the p...

Page 11: ...e operation guide and the menus refer to the Installation Manual on the CD ROM 3 button Turns the power on or off 4 Power Indicator Indicates the monitor s operation status Green Operating Orange Powe...

Page 12: ...this product on a lacquer coated desk the color may adhere to the bottom of the stand due to the composition of the rubber Check the desk surface before use Installation Requirements When installing t...

Page 13: ...ns page 17 before connecting the PC 1 Connect signal cables Check the shapes of the connectors and connect the cables After connecting the DVI cable or the D Sub cable to the monitor tighten the faste...

Page 14: ...ompletely when not using the monitor Note When turning on the monitor and PC for the first time with the analog signal the Auto Adjustment function works to adjust the clock phase and display position...

Page 15: ...r reboot the PC 2 The message below appears This message appears when the signal is not input correctly even when the monitor functions properly This message appears when no signal is input Example Th...

Page 16: ...400 69 Hz 71 Hz D Sub 50 0 Hz 75 0 Hz Synchronization Signal Separate Dot Clock Max DVI DisplayPort 108 MHz D Sub 135 MHz USB Port Upstream x 1 Standard USB Specification Revision 2 0 Power Input 100...

Page 17: ...nnected and DP Power Save On 4 2 Compatible Resolutions The monitor supports the following resolutions For Digital Signal Input DisplayPort DVI Resolution Vertical Scan Frequency 640 x 480 60 Hz 720 x...

Page 18: ...or EIZO FP 702 Arm Stand EIZO LS HM1 D Dual height adjustable stand EIZO LA 011 W Wall hung arm EIZO AAH 02B3W Wall hung arm Calibration Kit EIZO RadiCS UX2 Ver 4 6 3 or later Network QC Management So...

Page 19: ...etic waves that could influence limit or result in malfunction of the monitor Install the equipment in a controlled environment where such effects are avoided Classification of Equipment Type of prote...

Page 20: ...ent or stacked use is necessary the equipment or system should be observed to verify normal operation in the configuration in which it will be used When using a portable RF communication equipment kee...

Page 21: ...idance Electrostatic discharge ESD IEC EN61000 4 2 8 kV contact discharge 15 kV air discharge 8 kV contact discharge 15 kV air discharge Floors should be wood concrete or ceramic tile If floors are co...

Page 22: ...site survey a should be less than the compliance level in each frequency range b Interference may occur in the vicinity of equipment marked with the following symbol Note 1 UT is the a c mains voltage...

Page 23: ...aximum power W Minimum separation distance m IEC EN60601 test level V m Compliance level V m 385 380 390 TETRA 400 Pulse modulation b 18 Hz 1 8 0 3 27 27 450 430 470 GMRS 460 FRS 460 FM 5 kHz deviatio...

Page 24: ...Hz to 80 MHz d 1 2 P 80 MHz to 800 MHz d 1 2 P 800 MHz to 2 7 GHz d 2 3 P 0 01 0 12 0 12 0 23 0 1 0 38 0 38 0 73 1 1 2 1 2 2 3 10 3 8 3 8 7 3 100 12 12 23 For transmitters rated at a maximum output po...

Page 25: ...ce to radio communications However there is no guarantee that interference will not occur in a particular installation If this equipment does cause harmful interference to radio or television receptio...

Page 26: ...ZO Corporation All rights reserved 1st Edition March 2018 Printed in Japan 00N0N072A1 IFU MX194 6 http www eizoglobal com 153 Shimokashiwano Hakusan Ishikawa 924 8566 Japan 8 5B Siemensallee 84 76187...

Reviews: