background image

Before installing the unit, please read and follow the instructions provided in the Installation Manual included
in this kit.

WARNING - To reduce the risk of fire or electric shock:

install in accordance with the manufacturer’s instructions

do not expose this apparatus to rain or moisture

do not use this product near water

do not attempt to dissamble this unit

do not block any ventilation openings

do not install near any heat sources such as radiators, stoves or other equipment that produce
heat.

You are cautioned that any changes or modifications not expressly mentioned in this manual could void your
authority to operate this equipment.

When used as a mechanism to disconnect from the current network, a socket plug, or a device connector;
the disconnecting mechanism must be easily accessible at all times. Protect the power cord from being
walked on or pinched particularly at plugs, convenience receptacles, and the point where they exit from the
apparatus.

Only use attachments/accessories specified by the manufacturer.

as power-supply cord or plug is damaged, liquid has been spilled or objects have fallen into the

apparatus, the apparatus has been exposed to rain or moisture, does not operate normally, or has been
dropped.

Before operating the unit, please read thoroughly and follow the instructions provided in the User's Manual
and save it for future use.

This product has been designed and tested to provide reasonable protection against harmful interference in
residential installation. However there is no guarantee that interference will not have an affect it in a
particular installation. In these cases, reorient the receiving antenna, try to increase the separation between
the equipment and the source of interference and/or connect the equipment into an outlet on a circuit
different from that to which the source of interference is connected.

The entire risk of the installation, use, results and performance are the user's responsability.

Use a certified technician for installation, repair and/or maintenance of this equipment and comply with all
the regulations in force in each country. Servicing is required when the apparatus has been damaged in any
way, such

To change the batteries remove the cover pressing on the tab while lifting the cover. Use
batteries type AAA 1,5V. Do not discard used batteries with household waste

10

3

4

5

6

9

10

1. Introduction
2. General Operating Notes
3. Operating Audio Functions

5. Selecting Turn-On Mode

4. Operating the FM Tuner

6. “Ideal” mode

4.1 Station Search
4.2 Directly Keying Station Frequency
4.3 Tuning to FM Memory Pre-Sets
4.4 Storing and Clearing Station Frequencies Manually
4.5 Storing and Clearing Station Frequencies Automatically
4.6 Adjusting StationSearch Sensitivity

CAUTION

DO NOT OPEN

RISK OF ELECTRIC SHOCK

!

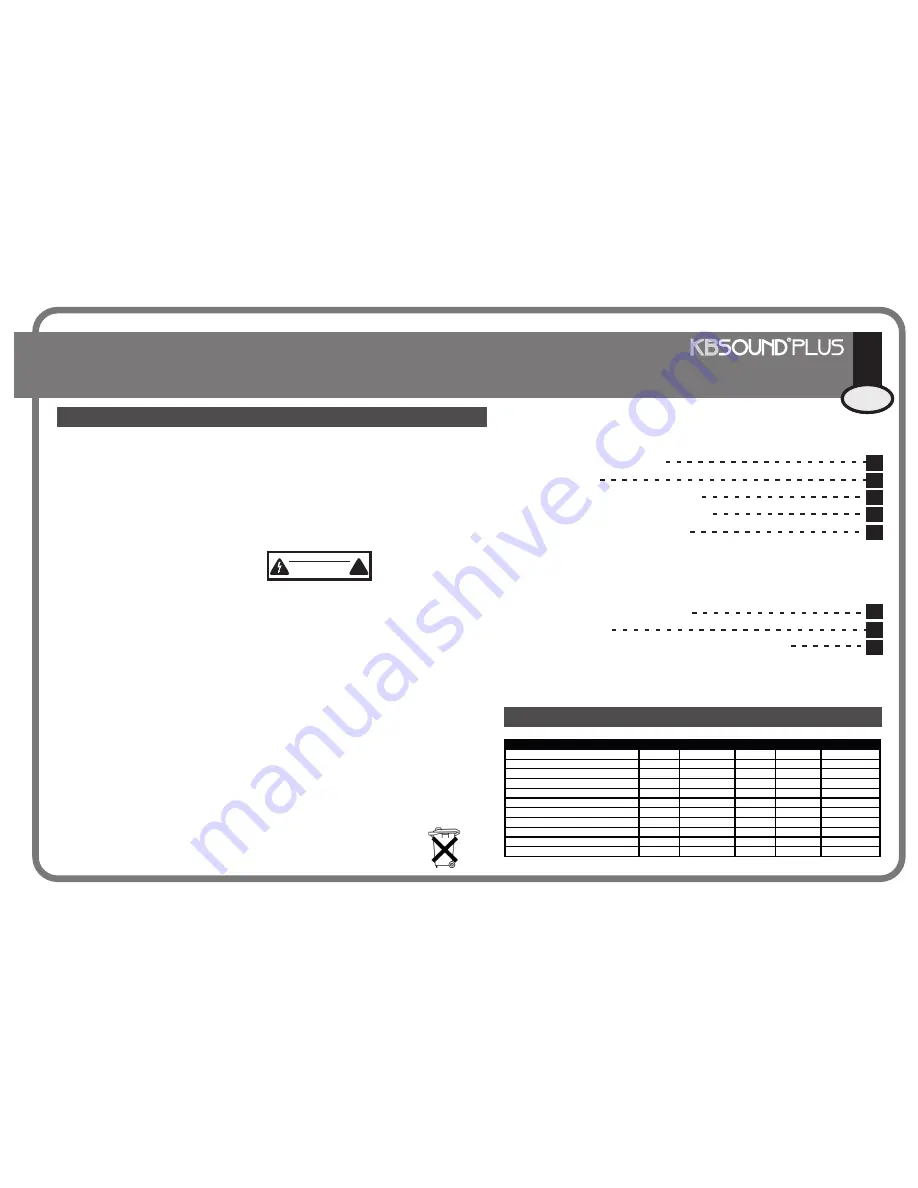
Technical Specifications

42695 , 42695U

MIN

NORMAL

MAX

COMMENTS

Measurements

181x50x52

mm

Voltage

120

Vac

60Hz

Consumption demand

10

W

terminals L,N

Output signal (16 ohms)

1,5

W

terminals D,I

Passband

20

15.000

Hz

Distortion

0,1

0,4

%

Frequency range

87,5

108

MHz

Antenna impedance

75

ohms

terminals A,M

Antenna sensitivity

3,5

5

uV

Tuner distortion

2

%

Number of station pre-sets

20

7. Play your iPod

through KBSOUND

®

®PLUS

2

Quick Reference Guide

ENG

Important Safety Instructions

ENG

1

CC-1088-05.1

Summary of Contents for KBSOUND PLUS

Page 1: ...28XW E254006 USER S MANUAL MANUAL DE USUARIO MANUEL DE L USUAIRE 1 11 21 ENG E F FOR KITCHENS BATHROOMS CC 1088 05 1 ...

Page 2: ...rference will not have an affect it in a particular installation In these cases reorient the receiving antenna try to increase the separation between the equipment and the source of interference and or connect the equipment into an outlet on a circuit different from that to which the source of interference is connected The entire risk of the installation use results and performance are the user s ...

Page 3: ...e turn on mode on off 5 DEL mem PRG mem FM C 2 2 5 2 Quick Reference Guide SCAN SCAN VOL VOL TREBLE BASS MEM LOUD M ST DEL mem DEL all PRG mem PRG all PRG 1 4 5 7 8 0 9 6 2 3 FM C SCAN SCAN VOL VOL Mute Numeric Keypad FM memory pre sets IDEAL mode Bass Control Treble Control Clear Directly keying FM station fre Loudness Volume Control Automatic FM station search Forced mono 95 8MHz 5 8 FM 9 On Off...

Page 4: ...an be operated remotely by using a fully equipped remote control eliminating the need to physically approach the control unit Blending perfectly into the décor of the kitchen or bathroom the device has the following basic characteristics KBSOUND PLUS The components supplied in this kit are for installation and use in the manner and for the purpose described in the installation manual and the user ...

Page 5: ...ed in this manual really means a standby state KBSOUND PLUS 2 General Operating Notes The control unit generates sound signals to communicate the status of operations carried out These signals are reflected in this manual as follows A short BEEP sound signal indicates that the data was received A long BEEP sound signal indicates that an operation was correctly completed A series of BEEP sound sign...

Page 6: ...llows the FM stations to be received in stereo the LED will flash once in RED When cleared this feature only allows for mono reception the LED will flash four times in RED Note If the control unit s configuration is mono see Installation Sheet supplied with this kit the signal will always be received in mono even if the signal received by the antenna is in stereo If the control unit is off a brief...

Page 7: ... then begin keying in the desired frequency BEEP BEEP BEEP BEEP BEEP BEEP 5 1 4 7 BEEP BEEP BEEP BEEP 4 2 Directly Keying Station Frequency While the search is taking place the LED will be RED Once the station has been found the LED turns GREEN When the search is going up the tuner a BO BEEP signal sounds when the end of the frequency range is reached The next press of the key will start the searc...

Page 8: ... a station from memory If the station you wish to clear from memory was not previously stored in the memory the sound signal and LED will be the same as when there is an error BEEP BIP The MEM MEM keys allow you to scroll through the stations stored in memory see Chapters 2 6 and 2 7 Storing and Clearing Stations in Memory When stations are stored in memory they are sorted in ascending order that ...

Page 9: ...use all the memory slots available reaching the maximum of 20 The process can take a few moments Once the scan has been completed or once the maximum number of memory slots has been used the process ends and a long BEEP signal sounds storing station frequencies automatically BEEP BEEP 5 PRG all 9 5 DEL all 6 4 5 Storing and Clearing Station Frequencies Automatically To adjust the automatic station...

Page 10: ...tch 2 The unit will flicker a couple of times and turn off 3 Turn on the unit using the remote control ON OFF key 4 With the unit turned on keep the ON OFF key pressed down for 5 KBSOUND PLUS KBSOUND PLUS KBSOUND PLUS KBSOUND PLUS If the Turn On mode is set to on the RED light will flash once In this state when power is fed to the unit it will turn on in ideal mode see Chapter 6 Ideal Mode If the ...

Page 11: ...ully stored the typical signal will sound BEEP BEEP PRG 2 7 Play your iPod through KBSOUND PLUS 1 Select an FM frequency on your Dial a numeric frequency see Chapter 4 2 on which you hear nothing but static noise with no audio in the background nor any of the neighboring frequencies 2 Select the same FM frequency using your iTrip or any other FM transmitter 3 From the iPod or any other MP3 player ...

Page 12: ...ra Donde se utilice como dispositivo de desconexión de la red eléctrica una clavija de red de alimentación o un conector de aparato dicho dispositivo de desconexión debe aparecer fácilmente accesible Asimismo proteger el cable de alimentación de ser aplastado o perforado particularmente en el enchufe y en el punto donde el cable sale del aparato Utilizar exclusivamente los accesorios suministrados...

Page 13: ...FM seleccionada 5 3 2 1 DEL all PRG all 9 6 5 5 PRG 2 5 DEL mem PRG mem FM C 2 2 Guía de referencia rápida TREBLE BASS MEM LOUD M ST DEL mem DEL all PRG mem PRG all PRG 1 4 5 7 8 0 9 6 2 3 FM C SCAN SCAN VOL VOL Mute 95 8MHz Teclado numérico Modo IDEAL Control de graves Control de agudos Borrado Selección directa de una emisora FM Loudness Control de volumen Búsqueda automática de emisoras FM Forc...

Page 14: ...de un mando a distancia de altas prestaciones que permitirá el acceso a cualquier función sin necesidad de desplazarse hasta el punto donde está instalado el módulo de control Perfectamente integrado en la decoración de la cocina o del baño ofrece las siguientes características básicas Los componentes suministrados en este kit debe ser instalados y utilizado en la forma y finalidad prevista en el ...

Page 15: ...o largo de este manual significa un estado de standby 1 1 parpadeo en ROJO función activada ón por lo que u KBSOUND PLUS El módulo de control genera unas señales acústicas que sirven de orientación sobre el resultado de las operaciones que se están llevando a cabo Estas señales se indican en este manual de la siguiente manera una señal acústica BIP corta indica dato ok una señal acústica BIP larga...

Page 16: ... FM el indicador luminoso parpadeará una vez en ROJO cuando está desactivado obliga a que la recepción sea en mono el indicador luminoso parpadeará 4 veces en ROJO Nota si la configuración del módulo es mono ver Hoja de Instalación suministrada con el kit aunque la señal recibida por la antena sea estereo se escuchará siempre en mono Secuencia teclas Si el módulo está apagado con una breve actuaci...

Page 17: ...la C A continuación se puede volver a iniciar la introducción de la frecuencia deseada BIP BIP BIP BIP BIP BIP BIP BIP BIP BIP BIP BIP BIP BIP BIP BIP BIP BIP BIP BIP BIP 4 2 Selección directa de una emisora Mientras dura el proceso de búsqueda el indicador luminoso se muestra en ROJO Una vez encontrada la emisora pasa a VERDE Cuando el proceso de búsqueda es hacia arriba se genera una señal del t...

Page 18: ...mento si estaba en alguna memoria quedará borrada borrar una emisora Si la emisora que se desea borrar no está en memoria se indicará con una señal acústica y luminosa BIP BIP BIP BIP BIP BIP BIP BIP BIP BIP Las teclas MEM MEM permiten moverse por las diferentes emisoras almacenadas en memoria ver capítulos 4 4 y 4 5 Memorización y borrado de emisoras Cuando se almacenan emisoras en memoria éstas ...

Page 19: ...sponga libres hasta un máximo de 20 Este proceso puede llevar unos segundos Una vez finalizada la búsqueda o una vez sobrepasado el máximo número de memorias finaliza el proceso con una señal acústica BIP largo memorización automática de emisoras BIP BIP 5 PRG all 9 5 DEL all 6 4 5 Memorización y borrado automático de emisoras Para ajustar el nivel de sensibilidad de búsqueda automática de emisora...

Page 20: ...con el mando a distancia tecla ON OFF 4 con el encendido mantener pulsada la tecla ON OFF durante 5 KBSOUND PLUS KBSOUND PLUS KBSOUND PLUS KBSOUND PLUS Si el modo de arranque inicial q u e d a a c t i v a d o c o m o encendido la luz ROJA parpadeará una vez En este c a s o a l s u m i n i s t r a r alimentación al módulo éste arrancará con el modo ideal ver capítulo 6 Modo ideal Si el modo de arra...

Page 21: ...encia teclas Señal acústica 6 Modo ideal El modo ideal de funcionamiento es un estado al que se puede acceder de manera instantánea sin más que pulsar la tecla IDEAL del mando a distancia Este estado comprende una emisora determinada con unos niveles de volumen graves agudos y loudness Para programar el modo ideal de funcionamiento seleccionar los niveles deseados volumen graves agudos y loudness ...

Page 22: ... cela arrivait réorientez l antenne réceptrice augmentez l écart entre cet équipement et la source d interférences et ou connectez l équipement à une base de prise différente de celle qu utilise l équipement qui les génère C est vous qui êtes responsable de l installation en évitant les risques possibles ainsi que de l utilisation des prestations et des résultats attendus mment au niveau de la pri...

Page 23: ...rche arrêt marche 5 DEL all PRG all 9 6 5 DEL mem PRG mem FM C 2 2 5 Guide de référence rapide SCAN SCAN VOL VOL TREBLE BASS MEM LOUD M ST DEL mem DEL all PRG mem PRG all PRG 1 4 5 7 8 0 9 6 2 3 FM C SCAN SCAN VOL VOL Mute Clavier numérique Sélection de préréglages de FM Mode IDEAL Contrôle des graves Contrôle des aigus Effacer Sélection directe d une station émettrice FM Loudness Contrôle de volu...

Page 24: ... à travers une télécommande performante qui permettra d avoir accès à n importe quelle fonction sans avoir besoin de se déplacer jusqu au lieu d installation du module de contrôle Il est par ailleurs parfaitement intégré dans la décoration de la cuisine ou de la salle de bains Voici ses caractéristiques Les composants fournis dans ce kit doivent être installés et utilisés de la façon et aux fins p...

Page 25: ... est un état de stand by 1 1 clignotement en ROUGE fonction actionnée KBSOUND PLUS 24 2 Remarques générales de fonctionnement Le module de contrôle émet des signaux sonores qui servent d orientation sur le résultat des opérations qui sont en train d avoir lieu Ces signaux sont indiqués dans ce mode d emploi de la façon suivante Un signal sonore BIP court indique donnée OK Un signal sonore BIP long...

Page 26: ...ule est mono voir Feuille d Installation fournie avec le kit bien que le signal reçu par l antenne soit stéréo nous l écouterons toujours en mono Si le module est éteint en appuyant légèrement sur la il s allumera graduellement entre 1 et 2 secondes Pendant la période allumé éteint graduelle le témoin est ROUGE Une fois que le module est prêt à recevoir plus d ordres depuis la télécommande le témo...

Page 27: ...C Ensuite nous pourrons recommencer et introduire la fréquence souhaitée BIP BIP BIP BIP BIP BIP BIP BIP BIP BIP 4 2 Sélection directe d une station Pendant la durée du processus de recherche le témoin est ROUGE Une fois trouvée la station il passe au VERT Lorsque le processus de recherche est vers le haut on assiste à un signal de type BO BIP qui indique que l on est arrivé en bout de gamme BAND ...

Page 28: ... était toutefois préréglée sera alors effacée effacer une station dont vous ne voulez plus Si la station que vous voulez effacer n est pas préréglée un signal sonore et lumineux vous l indiquera BIP BIP BIP BIP BIP BIP BIP BIP BIP BIP Avec les touches MEM MEM nous pouvons aller d une station gardée en mémoire à une autre voir chapitres 2 6 et 2 7 Préréglage et effacement de stations Lorsque l on g...

Page 29: ...l dispose mais avec un maximum de 20 mémoires Ce processus peut durer quelques secondes Une fois la recherche terminée ou une fois le maximum de mémoires atteint le processus touche à sa fin et un long signal sonore BIP se fait entendre préréglage automatique de stations BIP BIP 5 PRG all 9 5 PRG all 6 4 5 Préréglage et effacement automatique de stations 28 Pour régler le niveau de sensibilité de ...

Page 30: ... BIP 5 Cette fonction est conçue dans le cas où l alimentation sur le secteur du serait prise au moyen d un interrupteur destiné à cet effet Dans ce cas si l on veut que le s allume automatiquement en actionnant cet interrupteur il faut programmer le mode de démarrage automatique Pour cela KBSOUND PLUS KBSOUND PLUS 1 fournir l alimentation au en actionnant cet interrupteur 2 le clignotera deux foi...

Page 31: ...actéristique BIP BIP PRG 2 TR EB LE BA SS ME M LO UD M ST DE L me m DE L all PR G me m PR G all PR G 1 4 5 7 8 0 9 6 2 3 FM C SC AN SC AN VO L VO L MENU 99 4 FM 1 Sélectionnez une valeur numérique de fréquence ne correspondant à aucune station FM ni proche d aucune autre station Vous pouvez composer directement la valeur de la fréquence sur votre voir Chap 4 2 vérifiez que vous n entendez rien hor...

Page 32: ...the right to make changes without prior notice Electrónica Integral de Sonido S A is not responsible for any errors or omissions that may appear in this manual Electrónica Integral de Sonido S A se réserve le droit d introduire des changements sans avertissement préalable Electrónica Integral de Sonido S A ne se responsabilise pas des erreurs ou des omissions de ce manuel Electrónica Integral de S...

Reviews: