background image

Eela Audio D3 manual, October 2009 

19 

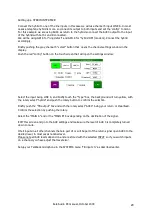
Setting up a STUDIO MICROPHONE with TB facility: 
 
Connect the studio microphone to one of the MIC inputs.  
Briefly pushing the grey “select” button that  opens the channel settings window in the display. 
Push the red “config” button on the touch screen that will open the settings window: 


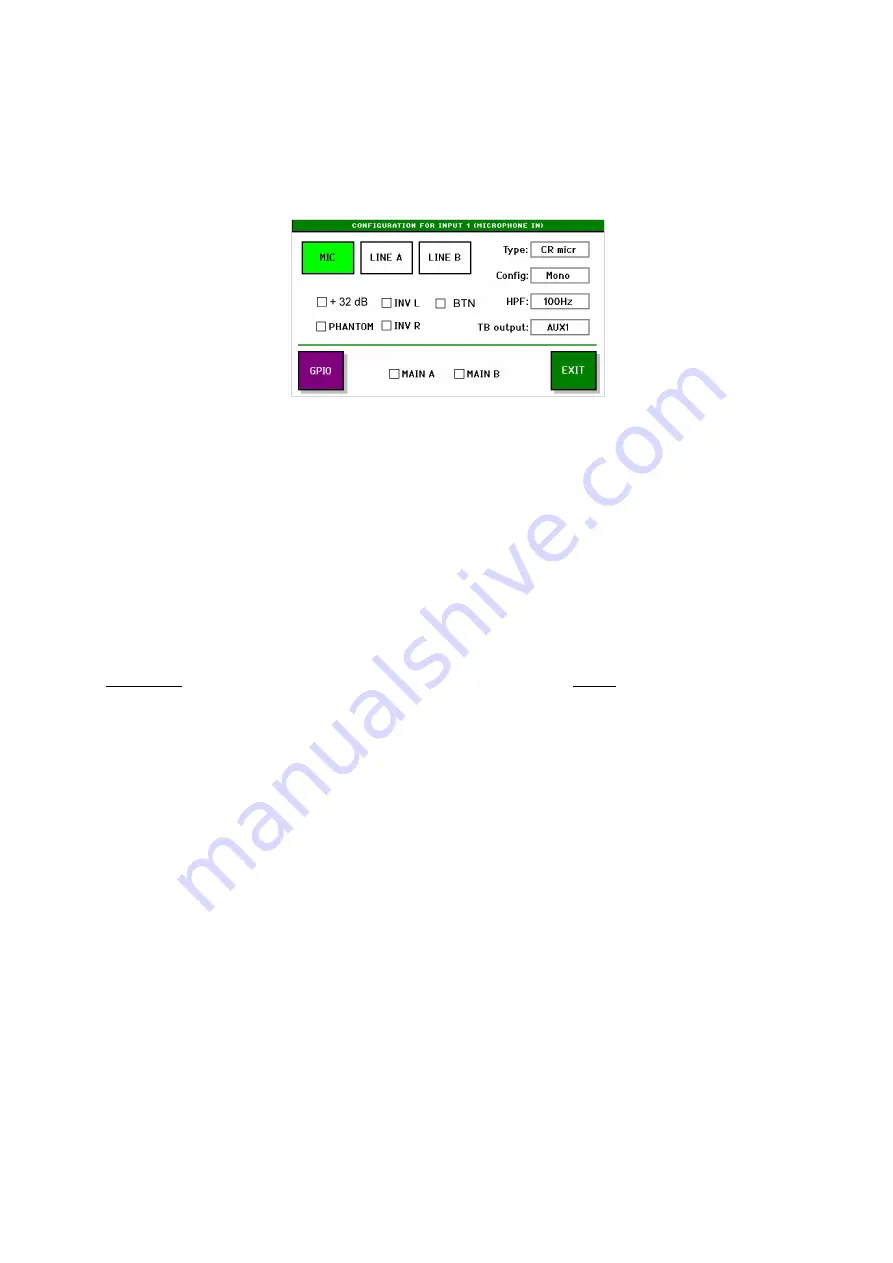
Select the input being microphone, and briefly touch the “Type” box, this will turn yellow and with the 
rotary select “Studio micr” and push the rotary button to confirm the selection.  
 
If you are using a condenser microphone select the box “PHANTOM”, please note that if you select 
“PHANTOM” in one channel the 48 Volts will be switched on in all microphone channels. 
 
Select the “MAIN A” and or the “MAIN B” box depending on the destination of the signal. 
 
You can assign one of the “AUX” outputs of the mixing desk as a return feed for the headphones of a 
presenter.  Briefly touch  the “TB-output” box and with the rotary select the “AUX” that you link to this 
channel as a feedback to the headphones of the presenter. Confirm the selection by pushing the 
rotary. As an example select “AUX1”.  
Of all inputs you want the presenter to hear adjust the volume of “AUX1” to the desired level and 
don’t forget the master volume of AUX1 in the Levels screen.  
Please note all AUX levels depend on and are stored with the selected INPUT so if you switch inputs 
on a channel you have adjust that level also! 
 
To setup a “cough” circuit see details in chapter “COUGH” on page 18. 
 
Briefly pushing the grey “select” button above the fader again to return to the main screen with 
meters. 

Summary of Contents for D3

Page 1: ...la audio com e mail sales eela audio com Eela Audio D3 table top 19 digital mixing console 24 inputs 2 main outputs 4 configurable stereo outputs 8 input faders 2 main output faders Color touch screen for settings e q dynamics configuration Channel on Start button above each fader Broadcast audio and logical functions ...

Page 2: ...ecified General Information Cleaning Clean the outside of this product with a soft cloth Do not use any cleaning detergents like alcohol white spirit or ammonia based fluids to clean this product This can severely damage the finish of the product For waste separation At the end of the lifecycle of this product or the batteries dispose it in accordance with local procedures for disposal of hazardou...

Page 3: ...Due to the flexibility and multi purpose nature of the unit some settings need extra attention especially the setup of hybrid connections and the integration in an automated environment Additional information can be found on the internet http www eela nl D3TI INDEX Control surface 5 Main screen meters 6 System settings 7 Presets 9 Channel settings 10 General specifications 13 Connections 14 GPIO p...

Page 4: ...radio applications and suited for simultaneous dual use APPLICATIONS The Eela Audio D3 is designed for use in modern radio and television broadcast applications for On Air and or production studios Table top 19 digital mixing console 24 inputs 2 main outputs 4 configurable stereo outputs 8 input faders 2 main output faders Color touch screen for settings E Q dynamics configuration Channel on Start...

Page 5: ...Eela Audio D3 manual October 2009 4 ...

Page 6: ...art command is the normal faderstart and the LED is steady lit upon opening of the fader This LED will blink slowly if an external MUTE signal is applied 3 LED s next to the fader LED A and B indicate the destination of the signal output A and or output B and are green when the fader is closed and turn red upon opening of the fader In case the fader is overruled by an external command the LED s wi...

Page 7: ...con in the meter selector the meter will follow the monitor source In addition you can touch the check boxes in the monitor screen for the other functions PFL to LSP routes the PFL signal to the main monitor speakers if a PFL button of one of the modules is active Mixed PFL or individual PFL Dim when Control Room microphone opens instead of mute The dim value can be adjusted in the next screen Ope...

Page 8: ...You can set the dim level for control room and studio loudspeakers GPIO The D3 has 8 opto isolated outputs and 8 opto isolated switching inputs on board A further 16 GPI O are available on the EA963 extender The GPIO button takes you into the main screen GPIO menu Inputs can be used to remotely load presets just with the help of a contact closure Red light signaling outputs for Studio and CR can b...

Page 9: ...on if the mains power was down and on again OUTPUT LEVELS MAIN SCREEN Selecting the OUTPUT LEVELS button in the main screen opens an overview of all output levels Touching a bar selects it and allows for level setting with the rotary Turning the rotary will immediately change the level no need to confirm the setting by pushing on the rotary In this way you can still set the outputs levels of the m...

Page 10: ...resets with external contact closures PRESET 1 can only be stored overwritten with the help of a computer and a small program connected to the USB bus In this preset you can store your basic settings in a protected way All settings are stored in memory with a battery back up This battery will last at least 5 years under normal conditions The battery is a widely available type CR2032 or equivalent ...

Page 11: ...e meter follows the headphones source so PFL of the channel must be active and in the main headphones menu PFL to headphones box must be checked for a correct reading E Q and dynamics can be switched on off in the check boxes The yellow telephone icon is only present when the channel is used as a Telco channel hybrid With this button you can open the Telco window to switch the external hybrid on o...

Page 12: ...itching or dialing you can set the channel as Line input Config Can be stereo swapped L R Left to mono Right to mono mono to both Although displayed this is not active in MIC mode HPF the frequency of the high pass filter can be set TB output if needed an aux output can be coupled to this input for Talkback purposes E g a feed to a presenter headphone or TB to a hybrid or other Outside Source If s...

Page 13: ...d buttons let you switch between the windows of the selected channel The channel GPIO The GPIO button opens the configuration menu for the General Purpose inputs and outputs Inputs are External mute remote Pfl on Fader bypass and if activated as hybrid also ringtone detect Fader bypass switched the channel on to unity gain and faderstart on independent of fader setting Outputs can be Faderstart Pf...

Page 14: ...nverters range 22kHz 200 kHz 2 x 8 analogue line inputs on RCA cinch connectors 2 stereo main outputs on balance XLR connectors nominal output level 6 dBU 2 AES EBU main digital outputs 48 kHz sample rate on XLR 4 stereo Aux cleanfeed foldback outputs on 6 3 mm Jack nominal output level 0 dBU Monitor output on Jack nominal output level 0 dBU Headphones output on the front panel and on the back on ...

Page 15: ...I O contacts as wel as 4 solid state AC relais for switching lamps USB standard connector for Firmware updates Locking of preset 1 In order to store your basic configuration in preset one you can use the update program to protect preset one against accidental overwriting You can download the special update program and updates from http www eela nl D3TI The Eela Audio CAPS2 radio automation program...

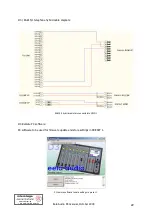
Page 16: ...ion 1 GPI_1 14 GPO_1 2 GPI_2 15 GPO_2 3 GPI_3 16 GPO_3 4 GPI_4 17 GPO_4 5 GPI_5 18 GPO_5 6 GPI_6 19 GPO_6 7 GPI_7 20 GPO_7 8 GPI_8 21 GPO_8 9 NC 22 5V 10 NC 23 5V 11 NC 24 GND 12 NC 25 GND 13 NC 25 pin D type connector pin layout GPIO schematic overview ...

Page 17: ...s also full bandwidth stereo communication devices can be used ISDN Codec With this system you can couple 2 or more D3 mixing desks in separate rooms together without the danger of feedback A special mode is putting the AUX es in pre fader mode this allows incoming callers to talk to each other off air CONFERENCE mode This can be useful when 2 or more reporters are active that need to know about e...

Page 18: ...a recording you have to be able to select which signals must be present in the CLEANFEED FOLDBACK or RETURN That is why an post fade AUX is used for this purpose and you have to open up the AUX volume controls of ALL channels that must be present in this mix en close the others D3 System settings Studio and CR LS dim TALKBACK Talkback is only possible when a microphone is set to be the TalkBack mi...

Page 19: ...h the TB output box and with the rotary select off as in most cases you do not need a TB channel assigned to a CR microphone Confirm the selection by pushing the rotary Select the MAIN A and or the MAIN B box depending on the destination of the signal NB The Config button mono stereo has no effect in MIC mode Briefly touch the grey select button again to return to the main screen with meters In th...

Page 20: ...elect the MAIN A and or the MAIN B box depending on the destination of the signal You can assign one of the AUX outputs of the mixing desk as a return feed for the headphones of a presenter Briefly touch the TB output box and with the rotary select the AUX that you link to this channel as a feedback to the headphones of the presenter Confirm the selection by pushing the rotary As an example select...

Page 21: ...dow Select the input being LINE A and briefly touch the Type box the background will turn yellow with the rotary select hybrid and push the rotary button to confirm the selection Briefly push the TB output box and with the rotary select AUX4 being your return or Cleanfeed Confirm the selection by pushing the rotary Select the MAIN A and or the MAIN B box depending on the destination of the signal ...

Page 22: ... button In case this LED is flashing slowly it indicates an Off Hook ON state of your hybrid In Input select mode of this channel 5 a yellow box with a telephone is visible Touching this icon will open the telephone screen to put the hybrid on and off hook and to dial a telephone number Dialing is done with and internal DTM tone generator and most hybrids are transparent for these tones You can co...

Page 23: ... remote is connected to GPIO 1 D3 Remote PC software PC software to be used for firmware update and store settings in PRESET 1 PC remote software to safe settings in preset 1 interstage Phistersvej 31 2900 Hellerup Danmark Telefon 3946 0000 fax 3946 0040 www interstage dk pro audio with a smile ...

Reviews: