background image

Optimuss OS User’s Manual

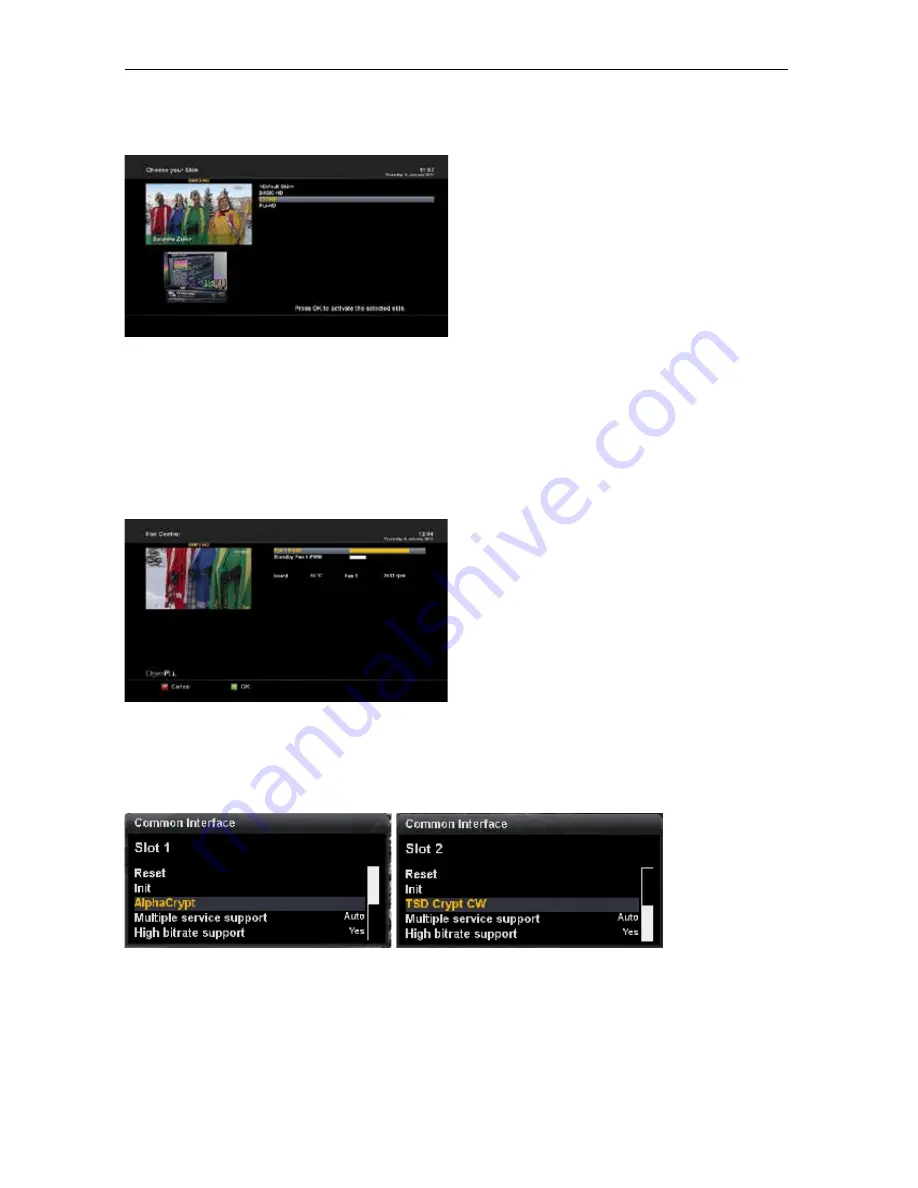
2-2-18. Skin Setup

Optimuss OS is a Linux based set top box and 

there are a lot of Skins available for Linux set top 

box. Using this menu, you can use a different Skin 

other than the default one. 

 - Navigate to your desired skin and press the OK 

button.

- To fully activate the skin the system needs to be 

restarted. Use the Up/Down button to select your 

desired option and press the OK button.


NOTE :

 It takes some minutes since the change of Skin requires a complete system shutdown. Please 

wait patiently until the system reboots with a newly selected Skin. 

2-2-19. Fan control 

The speed controlled fan cools the Optimuss OS 

no more than when required and therefore the 

speed level will additionally be adjusted. 

2-3. Common Interface (in available model only)

To be able to watch CAS channels, you need to have a proper CAM and a Smartcard. If you have 

CAM modules, keep them inserted in your Optimuss OS, it will reduce the trouble of changing CAM.


-

 56 

-

Summary of Contents for OPTIMUSS OS1

Page 1: ...The User s Manual OPTIMUSS OS2 OPTIMUSS OS1...

Page 2: ...7 Changing the audio track 27 8 Subtitle 27 9 Zoom 27 10 Teletext 28 11 Channel List 29 12 Electronic Program Guide EPG 33 13 Time Shift 34 Contents I Before initial operation of the receiver 5 1 Safe...

Page 3: ...2 2 19 Fan control 60 2 3 Common Interface 60 2 4 Parental Control 60 2 5 Factory Reset 62 2 6 Software Management 62 12 Electronic Program Guide EPG 30 13 Time Shift 32 14 Recording 33 15 Playing bac...

Page 4: ...he software 64 4 1 USB Update 65 4 2 Internet Update 65 VI Troubleshooting 66 VII Specifications 67 2 6 Software Management 59 3 System Information 60 4 Update the software 61 4 1 USB Update 61 4 2 In...

Page 5: ...ock 1 3 Liquid This product is not water proof and should not be exposed to dripping splashing or any type of liquid No objects filled with liquid such as base shall be placed on the product Please do...

Page 6: ...g the components specified by the manufacturer 1 10 Hard Disk Drive Do not move the product or turn the power off suddenly while the Hard Disk Drive HDD is still running This may result in damage to t...

Page 7: ...Video output HDMI Component YPbPr 12 character VFD display with scrolling for local time or channel name Dolby Digital Plus Dolby True HD supported S PDIF Output for Digital Audio and Dolby AC 3 Bit...

Page 8: ...utput LED display with IR Recording Command Dolby Digital Plus Dolby True HD supported S PDIF Output for Digital Audio and Dolby AC 3 Bit Stream Output Firmware Software Upgrade Through Ethernet USB M...

Page 9: ...Optimuss OS User s Manual 3 Packaging Contents Please ensure that the following items are included with the receiver in our packing User Manual Power cord SATA Cable Remote Control AAA X 2 batteries 9...

Page 10: ...Optimuss OS User s Manual 4 Product Descriptions 4 1 OPTIMUSS OS2 Front Panel 10...

Page 11: ...Optimuss OS User s Manual Rear Panel 11...

Page 12: ...Optimuss OS User s Manual 4 2 OPTIMUSS OS1 Front Panel 12...

Page 13: ...Optimuss OS User s Manual Rear Panel 13...

Page 14: ...n Out 9 LIST Displays the list of recordings stored on the internal HDD if any 10 MEDIA Open media file list 11 TIMER Start timer function 12 VOL Increase Decrease the volume 13 EPG Displays the Elect...

Page 15: ...COLOR BUTTONS Activates certain menu functions Usage instructions are shown in each OSD menu 26 Fast Rewind Fast rewinds at up to 128 times faster than the normal speed x2 4 8 16 32 64 128 27 PLAY Pla...

Page 16: ...r the SCART TV item in the Audio Video menu if your TV supports this mode because it is more clear than YC or CVBS Using A HDMI Cable If you have a HD television set you should use a HDMI cable for th...

Page 17: ...the appropriate cable to the S PDIF port on your Optimuss OS and then connect the other end to your digital audio equipment 4 Connecting your dish antenna to the receiver This receiver has two tuners...

Page 18: ...than the selected one you can use the Navigations buttons up down and the OK button to select it You can choose from the following video output options 1 HDMI using a HDMI cable 2 YPbPr YUV using a co...

Page 19: ...r selection If you choose User wizard to setup basic features you will be taken to the menu for the tuner configuration A Configuring Tuner A Using LEFT RIGHT key you can choose one of the following C...

Page 20: ...atellite antenna B Configuring Tuner B This step is for the configuration of Tuner B LNB 2 Input and the process is same as that of Tuner A For further information please refer to the above Configurin...

Page 21: ...ard setting Use DHCP should work if you have connected your Optimuss OS to a internet router The DHCP Server needed for this setting is most of the time activated by default on a router Press the OK b...

Page 22: ...eep standby mode This is the Standby Restart menu Navigate to the desired option and confirm by pressing the OK button Sleep timer Put your Optimuss OS into standby after duration of time that can be...

Page 23: ...and it will instantly tune into the channel NOTE If channel change is not done it is probably because the selected channel is encrypted and you do not have a proper smartcard 4 Controlling the volume...

Page 24: ...ow is broadcasted in Dolby Digital 9 Teletext Is highlighted as soon as a station transmits Teletext information 10 16 9 Is highlighted as soon as a show is broadcasted in 16 9 aspect ratio 11 Tuner A...

Page 25: ...DOWN navigate the list to select a subtitle that you want to play and press OK to activate it 9 Zoom To zoom the screen In Out 10 Teletext You can call up Teletext information by pressing TELETEXT bu...

Page 26: ...ailable if more than one service on the current satellite transponder actually transmits Teletext information If this is not the case you cannot make a selection Screen format Standard mode 16 9 on of...

Page 27: ...press Up Down key this will activate channel selection menu as below Four types of the channel lists are available to help you manage your channel selection RED displays the list of all scanned chann...

Page 28: ...l activates Press the Blue options button to switch to the bouquet view By pressing the Menu button the Channel list menu will open up Navigate to the option add bouquet Use the numeric keypad on your...

Page 29: ...vices that are in the selected bouquet are highlighted red Use the Up Down buttons to navigate to a desired service and press the OK button to select The service will be highlighted RED Using this met...

Page 30: ...on 11 9 Adding a marker to favorites You have the option to add makers within the favorites bouquets Pressing the Up Down buttons on your remote control activates the service list You can press the BL...

Page 31: ...EXT button in the Multi EPG view A window will appear where you can enter a time and date After you have entered the desired time and date press the OK button to activate you selection Add Timer By pr...

Page 32: ...stead you are watching a delayed presentation of it This is called time shifted television Then you can skip commercials until you catch up to the live broadcast For your information Timeshift is an i...

Page 33: ...cord multiple programs at the same time There are two ways to operate and manage recording 14 1 Instant recording Press the Record key to start the recording of the current program You have five avail...

Page 34: ...option is used to delete a timer Green Add This option is used to add a timer YELLOW Disable This option is used to disable the timer and X mark will appear NOTE if you want to enable the disabled ti...

Page 35: ...Choose the location 11 After event You can decide what should happen after the recording finishes by selecting the After event option You can choose between auto keep your Optimuss OS in the same stat...

Page 36: ...orward Fast Forward button 2x 4x 8x 16x 32x 64x 128x Back Rewind button 2x 4x 8x 16x 32x 64x 128x Every press on the button increases the speed by one step 15 3 To play in pause motion Press Timeshift...

Page 37: ...ectory of the HDD or plugged USB Select a file to play and press OK Supported formats are mainly JPG MP3 AVI etc In the same way you can play the recording files stored on the HDD 18 Plug ins Optimuss...

Page 38: ...igned to allow users a variety of system setting options as detailed as possible You can fine tune your Optimuss OS to be your OWN system to fit your taste This chapter will guide you through the enti...

Page 39: ...ss refer to the page 22 23 the Tuner A and B are already configured You can check the information of each Tuner and which satellites are scanned by each Tuner as follows 2 1 2 Default Channel List In...

Page 40: ...services underneath 2 1 4 Manual Scan If you know well enough to configure each exact setting required for manual search of services you can do manual scan as well There are many parameter values that...

Page 41: ...o scan all FTA and CAS channels Press OK to activate the manual scan This will take some minutes As the scan proceeds you will see the progressive bar and the newly found services underneath 2 2 Syste...

Page 42: ...f your screen Pan Scan 16 9 programs will be zoomed to full hight on 4 3 TV s parts of the picture on the left and right side will cut off 6 Digital AC3 downmix If you re watching a show with a AC3 au...

Page 43: ...enhancement settings In this menu you will find various customization options Amongst the options given in this menu the following ones are generally what you may need to know 2 2 3 Customize In this...

Page 44: ...ime after which you want the Infobar to disappear Show event progress in channel selection If set to yes the progress of the current event in the channel list is displayed Show channel numbers in chan...

Page 45: ...ing Maintain old EPG data for Allows epg data of a passed event to be displayed Handy when you want to know something about an event that is about to finish or has just finished Show background in Rad...

Page 46: ...the DVB subtitle DVB subtitle black transparency Allows you to set the transparency of the DVB subtitle Yellow pango subtitles Allows you to use Yellow pango DVB subtitle 2 2 6 Auto Language Selectio...

Page 47: ...lay the audio and video signals on your TV set 21 to 69 The UHF modulator is set to Channel 36 by default You can change these values with the Left Right buttons Save your settings with the Green butt...

Page 48: ...f Optimuss OS to fully enjoy the system Adapter settings Use interface YES is used to activate the Ethernet If you set this option at NO the Ethernet will not work Use DHCP YES is used to use DHCP Dyn...

Page 49: ...Press the Green options button if you want to add a seconds name server and the Yellow options utton to delete a name sever Network test The network test will assist you in finding possible sources of...

Page 50: ...ke 5 mount type CIFS share 6 server IP enter PC IP here 7 server share 4D make sure you include the 8 username 4D password 4D 9 Press OK Network Browser Optimuss OS can find other devices on the netwo...

Page 51: ...ss OK to edit the remote control settings repeat and delay settings 2 2 11 Display Setup There is a 12 character VFD display on the front panel of Optimuss OS This display shows various information li...

Page 52: ...eeded How to change the default paths for recordings 1 Open the recordings paths menu 2 Select the item default movie location and press the OK button 3 Press the menu button and select the item switc...

Page 53: ...Exit button will quit this menu 2 2 15 Timezone You can set your time zone in this menu Using Left Right key you can find a time zone that you want to use for your Optimuss OS After selecting a time...

Page 54: ...f this guide we will select Open TV Providers highlight open TV astra 28 2 press OK to enable this provider and Green tick will appear 10 Press Red for Back and keep pressing exit to exit all screen 1...

Page 55: ...imeshift recording is started I would recommend you here a value of about 10s Then after you ve zapped 10s started the timeshift recording 5 Timeshift Save on Action zap Should you wish to have the In...

Page 56: ...option and press the OK button NOTE It takes some minutes since the change of Skin requires a complete system shutdown Please wait patiently until the system reboots with a newly selected Skin 2 2 19...

Page 57: ...to enter the new pin code twice to ensure you didn t make any typing errors You now will be prompted to enter the old pin code and afterwards the new one You will see this notice that the pin code ha...

Page 58: ...tionally you have the option to protect the parental control menu using a pin code Setting the Protect setup option to yes you will only be able to change parental control setting after you have enter...

Page 59: ...is will take a few minutes to process and once done you will see the finished screen 2 6 3 Image restore Restore your receiver Image A Press OK button on your remote control to continue B Press Green...

Page 60: ...iew install and remove available or installed packages E Select upgrade source Edit the upgrade source address 3 System Information If you want to check the H W or S W system of your Optimuss OS this...

Page 61: ...eleted 4 1 1 Format your memory stick on your PC to be FAT32 4 1 2 Unzip the upgrade files update folder into memory stick 4 1 3 Insert memory stick into front USB slot on the Optimuss OS 4 1 5 AC pow...

Page 62: ...on on the Live Mode 4 3 2 Navigate to the option 4D S W Update and press the OK button 4 3 3 If you press OK on the update file it will download the file on the tmp folder 4 3 4 Press Yes on the updat...

Page 63: ...able is connected correctly Check the volume level of your TV and the product Check if the product or TV is on mute Check the audio option if it is correctly selected for the program that you are curr...

Page 64: ...Optimuss OS User s Manual VII Specifications 64...

Page 65: ...Optimuss OS User s Manual Thank you 65...

Reviews: