25
IV-1-2-1.
Computer
1.
Configure the wireless settings
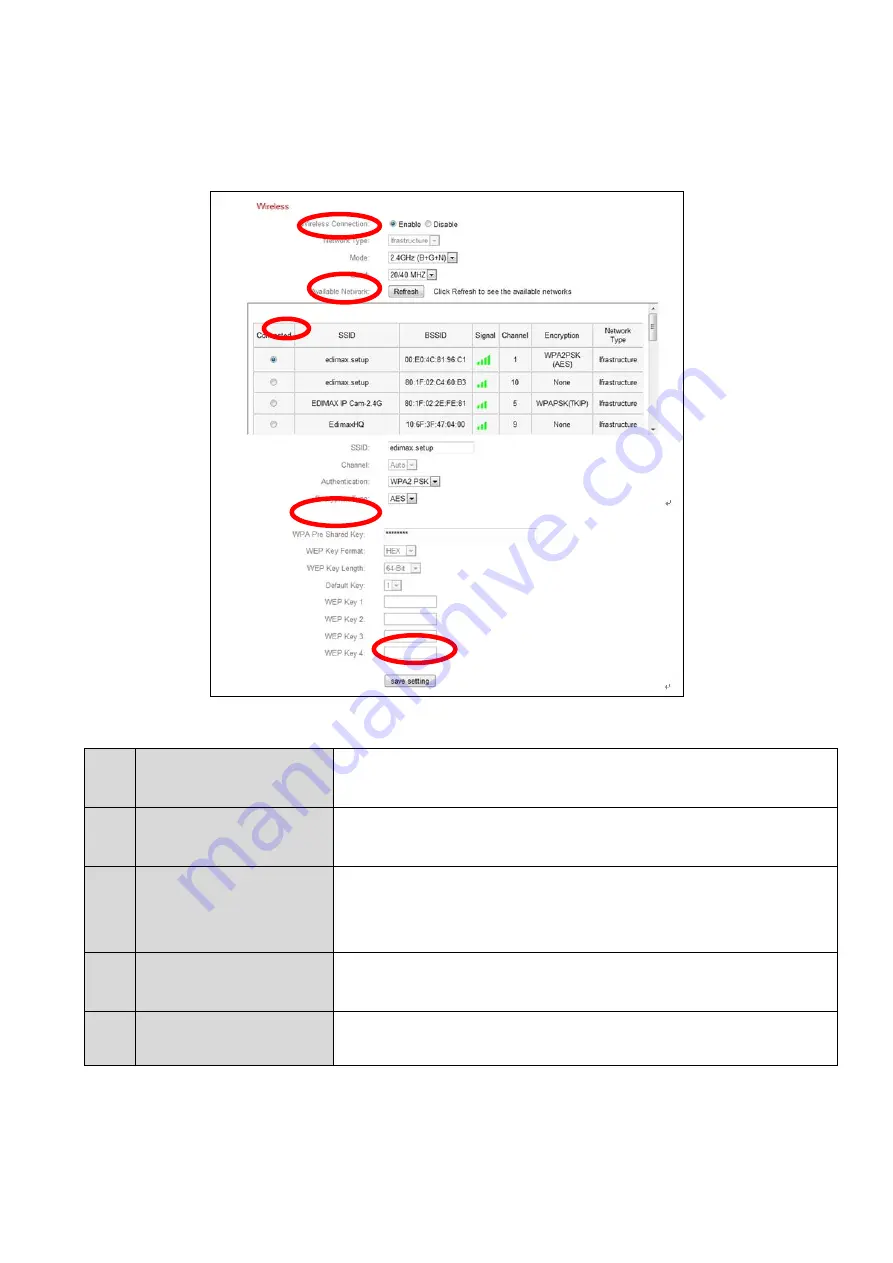
A – E
shown in the table below:
2.
After the settings are saved, remove the Ethernet cable from your
network camera. Your camera should now be connected to your Wi-Fi.
A
Wireless
Connection
Select “Enable” to enable the wireless
connection.
B
Available
Network
Click “Refresh” to display all available Wi-Fi
networks.
C
Connected
Select your Wi-Fi network from the list. This is the
wireless network which your camera will connect
to.
D
WPA Pre Shared
Key
Enter your Wi-Fi password.
E
Save Settings
Click “Save Settings” to save your settings.
A
B
C
D
E
Summary of Contents for IC-3040IWT
Page 1: ...IC 3040IWT User Manual V1 0 2013 11...
Page 11: ...11 4 Select the IP CAM found...
Page 12: ...12 5 1 Click the Configure Camera ICON and 2 key in the password then OK...
Page 13: ...13 6 Press the OK button as the figure in below...
Page 14: ...14 7 Select the Browse Camera via Web ICON to access the IP CAM...
Page 22: ...22...
Page 48: ...48 IV 4 3 NAS Settings The NAS Settings allow you to define the NAS location...
Page 53: ...53...


