


3
Step 1. Software Installation
Edelbrock QwikData 2
USB Drivers
The QwikData 2 Power to Win install disk will copy the current device drivers during installation to your
"C:\Power to Win" directory. Follow the instructions below to complete the installation of your USB drivers.
NOTE: Some files and components of QwikData 2 installation are referred to as Power To Win and EFI.
First Time Installation
USB Driver Initialization:
Power up your Logger and connect to your Laptop with the USB cable. When
connected the logger hardware will be detected and the "Found New Hardware" wizard will open. Follow the
instructions to install the driver making sure to point to the "C:\Power to Win" directory if prompted.
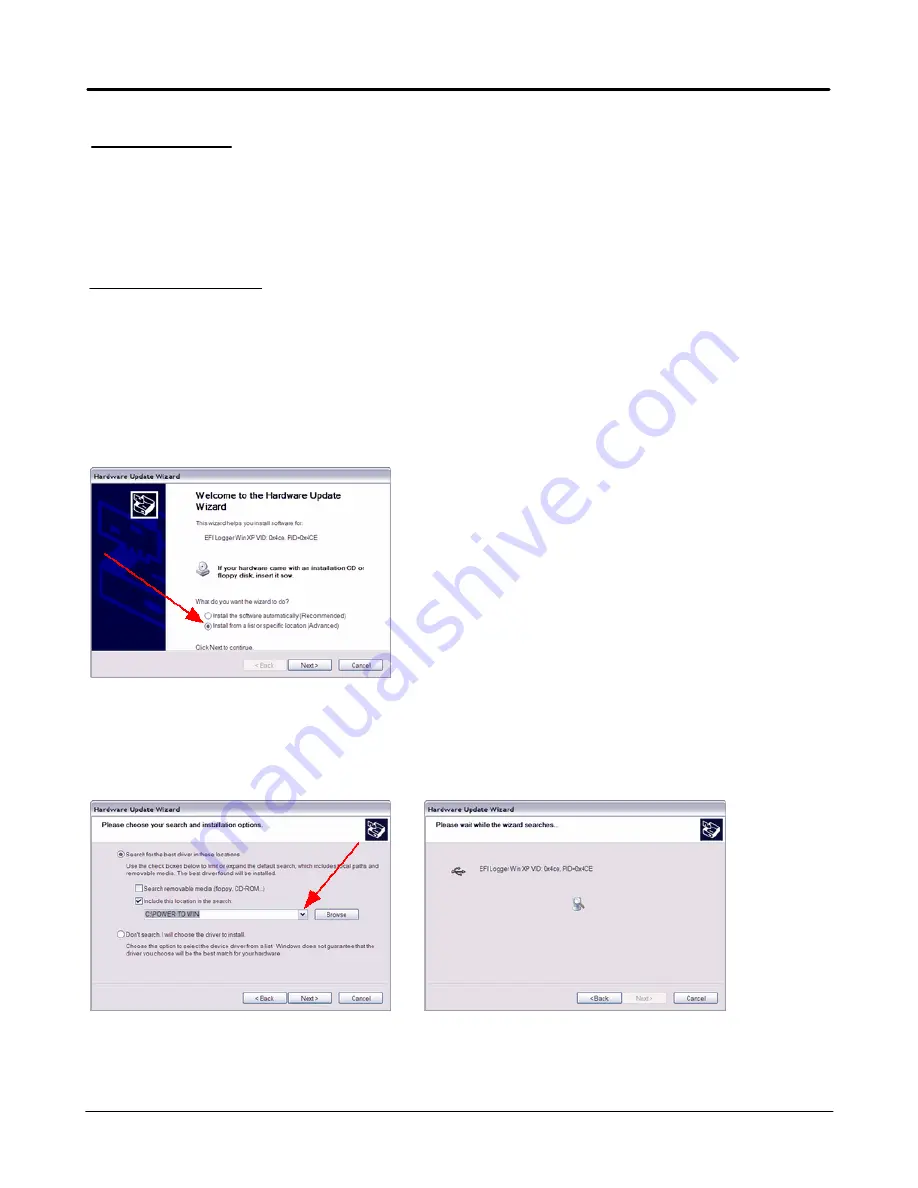
1. From Hardware Update Wizard window select Install from a specific location. Select Next to continue.
2. Enter Path: C:\Power To Win or select from pull down in window. Select Next to continue. Update wizard
will locate and setup necessary driver device.
Notes
·
Drivers can only be installed or updated when the logger is powered up and connected to the USB port.
Summary of Contents for QwikData 2
Page 27: ...26 Getting Started Edelbrock QwikData 2 Suggested Harness Routing...
Page 28: ...27 Getting Started Edelbrock QwikData 2 91290 Basic Analog Harness Details...
Page 29: ...28 Getting Started Edelbrock QwikData 2 91290 Basic Harness Schematic...
Page 31: ...30 Getting Started Edelbrock QwikData 2 91294 Advanced Thermocouple Harness Details...
Page 32: ...31 Getting Started Edelbrock QwikData 2 91294 Advanced Thermocouple Harness Schematic...
Page 34: ...33 Getting Started Edelbrock QwikData 2 91291 Advanced Analog Harness Details...
Page 35: ...34 Getting Started Edelbrock QwikData 2 91291 Advanced Analog Harness Schematic...
Page 39: ...38 Getting Started Edelbrock QwikData 2 User Notes...


