background image

www.ecosmartfire.com 


Clearances & Installation

ENGLISH

dISH

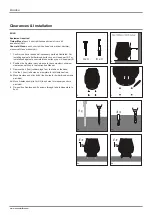
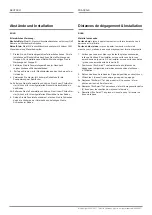
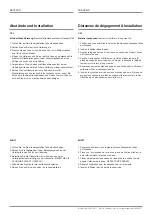
Equipment required: flyscreen offcut, or fine mesh, small river pebbles 
or ornamental stones, sand or decorative soil

1. Position the fireplace in accordance to the compulsory minimum 

clearances outlined in the Instruction Manual;

  NOTE: Once filled, fireplace will be extremely heavy and  

difficult to move!

2. Ensure drain hole is kept clear using a small offcut of flyscreen or 

fine mesh, place a layer of pebbles in dish to allow Burner to sit flush 
with top rim of DISH fireplace;

3. Make sure Burner sits in the centre of the DISH fireplace;
4. Use a spirit level to ensure Burner top is horizontal and not leaning 

or tilted;

5. Add remaining decorative pebbles, stones and sand as desired.

1.

2.

5.

6.

3.

4.

2.

lantErn

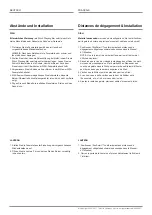
1. Position the fireplace in accordance with the compulsory minimum 

clearances. 

2. Open the Lantern door and gently fit the burner into position.

Summary of Contents for Cyl

Page 1: ...ing the EcoSmart Fire Outdoor Range CLEARANCES INSTALLATION Please read these instructions completely before operating the EcoSmart Fire Mini T 12 8kgs 28 4lbs Dish 7 8kgs 17 2lbs Lantern 11 5kgs 25 3lbs Bulb 4 3kgs 9 5lbs Atom 4 5kgs 9 9lbs Cyl 7 6kgs 16 8lbs Stix 20 7kgs 45 7lbs ...

Page 2: ...ts 59 05 1500mm When used outdoors be aware of different weather conditions and place the unit in an open space at least 2000mm 78 74in away from any combustibles such as trees umbrellas or porch ceilings For example on windy days where there is movement in branches the clearance must still be met When not in use cover the unit to protect it from water damage or corrosion Protective covers are ava...

Page 3: ...hützen Schützen Sie den Burner darüber hinaus mit dem mitgelieferten Burner Deckel Dégagements pour la Gamme Outdoor La Gamme Outdoor convient pour un usage d intérieur comme d extérieur A l intérieur assurez vous que la flamme du Brûleur est positionnée loin 1500mm au minimum des rideaux matériaux inflammables et de tout ce qui pourrait prendre feu Attention aux courants d air En extérieur gardez...

Page 4: ... all necessary parts as illustrated For installing against a timber wood surface you will need part A For installations against a concrete stone surface you will need part B 2 Position the fireplace in accordance to the compulsory minimum clearances outlined in the Instruction Manual 3 Remove the 4 four rubber plugs from the tabs on the base 4 Use the 4 four tab holes as a template for drill hole ...

Page 5: ... die mitgelieferten Mauerdübel in den Boden 6 Setzen Sie die Feuerstelle wieder auf stecken Sie die Schrauben durch die Löcher an der Unterseite und befestigen Sie die Schrauben im Boden Gamme Extérieur Installation ATTENTION Pour éviter qu il ne bascule accidentellement le système EcoSmart doit être installé dans une position solidement ancrée en utilisant les pièces fournies et en suivant ces in...

Page 6: ...t A For installations against a concrete stone surface you will need part B 2 Position the fireplace in accordance to the compulsory minimum clearances outlined in the Instruction Manual 3 Remove the 4 four rubber plugs from the tabs on the base 4 Use the 4 four tab holes as a template for drill hole centres 5a Move fireplace and pilot drill 4 four holes for timber wood screws provided 5b Move fir...

Page 7: ...quatre 4 trous pour les chevilles de maçonnerie fournies 6 Remettez l EcoSmart en place et vissez le au sol à travers les trous de la base BULB Erforderliches Werkzeug Bauholz Holz Bleistift Kreuzschlitzschraubendreher mit kurzem Griff Bohrer und Pilotbohrer Bohrspitze Beton Stein Bleistift Kreuzschlitzschraubendreher mit kurzem Griff Mauerbohrer und Mauerbohrspitze 1 Prüfen Sie ob Sie alle darges...

Page 8: ... Glass Support Brackets are firm and tight and set base upright again 6 Position Glass cylinder over slots in the three 3 Glass Support Brackets and push firmly down using even force around the top rim of the glass Exercise caution so as not to fracture or damage glass 1 2 3 4 5 6 Mini T 1 Confirm you have received all necessary parts as illustrated 2 Fit glass panel with fixing hole located on lo...

Page 9: ...l se trouve au centre des 2 deux séries de trous de la base 4 Couchez la base avec le Brûleur sur le côté et vissez les trois 3 pieds de support à encoche pour la Vitre par le dessous à l aide du tournevis cruciforme à long manche 5 Assurez vous que les pieds de support à encoche pour la Vitre sont solidement fixés et redresser la base 6 Insérez le cylindre de verre dans les encoches des trois 3 p...

Page 10: ...to move 2 Ensure drain hole is kept clear using a small offcut of flyscreen or fine mesh place a layer of pebbles in dish to allow Burner to sit flush with top rim of DISH fireplace 3 Make sure Burner sits in the centre of the DISH fireplace 4 Use a spirit level to ensure Burner top is horizontal and not leaning or tilted 5 Add remaining decorative pebbles stones and sand as desired 1 2 5 6 3 4 2 ...

Page 11: ...oSmart conformément aux distances de dégagement obligatoires minimales énoncées dans le Manuel d Utilisation 2 Ouvrez la porte de la Lanterne et placez délicatement le Brûleur à l intérieur DISH Erforderliches Werkzeug ein Stück Fliegengitter oder feines Netz kleine Kieselsteine oder Dekosteine Sand oder Dekoerde 1 Platzieren Sie die Feuerstelle gemäß den im Handbuch vorgeschriebenen Mindestabstän...

Page 12: ...T 61 2 9997 3050 E info thefirecompany com au REV090911 ...

Reviews: