14
eCopy ScanStand Assembly Instructions
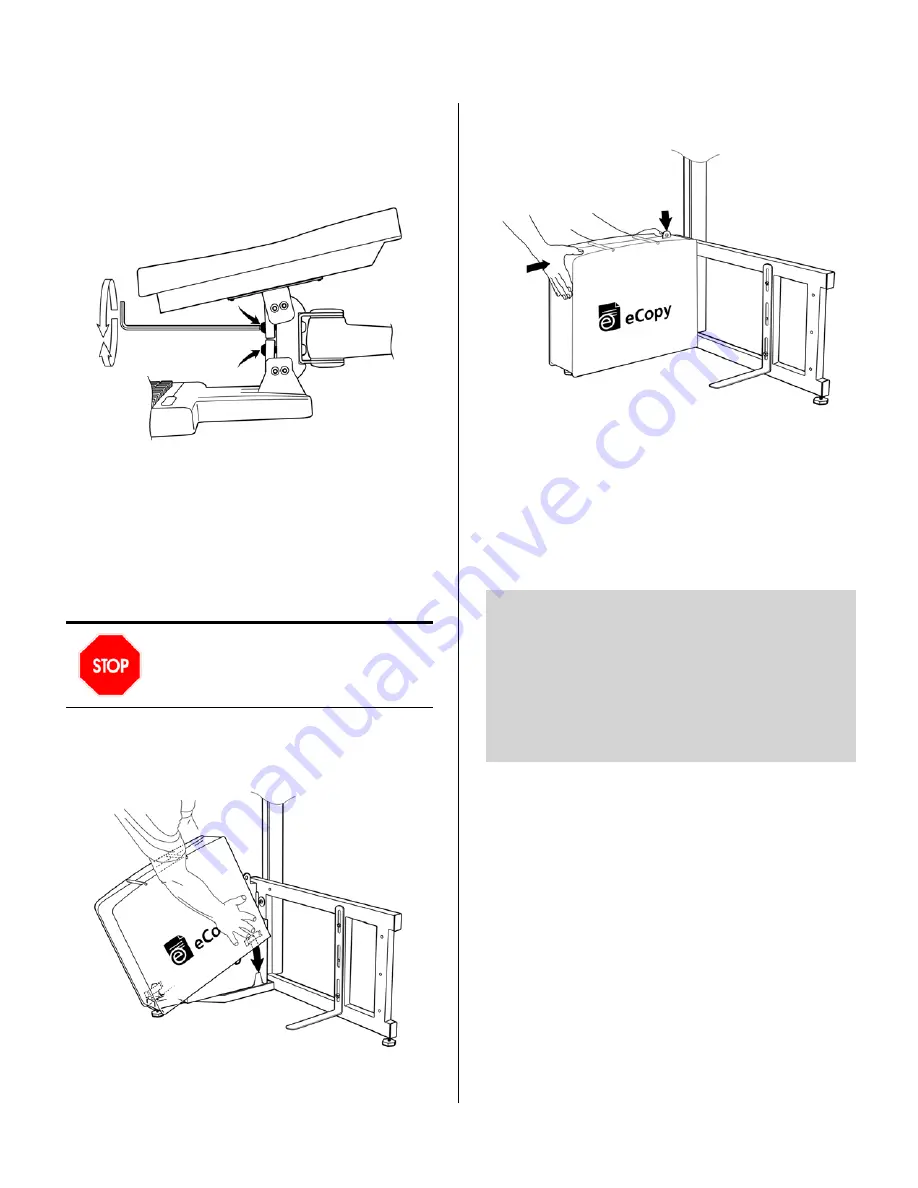
9.1
The tilt tension on screen and keyboard is set at
the factory and typically does not require
adjustment. If required, tilt screen up and use
4mm Allen key to adjust screws visible through
slot in bracket:
> Turn top screw to adjust screen bracket tension.
> Turn bottom screw to adjust keyboard bracket
tension.
Do not over tighten the screws. You should be
able to tilt the touch screen and keyboard easily
using one hand, but the keyboard should not tilt
or travel while typing.
9.2
Place cover over PC and align inside cover clips
with tongues on frame. You may need to press
the side covers together to align the clips.
Warning!
Be careful to avoid pinching your hands
between the cover and the frame.
9.3
Push cover down and into position. The locking
tab should protrude from the top of the cover.
9.4
Loosen nuts on L-bracket and slide bracket up
to contact underside of copier. Tighten nuts
securely using 13 mm wrench.
9.5
Fold arm so front edge of keyboard lines up
with front edge of copier.
9.6
Readjust cable routing if necessary to take up
slack.
Do not attempt to loosen or tighten the
Allen screws on the arm joints. These are
set at the factory and do not require
adjustment.
Important!
If you used the PC’s internal 3-port
hub, disable standby/hibernate mode as follows:
i. Click
Start > Settings > Control Panel >
Power Options
.
ii. On the Power Schemes tab, set
System
standby
and
System hibernates
to
Never
.
iii. Click
OK
.
Step 9: Final adjustments and cover assembly


