7
Substitutes may result in early failure. Part numbers are
shown in the parts drawings listed in Table 1.
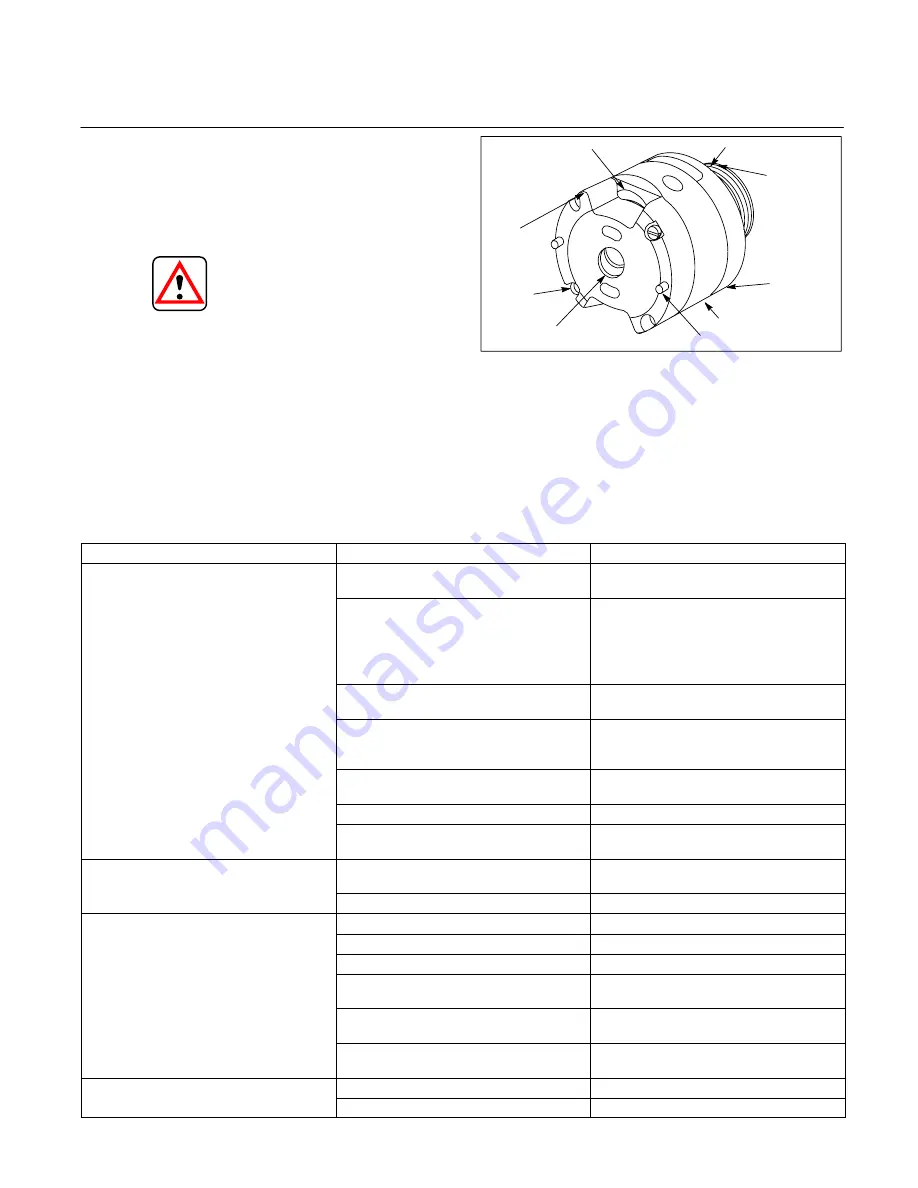
Repair Kits – Commonly replaced parts are usually provided
in the form of a kit (Figure 4). It is recommended that all such
parts be replaced with the kit when a unit is overhauled.
CAUTION
Individual cartridge parts ARE NOT
interchangeable with similar parts of previous
design models. Complete cartridge kits ARE
interchangeable with previous designs.
F. Product Life
The longevity of these products is dependent upon envi-
ronment, duty cycle, operating parameters and system
cleanliness. Since these parameters vary from applica-
tion to application, the ultimate user must determine and
establish the periodic maintenance required to maximize
life and detect potential component failure.
Rotor, vane and
intra-vane
assembled
inside ring
Inlet
Support
Plate
Screw
Bushing
Location Pin
Ring
Outlet
Support
Plate
Sealing Ring
Back-up
Ring
and O-ring
Figure 4. Pre-assembled cartridge kit
G. Troubleshooting
Table 3 lists the common difficulties experienced with vane
pumps and hydraulic systems. It indicates probable causes
and remedies for each of the troubles listed.
TROUBLE
PROBABLE CAUSE
REMEDY
Excessive noise in pump.
Low oil level in reservoir.
Fill reservoir to proper level with
recommended fluid.
Air in system.
Open reservoir cap and operate system
until purged.
Bleed hydraulic lines at highest point
down stream of pump while system is
under pressure.
Vacuum condition.
Check inlet (suction) line and fittings for
air leaks.
Oil too thick.
Be certain correct type of oil is used in
system. Warm up pump in cold weather
until noise disappears.
Damaged or missing pump seals at
mating surfaces.
Locate and replace damaged or missing
seals.
Cartridge kit not assembled properly.
Reassemble cartridge kit.
Pump inlet/outlet lines reversed.
Replumb lines to proper port
connections.
Pump overheating.
Internal leakage.
If excessive internal leakage exists,
return to shop for complete overhaul.
Heat exchanger not functioning.
Locate trouble and repair or replace.
System not developing pressure.
Relief valve open.
Repair or replace.
y
g
Loss of fluid internally (slippage).
Return to shop for evaluation and repair.
Cartridge kit not assembled properly.
Reassemble kit.
Cartridge kit assembled for opposite
rotation.
Reassemble kit to proper rotation.
Pump inlet/outlet lines reversed.
Replumb lines to proper port
connections.
Disconnected or broken drive
mechanism.
Locate and repair.
Loss of fluid.
Ruptured hydraulic lines.
Locate and repair.
Leaking or missing seals.
Locate and repair.
Table 3. Troubleshooting Chart


