


Quick Installation Manual with MRF
Page 7 of 24
6. Install the Devices and turn them On.
B. Via Device network scan:
1. Install the Devices and turn them On.
2. Scan the network for available devices: Click:
3. Specify a clear name for each Device.
4. Move each Device into a Room/Zone in the Topology tree.
3. Configure the applicable Device Settings. For example:
A. Door (Switch) Actuator: Function: Off / On with switch off delay.
B. Shutter Actuator: Runtime.
C. Dimming Actuator: Dimming time, Dimming limits, Memory function.
D. Binary Inputs: Mode 2, Cyclic sending.
E. Analog Inputs: 0
– 10V, Cyclic sending.
F. Temperature Sensors: Send Temperature value, Cyclic sending. Per default the SHC Climate
Function expects within every hour a temperature value. Set cyclic sending value to 55 minutes.
G. Room Controller: Send Temperature value, Send Humidity value, Cyclic sending.
Note!:
Per default
the SHC Climate Function expects within every hour a temperature value. Set the protection timeout
in the SHC Climate Function to 6 hours.
4. Setup RF network:
A. Connect needed xComfort Devices to the Smart Home Controller (or ECIs).
B. Create additional switching groups if needed.
C. Scan reception quality of all devices. Calculate and check all connections.
D.
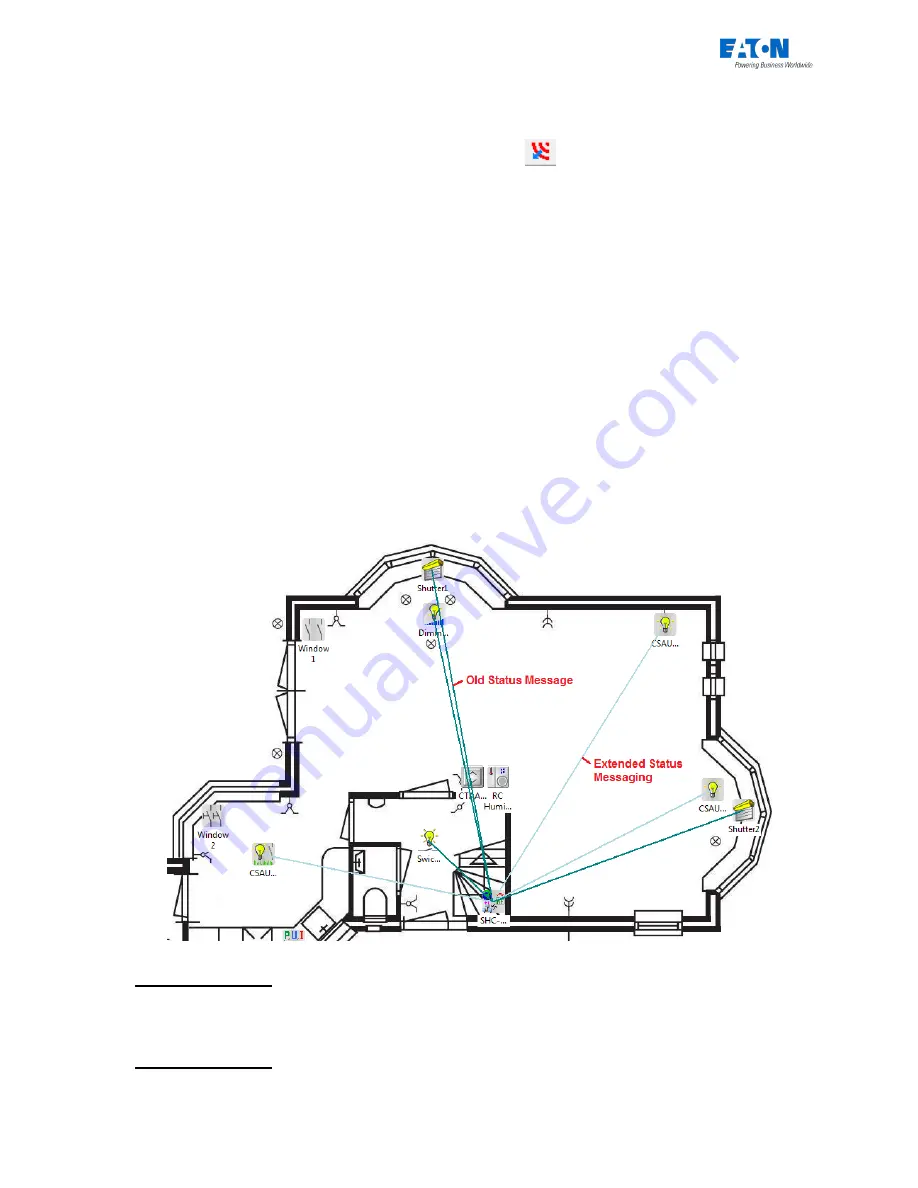
Important!:
Check if the Old Status Message is directly connected to the SHC or ECI! Use
new generation Actuators and Routers if the status is still not reliable.
Select: View -> Status-Connections (F8):
E. Load the configuration into the devices.
5.
Optional for ECI
: For each ECI create datapoint file:
A. Right click on the ECI Icon and select:
Create datapoint-file
B. Select Transmission:
download by RF
C. Click:
OK
6.
Optional for ECI
: SHC ECI settings:
A. Right click on the SHC Icon and select:
Settings


