


4
Technical Data
TD150019EN
Effective January 2017
PXM4/6/8K Meter Advanced Color
Touchscreen Display Quick Start Guide
EATON www.eaton.com
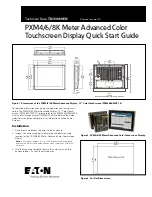
The user will be prompted to open the installer. Follow the prompts
to open the certificate to begin installation. Be sure to select
Trusted Root Certification Authorities
as the certificate store.
After the certificate is successfully imported, the user may then
close all dialog boxes. The main window can be closed by the
hotspot in the upper right hand corner and closing out the window.
Figure 11. Follow Prompts to Open the Certificate.
To put the display in ‘display mode’, select the display mode icon
on the desktop and drag-and-drop it on into the startup folder (also
on the desktop). This enables the display to connect to the meter
immediately upon power up. To finish, power-cycle the display.
Figure 12. Display Mode Icons.
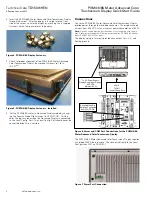
On future power-ups, when the device is properly connected to the
meter, a grey progress bar will begin to fill, in conjunction with the
meter’s power-up sequence. After the meter is ready, the main
screen of the meter interface should appear.
Figure 13. Main Screen of Meter Interface.
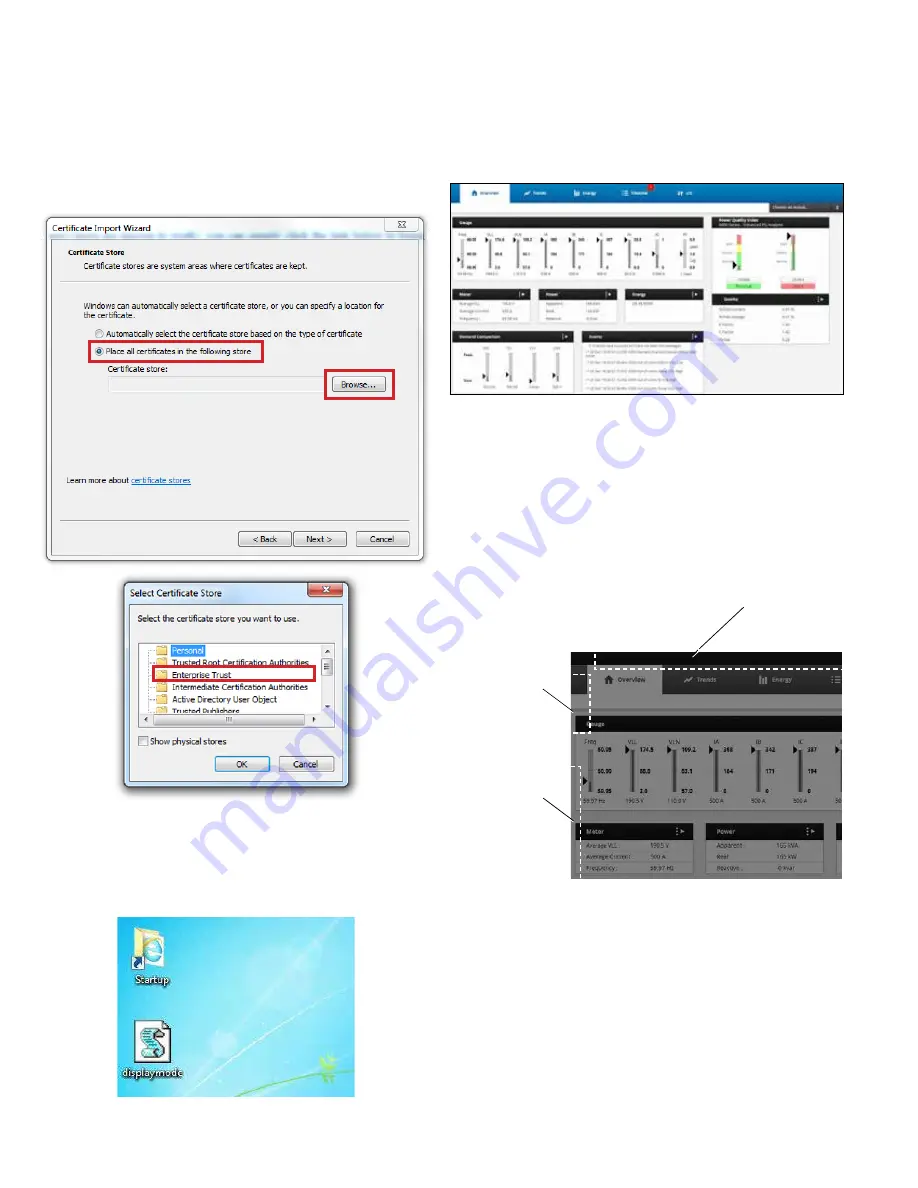
Display Hot-Spots
There are a handful of hot-spots that aid with meter navigation. An
on-screen keyboard can be called by tapping in the upper left corner.
The keyboard will be hidden when it is closed.
If connection to the meter is lost, tapping the top of the screen will
unhide a Refresh Bar with a button that re-establishes connection to
the meter. To hide this bar, tap the white space at either left or right
edge of the screen.
Figure 14. Display Hot Spots.
Tap the top of the
screen to unhide
the Refresh Bar
Tap the upper
left corner to
unhide on-
screen keyboard
Tap the white
space at the
side of the
screen to hide
Refresh Bar


