2
Integrated Sensor Remote Programming
ADF142501 www.eaton.com
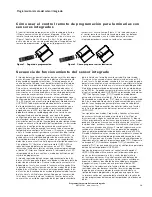
Figure 1. Programming Angle
Figure 2. Programming Multiple Fixtures
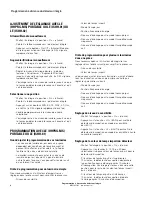
Integrated Sensor Remote Programming
The occupancy sensing portion of the sensor uses Passive
Infrared (PIR) technology with Auto-on/Auto-off operation.
The small lens in the center of the sensor directs the
view of a passive infrared occupancy detector to sense
occupants moving through the room. To trigger the light
on, an occupant must cross at least two passive infrared
beams. When motion in the coverage area ceases, the
sensor logic concludes the room is unoccupied, and begins
a count-down timer. By default, the timer is factory-set
to 20 minutes, and can be adjusted to 5, 10, 15 and 20
minutes using the optional remote control, model number
HHPRG-MS. Any motion detected during the count-down
timer will cause the light to remain on and resets the timer.
When motion is detected, a red LED will blink. In addition
to the default on/off functionality, the sensor has an Energy
Saver feature, where the light can be set to dim to a preset
level after the sensor detects no occupancy for half of the
count-down timer, when the timer is complete the lighting
will change to the unoccupied setting. The Energy Saver
feature works when the count-down timer is set to at least
15 minutes, and the preset level and feature are configured
using the optional remote control. The sensitivity of the
occupancy detection can be adjusted, using the HHPRG-MS
remote. By default, the sensor operates at the full detection
range shown on the coverage pattern diagram. Using the
“LO” button on the HHPRG-MS remote, reduces the sensor
detection range by 50%. Full coverage can be restored
at any time by pressing the “HI” button on the remote.
The red LED indicator will blink repeatedly to confirm any
programming change.
The dimming daylight harvesting portion of the sensor uses
a small photo sensor located next to the occupancy sensing
lens. The sensor continuously measures the available light
in the room, even when the fixture is turned off. This allows
sensor to operate in one of three daylighting modes, where
the artificial light from the paired luminaire can adjust the
light based on the amount of ambient light from surrounding
natural and artificial light sources. Since the sensor
measures light from its luminaire along with other light
sources, this sensor follows a closed-loop dimming daylight
harvesting style. The first mode, Daytime, is active when
the sensor detects light of at least 100 lux in the room. In
Daytime mode, when the light is turned on after detecting
occupancy, the sensor will begin balancing the luminaire
light level relative to the total available light it measures. The
default light balancing target in daytime mode is 500 lux.
This level can be adjusted higher or lower using the optional
HHPRG-MS remote, and pressing “SET” and then the “DO”
(Daytime Occupied) button to store the new light level.
Similarly, the Daytime Unoccupied, “DU” has a default of
level of 0 lux, or off, but can be adjusted higher to prevent
the lights from turning off completely when unoccupied.
More details on this function are found in the Sensor
Programming Guide for the HHPRG-MS remote.
The next two modes, Twilight and Nighttime, function in a
similar way, allowing the artificial light to adjust to different
levels based on the surroundings. While primarily for use
in outdoor luminaires, these modes are available for use in
areas with a wide range of natural light, including atriums,
day lit stairwells, and rooms with large or continuous
windows. The Twilight mode is active when the sensor
detects 50-100 lux in the off position, and has a 300 lux
default light balancing target. The Nighttime mode is active
when the sensor detects less than 50 lux, and has a 250
lux default light balancing target. Like the Daytime mode,
there are separate settings for Twilight Occupied (“TO”),
Twilight Unoccupied (“TU”), Nighttime Occupied (“NO”) and
Nighttime Unoccupied (“NU”) which can be adjusted and
set using the optional HHPRG-MS remote.
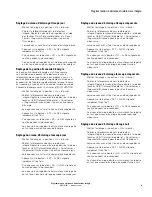
In addition to programming the sensor, the optional HHPRG-
MS remote can be used for personal control to adjust the
lighting temporarily override the functions of the sensor
temporarily. The remote has raise/lower buttons to adjust
the light level for special tasks, as well as a power button to
turn the lights on or off. Unless the SET button and another
function is selected, any changes made using these buttons
will revert to the programmed settings after the sensor has
detected no occupancy for its programmed time out, and
turned off the lighting. The next time the sensor detects
occupancy, it will revert to its programmed settings for
count-down timer and light balancing.
Integrated Sensor Sequence of Operation
Using the Programming Remote for Luminaires with Integrated
Sensors
The Programming Remote uses infrared (IR) technology
to communicate with the Integrated Sensor. The remote
operates within line-of-sight angles to the luminaire (Figure
1) within 10 to 20 feet. More than one Integrated Sensor
can be within range of the programming remote, allowing
multiple luminaires to be programmed at one time (Figure
2). A red indicator on the remote will light when buttons are
pushed and commands are sent, and a red indicator light
on the Integrated Sensor will blink when commands are
received.
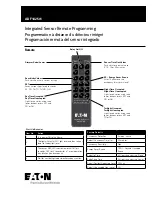
Ra
ise/
Low
er
Scen
es:
To s
ave s
ce
ne
s p
ress SE
T
an
d s
el
ect
scen
e L
ow
er
Prog
ram
m
ing
R
em
ot
e
HHPRG-MS
Time
O
ut
5
10
15
20
NO
NU
TU
T0
L0
HI
DU
D0
SE
T
ES
Ra
ise/
Low
er
Scen
es:
To s
ave s
ce
ne
s p
ress SE
T
an
d s
el
ect
scen
e L
ow
er
Prog
ram
m
ing
R
em
ot
e
HHPRG-MS
Time
O
ut
5
10
15
20
NO
NU
TU
T0
L0
HI
DU
D0
SE
T
ES

