


9
www.eaton.com/HaloHome
HALO Home Quick Start Guide - Smart LED Motion Flood
1
2
3
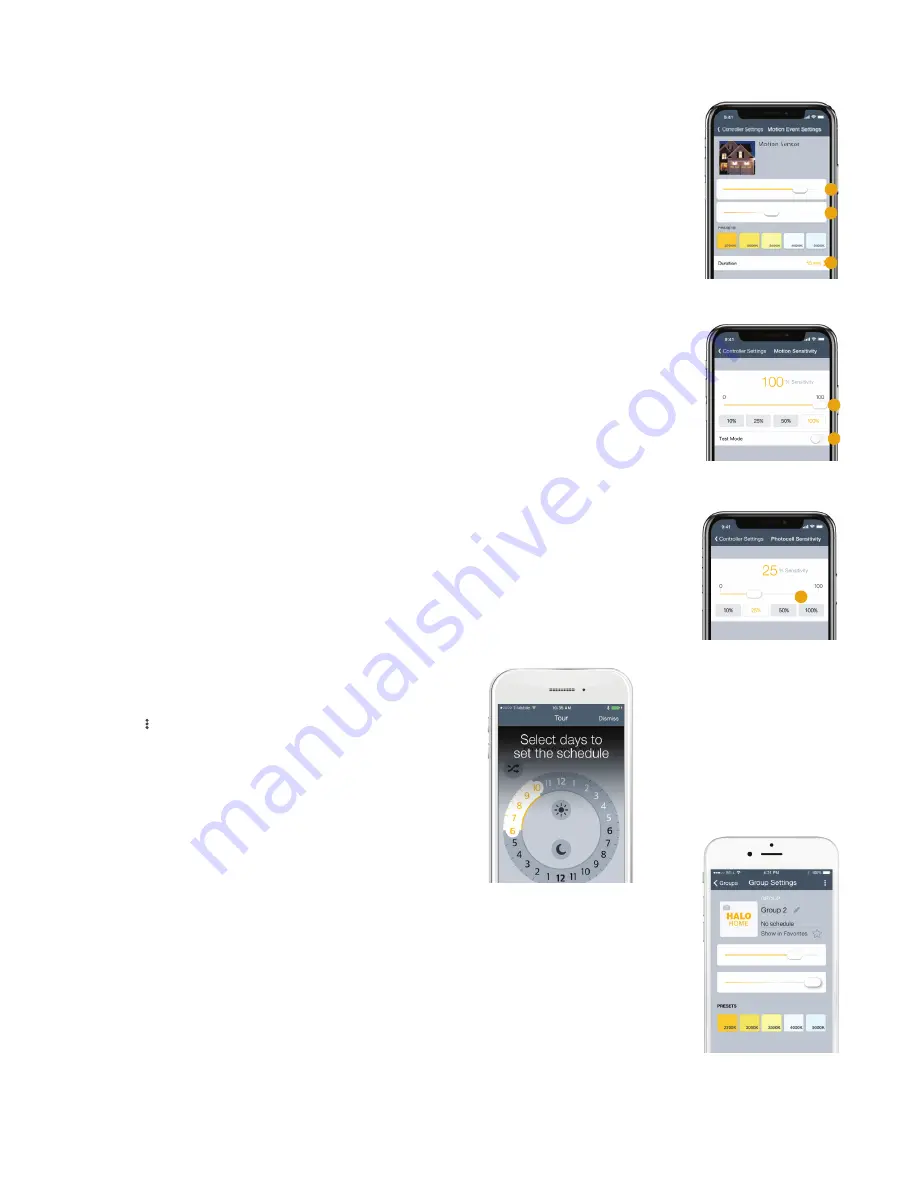
Motion Event and Standby Settings
1. Dimming: Set the dim level activated by a motion event. The LED floodlight can dim from
100% to 5%.
2. Color Tuning: Set the color temperature (CCT) activated by a motion event, or select one of
the presets. The LED floodlight has a CCT range of 3000K to 5000K.
3. Duration: Set the length of time these settings will remain in effect when motion is detected.
Note:
This countdown timer continually resets as additional motion events occur.
Motion Sensitivity and Test Mode
1. Adjust motion sensitivity, or range, by using the slider or the preset buttons.
2. Activate Test Mode to test the range of the motion sensor, day or night, as you make adjustments
to the sensitivity. The associated device or group will turn on for a few brief seconds between
motion events. Deactivate this mode after choosing the sensitivity that works best for your
application.
1
2
1
Photocell Sensitivity
1. Adjust the photocell sensitivity by using the slider or the preset buttons.
2. The motion sensor only activates fixtures at night. Photocell sensitivity determines how dark it
needs to be for the motion sensor to begin doing this; choose low sensitivity to have devices
wait until it is very dark at night to begin activating, while stopping earlier in the morning at
dawn. A high sensitivity will activate the motion sensor as soon as dusk begins, and keep it
active until later in the morning.
Setting up a schedule
1. Tap the “ ” icon to the right of your device’s name.
2. Tap the calendar icon on the slider. And tap the “
+
” button.
3. Using the dial, set your desired time.
4. Tap the days of the week that you want the schedule applied to.
5. Tap “
Save
” and give your schedule a unique name.
Creating a group
1. At the top left, press the “
=
” menu icon and click on Groups to access the new grouping page.
2. Tap the large plus sign in the center of the screen, or in the top right corner, to make your first group.
Then enter a unique name for your group and tap “
Done
.”
3. Touch and drag devices from the bottom of the screen towards the top of the screen to add them to
your Group. Repeat to add more and press next.
4. After your group is saved, you will be brought to the “
Group Settings”
menu.


