25
EATON
Series 1 Heavy Duty Hydrostatic Fixed Displacement Motors Parts and Repair E-MOPI-TS002-E September 2004
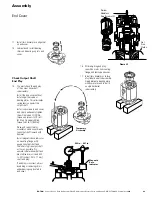
18. Install valve plate dowel pin in
the face of end cover.
19. Using petroleum jelly, lightly
coat side of valve plate facing
the end cover to hold valve
plate during assembly. Install
valve plate over bearing cup,
aligning it with dowel pin.
Valve parts must rest flat and
be flush with end cover.
Input Rotation
Valve Plate
Metering
Slots
Valve Plate
Rotation
Metering
Slots
Metering
Slots
Pump valve plates are all uni-
directional and motor valve
plates are bi-directional. The
pump valve plate is identified
by two metering slots and
rotates clockwise. The motor
valve plate has four metering
slots and is bi-directional.
Pump and motor valve plates
are not interchangeable.
Note: Use extreme care
when handling all close
tolerance internal parts of
motor. Keep parts clean.
Assembly
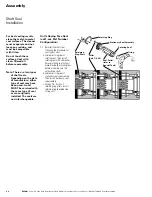
20. Holding the valve plate firmly
in position, install end cover
on housing.
21. Install cap screws in end
cover. Tighten them slowly and
evenly.
Torque the cap screws in a
star pattern. Models 33/39/46
should be torqued to 39 lb-ft
[53 Nm]. Models 54/64 should
be torqued to 63 lb-ft [85 Nm].
Torque each screw a second
time to compensate for gasket
compression set.
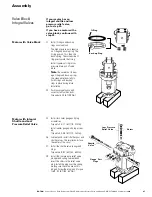
If you have a motor with a
face seal, use the following
procedure. If you have a
motor with a lip seal, use the
procedure on page 24.


