


6. OPTIONS
6.1 Automatic closing
Automatic closing is activated after a pre-set PAUSE.
a) Press the CLOCK BUTTON. The
green LED on the right will light up.
-
If neither of the
“
-
”
or
“
+
”
LEDs is on,
automatic closing is not active - to
activate it, press the
“
+
”
button.
-
If at least one
“
1
”
LED is on,
automatic closing is active - to deactivate
it, press and hold the
“
-
”
button until all
LEDs turn off.
By pressing
“
-
”
and
“
+
”,
you can adjust the PAUSE.
Wait 20 seconds or press the CLOCK BUTTON again
to exit programming mode.
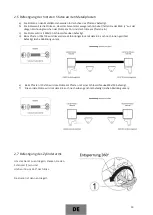
Operating sequence: OPEN - PAUSE - CLOSE - PAUSE
6.2 Slowdown time adjustment
a) Press the CLOCK BUTTON for 5
seconds - the green and red LEDs on
the right will light up. By pressing
“
-
”
and
“
+
”,
you can adjust the
SLOWDOWN TIME.
LEDs ON
PAUSE
AUTOMATIC CLOSING IS NOT
ACTIVE
5 s
10 s
30 s
60 s
120 s
44
Summary of Contents for 210
Page 1: ......
Page 13: ...3 INSTRUKCJA MONTAŻU JEDNOSTKI STEROWNICZEJ 12 ...
Page 15: ...3 3 Połączenie elektryczne 14 ...
Page 39: ...3 CONTROL UNIT INSTALLATION INSTRUCTIONS 38 ...
Page 41: ...3 3 Electrical connections 40 ...
Page 65: ...3 MONTAGEANLEITUNG FÜR DIE STEUERUNG 64 ...
Page 67: ...3 3 Elektrische Verbindung 66 ...
Page 91: ...3 NÁVOD NA MONTÁŽ OVLÁDACÍ JEDNOTKY 90 ...
Page 93: ...3 3 Elektrické připojení 92 ...
Page 117: ...3 MONTÁŽ RIADIACEJ JEDNOTKY 116 ...
Page 119: ...3 3 Elektrické zapojenie 118 ...
Page 143: ...3 VEZÉRLŐ EGYSÉG SZERELÉSI UTASÍTÁSA 142 ...
Page 145: ...3 3 Elektromos bekötés 144 ...


