background image

to feed, when there is regular silk come out of the nozzle, feed succeed, Then you 

can press 

button to finish feed.


Note:

 Make sure the distance between the nozzle and printing bed is 3cm at least . If 

no enough space, press the button 

 hold for 3 seconds then release , Z 

axis will go up 1cm

 ( when the printer power on ,press 

for 3 seconds then 

release , every time the nozzle will raise 1cm)


3

Print


Insert the TF card to the printer, Click 

button, and the button light will flash, 

Please be patient and wait about 5 minutes

 for the nozzle and 

hotbed to heat up, the printer starts printing when the temperature 
rises to set value

 ( the Printer will choose the lastest gcode file to print 

automatically) .


4

Pause/Restore


during printing, Click 

 ,the button light stops flashing , then printing paused.


If need to continue printing , Click 

 to restore, the button light flashes again , the 

printer goes back to print . 


5

 Stop Print


If  you want to stop print during printing , press button 

 for 3 seconds then 

release  , the machine will stop printing, then printing cancelled.


6

Unload Filament,Retract


If users want to change filament or keep the machine stop working for quite a long 
time , then need to unload the filament , Click 

button,the light inside will flash, 

Please be patient and wait about 2 minutes

, the motor inside the 

head will work and draw out the filament , after that, take out the filament from the 
print head.


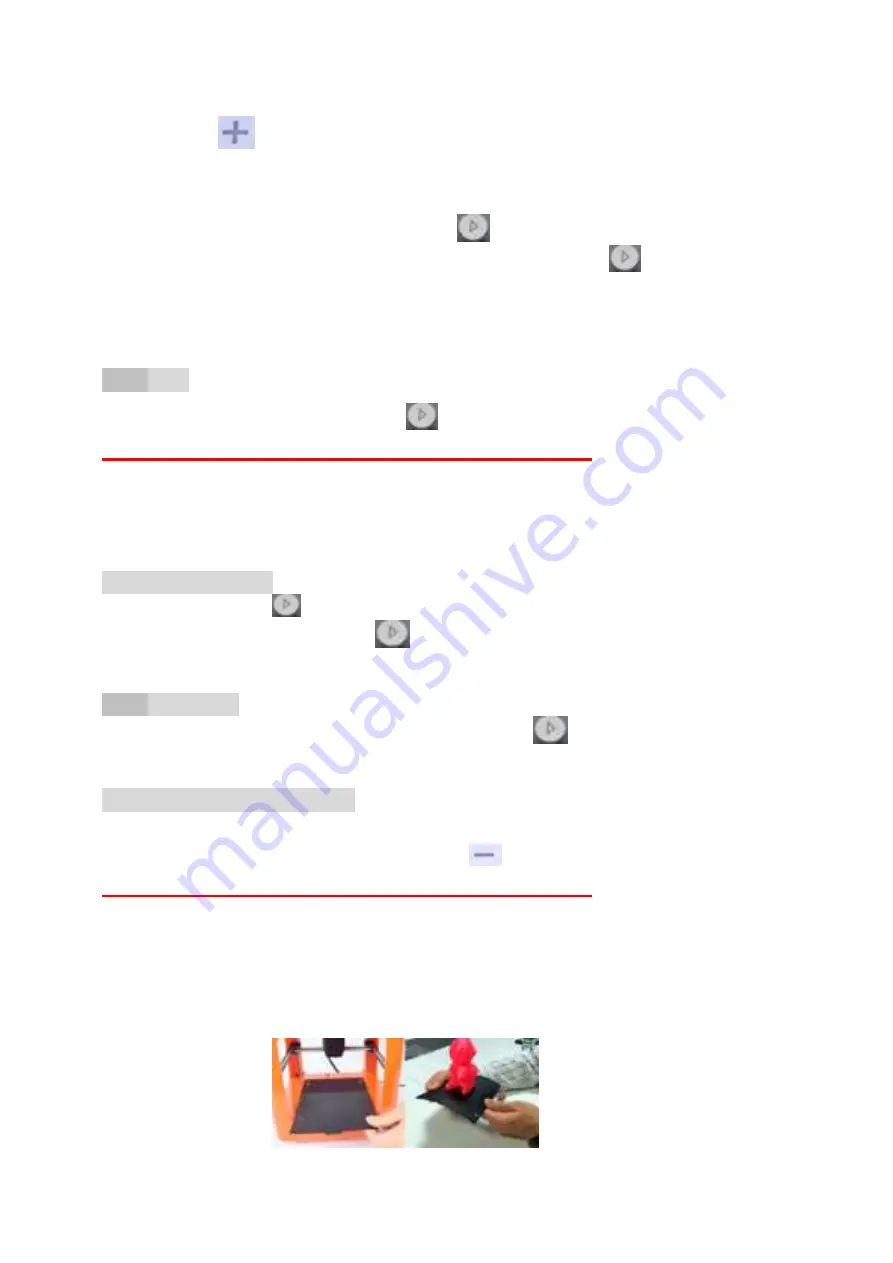
After print ,remove the platform, and easy to take off the object.


Summary of Contents for NANO plus

Page 1: ...NANO plus USERS MANUAL Please watch operation video in Website or YouTube Channel Easythreed3D ...

Page 2: ...ing box Remove bubble wrap foam Tape 2 Inside is an NANO plus 3d printer and accessories box with manual filament power adaptor TF card card reader screw driver Filament holder 3 Be sure to remore the clips in the left and front right corners of the printer The clips are only for protection during transportation As shown in the above figure 1 4 install the filament holder at the left side or right...

Page 3: ... the light inside the Print button will be light 4 0 Print 1 Platform Leveling The first time to use this printer you need leveling the platform Please adjust the distance between the nozzle and the platform in 1 2 3 4points the distance should be just the thickness of a sheet of paper Please do this leveling with the help of adults a Click the button Z axis will go home position After Z axis come...

Page 4: ...the distance between the nozzle and the platform all is right distance in 1 2 3 4 four points leveling finished and succeed Please turn on the power again after platform leveling 2 Load Filament feed a Insert filament into the print head tube until it can not go further and gently press the filament to stop it runs back b Click button the button light turn on and flash the nozzle is heating Please...

Page 5: ...nter will choose the lastest gcode file to print automatically 4 Pause Restore during printing Click the button light stops flashing then printing paused If need to continue printing Click to restore the button light flashes again the printer goes back to print 5 Stop Print If you want to stop print during printing press button for 3 seconds then release the machine will stop printing then printin...

Page 6: ...ents are certified for food safety nor should they be regarded as food safe therefore should not come in touch with the mouth or foods liquids that will be ingested by humans or animals Maintenance Long time use or improper use nozzles nozzle assemble parts or other may need to be replaced or cleaned print platforms and its overlays may need to be replaced the extruder may need to be cleaned 7 0 F...

Page 7: ...ty force The rounded strips adhesion effect is not good they are easily moved Printing effect is very unsatisfactory The distance is too close the silks are irregular protrusion with burrs on the both sides but thin in the middle Or there are no silks coming down Or the bed is scratched with a deep trace Q7 Why do there twist lots of filament nearby the nozzle in the process of printing Model beco...

Page 8: ... gear and press printing button shortly to resume printing Please pay special attention that after feeding 10 seconds timely slide switch to the middle gear in avoid that the the filament pimple appear in the model Q15 When print the first layer there is no filament on the bed why A Please check if the distance between nozzle and bed is to close cause no space for filament to come out Q16 Can the_...

Reviews: