Some products may not be available in your country, please contact our distributor for more details
Some products may not be available in your country, please contact our distributor for more details
9
10
5.OPERATING THE SPEED DOME
FIRMWARE
Protocol: PELCO
Dome Address: 001
Comm 9600,N,8,1
V1.03
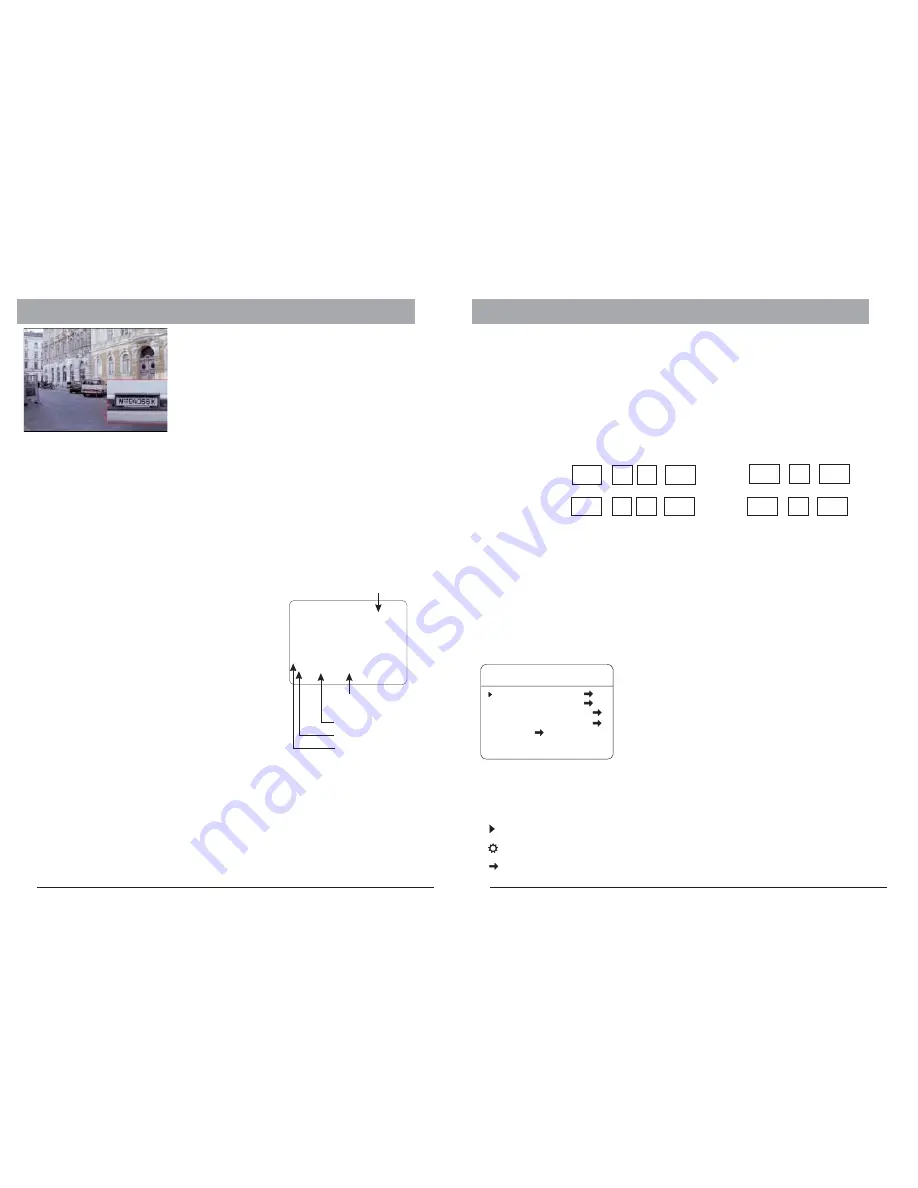
Initial Screen
After powering up, the camera will enter into
the self-test mode and display the status
screen (see picture left). It contains
information about the model and current
settings.
- “
"
- V1.03:
- Protocol:
- Dome address:
- Comm 9600,N,8,1:
: Model number
Current firmware version
Control protocol which currently used
Address ID of speed dome. Please refer to the section "Protocol
setup " for details
Current setting of the serial communication interface
Baud rate. Please refer to section "Baud-Rate setup" for details
No parity bit, 8 bit length, 1 stop bit. This setting cannot be changed
FIRMWARE
9600:
N, 8, 1:
Operation Screen
The operation screen can display additional
information.
Temperature: Current temperature inside the speed
dome( °C)
Cam title:
User definable camera title
Zone:
Current zone name
Pan deg.:
Pan angle, 0-359°
Tilt deg.:
Tilt angle, 0-90°
Zoom Factor: Zoom factor
Display of the information can be activated or
deactivated through the OSD menu.Pplease refer to
the system setting for detais.
The intial screen will remain on until any user action is taken. If the power-up action is
set, the initial info wil vanish immediately.
32.0
CAM TITLE
ZONE-1
285 78
18X
Pan degree
Zoom factor
Tilt degree
Zone description
Temperature
PTZ operation
For the surveillance operation, the dome can be controlled from a keyboard device,
Multiplexer or DVR through RS485 interface. Make sure that the cable is connected
and the settings (baud rate, Address ID and protocol) of both, keyboard and the dome,
are correctly configurated. For further details on operating the PTZ, please refer to the
user ’s manual of the keyboard.
OSD Menu
How to start the OSD Menu
The dome camera are equipped with the new OSD Menu function. All operational functions
and camera related settings can be controlled here. In order to use the OSD function, a
telemetric controller device, such as keyboard, DVR or other devices with similiar functions,
is required. Please make sure that the device used is properly physically connected to the
dome and all connection parameters are set.
To start the OSD Menu, you need to press the following sequence on the keyboard:
With
or
With keyboard
or
In case a DVR is used for operating the OSD, select “go to preset 95” or 2 X “go to preset 9”.
Please refer to the DVR’s operation manual for more details.
Note that in some situations, it is not possible to access the OSD menu:
1. The dome is running a tour
2. Performing PTZ operations
3. Dome is receiving a command other than OSD-request from the keyboard
To solve this inability stop the operation and try again.
2 X
2 X
keyboard
Shot
9
5
Enter
Main menu and navigation
Main Menu
SYSTEM SETTING
CAMERA SETTING
FUNCTION SETTING
WINDOW BLANKING
ALARM
EXIT
After entering the OSD Menu, the screen will show
menu items . Use the controller’s joystick to navigate
the menu’s main and sub items by moving in the
desired direction. The angle mark on the beginning of
every item indicates the selection.
UP, DOWN:
- Moving between current menu items
- Changing the value in sub items
RIGHT:
- Enter the selected menu item
- Confirm the value change and return
to
item selection
LEFT:
- Exit from sub menu
For more inforamtion, please refer to the illustration on
Symbols and indicator
Cursor.
Sub item is selected. use up or down to change value
This item has subitem(s)
call
9
5
Enter
call
9
Enter
Shot
9
Enter
6.OSD
(
)
3-Axis


