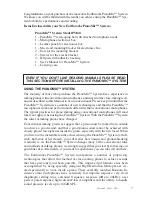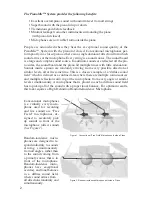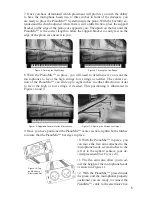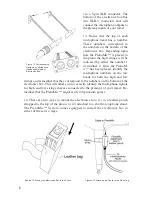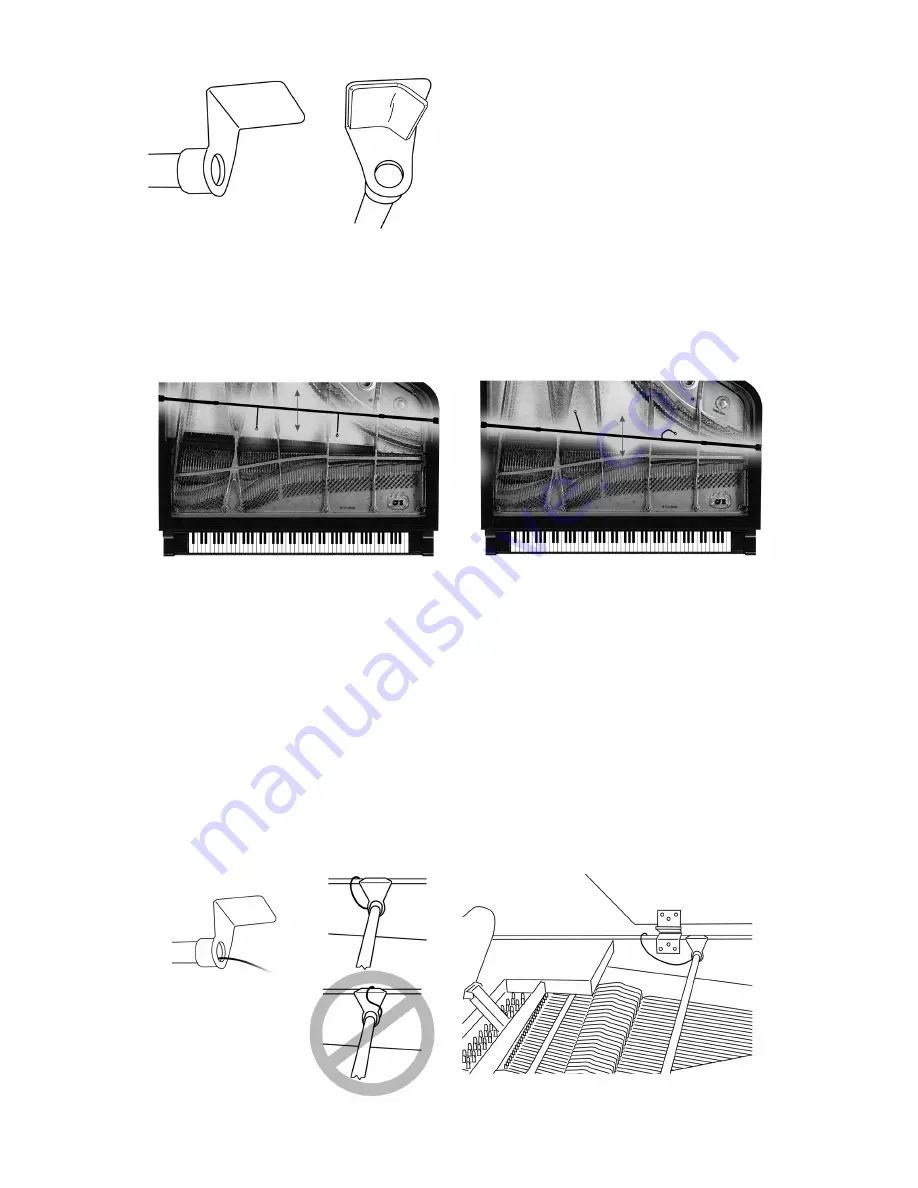
5. The PianoMic™ can be placed inside
the piano with the microphone heads ei-
ther facing the dampers (Figure 5) or
facing away from the dampers (Figure
6). For optimum results, the PianoMic™
System should be placed in the piano
with the microphone heads placed two
to three inches away from the dampers.
How you place the PianoMic™ System
will depend upon the piano, its size and
how it is made. This will govern whether the microphone heads can be faced toward
or faced away from the dampers. It is best to position the PianoMic™ System so that
the support bracket does not have to rest on the curved part of the piano case.
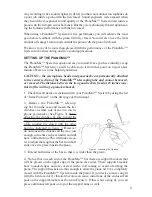
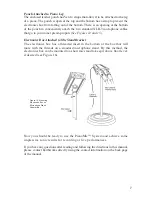
6. Notice that one end of the PianoMic™ has a multi-connector shielded cable com-
ing out of the tube below the support arm (Figure 7). It doesn’t matter which side of
the piano the cable exits. The main objective is to place the PianoMic™ in the piano
so that the microphone heads can be easily placed 2 to 3 inches in front of the damp-
ers. The cable is long enough to easily reach the opposite side of the piano should
you decide to locate the electronics box on the opposite side of the piano from where
the cable comes out of the PianoMic™. You will need to position the cable so it does
not lie on top of the support arm. The combined thickness of the support arm with
the cable on top if it would exceed the size of the opening between the piano case
and the lid. Therefore when the lid is closed it would pinch and deform the cable. To
avoid this, place the cable to one side of the support arm. You may also position
the cable so it comes out the open area of the piano as illustrated in Figure 7.
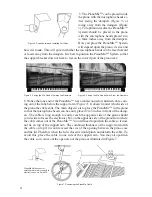
Figure 4. Support Arms and Installing Felt Pads
Figure 5
Figure 6
Figure 7. Positioning the PianoMic Cable
PianoMic multi-conductor
shielded cable that connects to
electronics box via 5-pin XLR.
Figure 5. Facing the Mic Heads Towards the Dampers
Figure 6. Facing the Mic Heads Away From the Dampers
4


