SUBJECT
REF. MDL.
REPORT NO.
INSTRUCTIONS FOR CONTINUED AIRWORTHINESS
GA182
ICA182-2
Rev. A
10/15/12
SEE NON-DISCLOSURE NOTICE ON THE COVER PAGE
22 of 101
Copyright 2012
Eagle Copters
All Rights Reserved
Section 4.0 Analog Audio Router Removal, Inspection and Re-Installation
4.1
Analog Router Removal
a.
Disconnect all cables from the Analog Router.
b.
The installation of the Router will vary depending on the aircraft
configuration. Disconnect all hardware attaching the Router to the
aircraft and completely remove the entire Router Assembly.
4.2
Analog Router Inspection
WARNING
Most electronic devices are subject to damage by electrostatic discharge (ESD).
Installation or removal of components or circuit boards should follow the guidelines in
AC43.13-1b Par 12-2 and AC 43-206 Par 905, which are summarized below:
When removing ESD-sensitive equipment from the aircraft, the aircraft should be
grounded and power removed. Prior to disconnecting the cables from the equipment,
personnel should touch the metal case of the equipment to equalize any electrostatic
potential. Once the cables are disconnected, conductive dust caps or conductive grid
tape should be placed on the connector receptacles.
Circuit cards and components should be packaged in ESD-protective packaging prior to
leaving the ESD workstation. Static shielding bags which have a static-dissipative inner
layer and a conductive outer layer are used for this purpose. They should be
noncorrosive and should zip-lock or heat seal closed. Cushion wrap (bubble wrap) used
around circuit cards should also be made of static-dissipative material.
a.
Inspect the Router Shell for cracks or excessive corrosion. If any of
the parts are cracked or excessively corroded (refer to Section 3.1.1
for corrosion limits) they must be removed and replaced.
b.
The Audio Control Boards (P/N G11428) in the Router are field
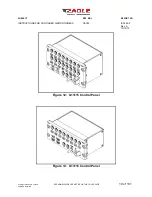
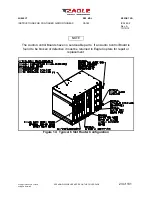
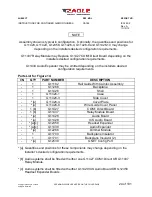
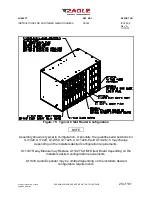
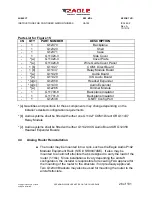
replaceable. The Audio Control Boards as shown in Slots 1-6 of
Figure 14 and Slots 1-8 in Figure 15 are physically identical and may
be interchanged for diagnostic and spares purposes.
c.
To remove an Audio Control Board remove the 2 retaining screws and
apply pressure two the 2 card ejector tabs on either side of the Audio
Control Board.

