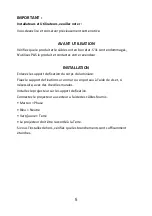
background image

IMPORTANT


Installer and Users please note: 

These  instructions  should  be  read  carefully  and  left  with  the  user  of  the 

product for future reference. 

BEFORE USE 

You must inspect the luminaire including its cable for any signs of damage. If the 
product is damaged, DO NOT use it, and contact your supplier immediately. 

INSTALLATION 

Remove the fixing bracket from the body of the luminaire. 

Attach  the  fixing  bracket  to a wall or post, using  screws and, if necessary, wall 
plugs. 

Fit the body of the luminaire into the fixing bracket. 

Connect the luminaire to the electricity supply using the lead provided. 

• Brown = live

• Blue = neutral

• Green/yellow = earth

• The luminaire must be earthed.

If  mounting  outdoors  then  make  sure  that  the  connections  are  adequately 
waterproofed. 

GENERAL SAFETY REQUIREMENTS 

• All  electrical  work  must  be  carried  out  to  the  requirements  of  the  latest
edition of the IEE wiring regulations (BS7671).

• Domestic wiring must be tested periodically by a qualified electrician at least
once every 10 years or at every change of occupancy.

DISPOSAL AND RECYCLING 

You must not dispose of this luminaire with domestic household waste. 

Most  local  authorities  have  specific  collection  system  for  appliances  and 

disposal is free of charge to the end-user. 

When  replacing  an  existing  luminaire  with  a  similar  new  luminaire  your 

retailer may take the old luminaire for disposal. 

Summary of Contents for L320EA/EG

Page 1: ...1 L320EA EG 70 W LED Flood light Projecteur LED 70W...

Page 2: ...ead provided Brown live Blue neutral Green yellow earth The luminaire must be earthed If mounting outdoors then make sure that the connections are adequately waterproofed GENERAL SAFETY REQUIREMENTS A...

Page 3: ...mm Weight 6 3 kg Power supply 85 253 V LED power 70 W System power 75 W ERP Energy rating A Colour temperature 6500 K Colour rendering index 82 IP rating IP65 Viewing angle 120 Power factor 0 90 Ambi...

Page 4: ...indicated on the unit or any attempts made to service or modify the unit then the warranty will be rendered void The product you buy may sometimes differ slightly from illustrations This warranty is i...

Page 5: ...ur INSTALLATION Enlevez le support de fixation du corps du luminiare Fixez le support de fixation sur un mur ou un poteau l aide de vis et si n cessaire avec des chevilles murales Installez le project...

Page 6: ...ement par un lectricien qualifi au moins une fois tous les 10 ans ou chaque changement d occupant DEBARRAS ET RECYCLAGE Vous ne devez pas jeter ce projecteur avec les ordures m nag res La plupart des...

Page 7: ...3 kg Alimentation 85 253 V Puissance de la LED 70 W Puissance du Syst me 75 W Classe d Energie A Temp rature Couleur 6500 K Indice de Rendu des Couleurs 82 Taux IP IP65 Angle de Vision 120 Facteur de...

Page 8: ...duit Les coordonn es du revendeur sont indiqu sur la facture voyageant avec le produit ou sur l e mail que vous avez re u quand vous avez pass votre commande Ne contactez pas Electrovision seul votre...

Reviews: