


P
OWER
M
ATE
3
29
4 DIGITAL AUDIO INTERFACE
The USB 2.0-Port of the PowerMate serves as digital au-
dio interface for the connection of a PC or Apple Macin-
tosh (Mac). The DIGITAL AUDIO INTERFACE can be used
as input or output device at the same time. When using a
PC/Mac with USB 2.0 interface up to four channels can
be transmitted simultaneously in any direction. When us-
ing a PC/Mac with USB 1.1 interface up to two channels
can be transmitted simultaneously in any direction.
HINT: Using high grade USB 2.0 cables is recom-
mended for optimal signal quality.
CAUTION:
We can accept no responsibility for any
loss of the data you record using this prod-
uct onto other MIDI equipment in your sys-
tem or onto storage devices such as hard
disk.
4.1 Installing the USB driver
Before connecting the PowerMate and your PC/Mac for
the first time via USB you have to install the needed USB
driver (located at the provided DVD) on the computer.
HINT: If you are unsure about how to perform basic
computer operations appearing in this manual,
please refer to the owner‘s manual that came
with your PC/Mac.
CAUTION:
Never attempt to play the enclosed DVD in
a conventional audio CD/DVD player, as
the resulting noise may damage your
speakers or your hearing.
1.
You will be asked to connect the PowerMate to your
PC during the installation process, do not connect
the PowerMate before. Please cancel the Add Hard-
ware Wizard in Windows if it has already started.
2.
Place the supplied DVD in your PC/Mac‘s drive.
3.
If the application does not start automatically,
execute the file „PowerMate3.exe“ (PC) or
„PowerMate3.app“ (Mac) found in the root direc-
tory of the DVD.
4.
Select the language of the application.
5.
Start installation of the USB driver for your opera-
ting system by clicking the corresponding button.
HINT: If you are not sure which Windows Operating
System is installed on your PC, click on Start >
Control Panel > System. In the„General“ tab the
Windows type is shown. For more information
read the documentation found in the directory
„ApplicationNotes“ at the supplied DVD.
6.
Choose your language at the language selection
dialog and click the OK button.
7.
Click on the „Install driver“ button.
8.
Follow the on-screen instructions.
HINT: Check www.dynacord.com for USB driver
updates and additional information regularly.
4.2 Cubase LE
For using the PowerMate with your PC/Mac, the Cubase
LE software is included at the supplied DVD.
I
NSTALLATION
Execute following steps to install Cubase LE on your PC/
Mac.
1.
Place the supplied DVD in your PC/Mac‘s drive.
2.
If the application does not start automatically,
execute the file „PowerMate3.exe“ (PC) or
„PowerMate3.app“ (Mac) found in the root direc-
tory of the DVD.
3.
Select the language of the application.
4.
Click on „Install Cubase LE“ to start installation of
the software.
C
ONFIGURATION
For using your PowerMate in the Cubase software execu-
te following steps:
1.
Start the Cubase LE software.
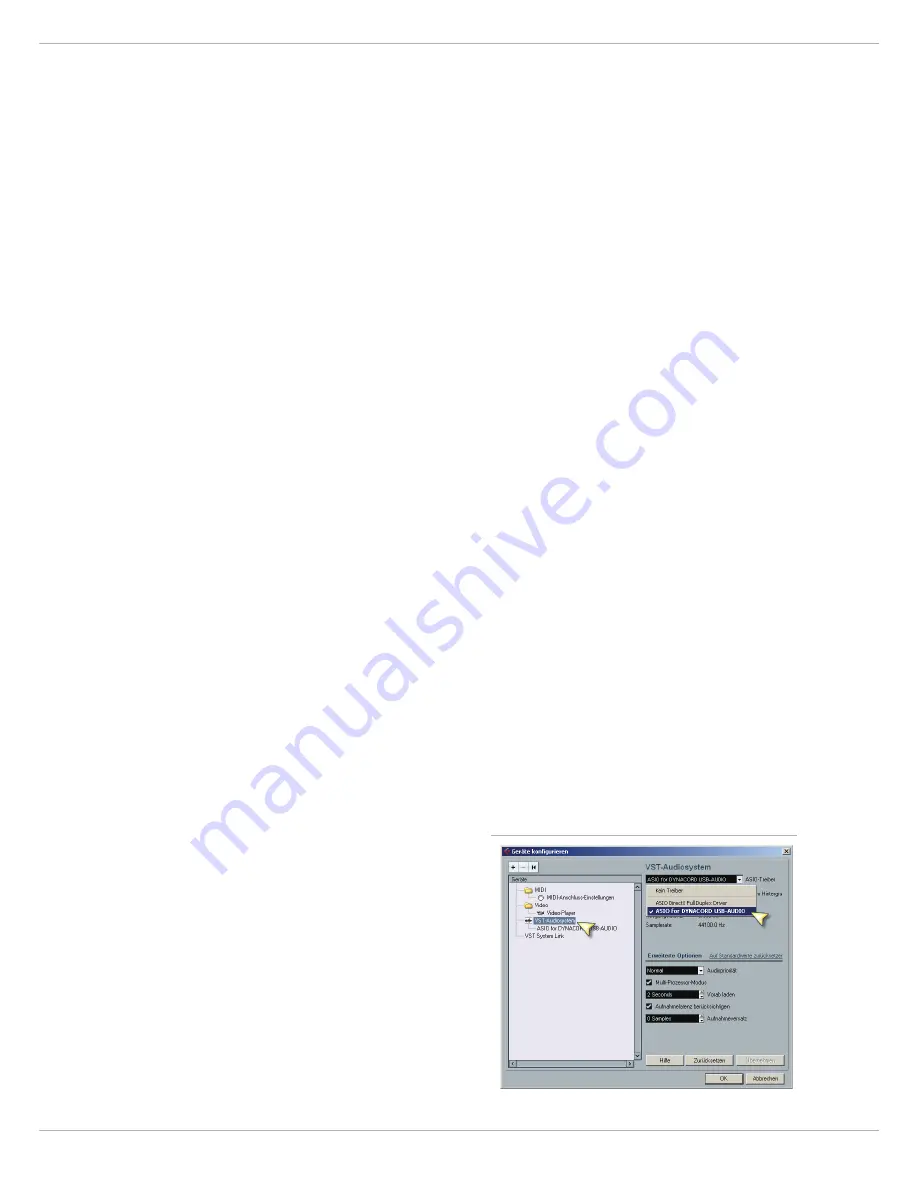
2.
Select Devices > Configure Devices. The Configure
Devices dialog appears.
3.
Select VST-Audiosystem in the left section of the
dialog.
4.
Select the ASIO driver„ASIO for DYNACORD USB-
AUDIO“.
5.
Press the OK button.
HINT: For more information about using the software
read the documentation found in the directory
„ApplicationNotes“ at the supplied DVD or
open menu Help > Documentation in Cubase LE.
Illustration 4-1: Configuration of Cubase LE
Summary of Contents for PowerMate 600-3
Page 1: ...PowerMate3 PowerMate 600 3 POWERED MIXER Owner s Manual Bedienungsanleitung...
Page 2: ...POWERMATE 3 2...
Page 14: ...POWERMATE 3 14...
Page 16: ...POWERMATE 3 16...
Page 18: ...POWERMATE 3 18...
Page 39: ...POWERMATE 3 39...
Page 50: ...POWERMATE 3 50...
Page 52: ...POWERMATE 3 52...
Page 54: ...POWERMATE 3 54...
Page 78: ...POWERMATE 3 78 7 1 Dimensions...
Page 79: ...POWERMATE 3 79 7 2 Block Diagram...
Page 81: ...POWERMATE 3 81 Notes...
Page 82: ...POWERMATE 3 82 Notes...
Page 83: ...POWERMATE 3 83...


