background image


49

5. Installing software and drivers 

Read this section to learn how to install drivers and software for the video camera.   

5.1 Drivers 

You can use the “Mass Storage” functions of the video camera on the PC. 

5.1.1 Mass 

Storage 

The digital camera offers Mass Storage function as a card reader device. You can treat this digital 
camera as an SD device. 

You will only need to install a driver for the camera if your operating system is Windows 98SE. 
Windows XP/ME/2000 is plug and play operating systems and do not require a driver to be 
manually loaded. 

When the driver has been installed and the camera is connected, the camera memory and any 
installed mini SD card will appear as Mass Storage in Windows Explorer. Files can be dragged 
and dropped in the same way as on an ordinary disk. 

To install drivers, please follow the instructions below: 

1.


Insert the supplied CD-ROM in the CD-ROM drive. 

2.


If the CD-ROM doesn’t automatically boot, use Windows Explorer to execute the 
InstallMgr.exe file in the root directory. 

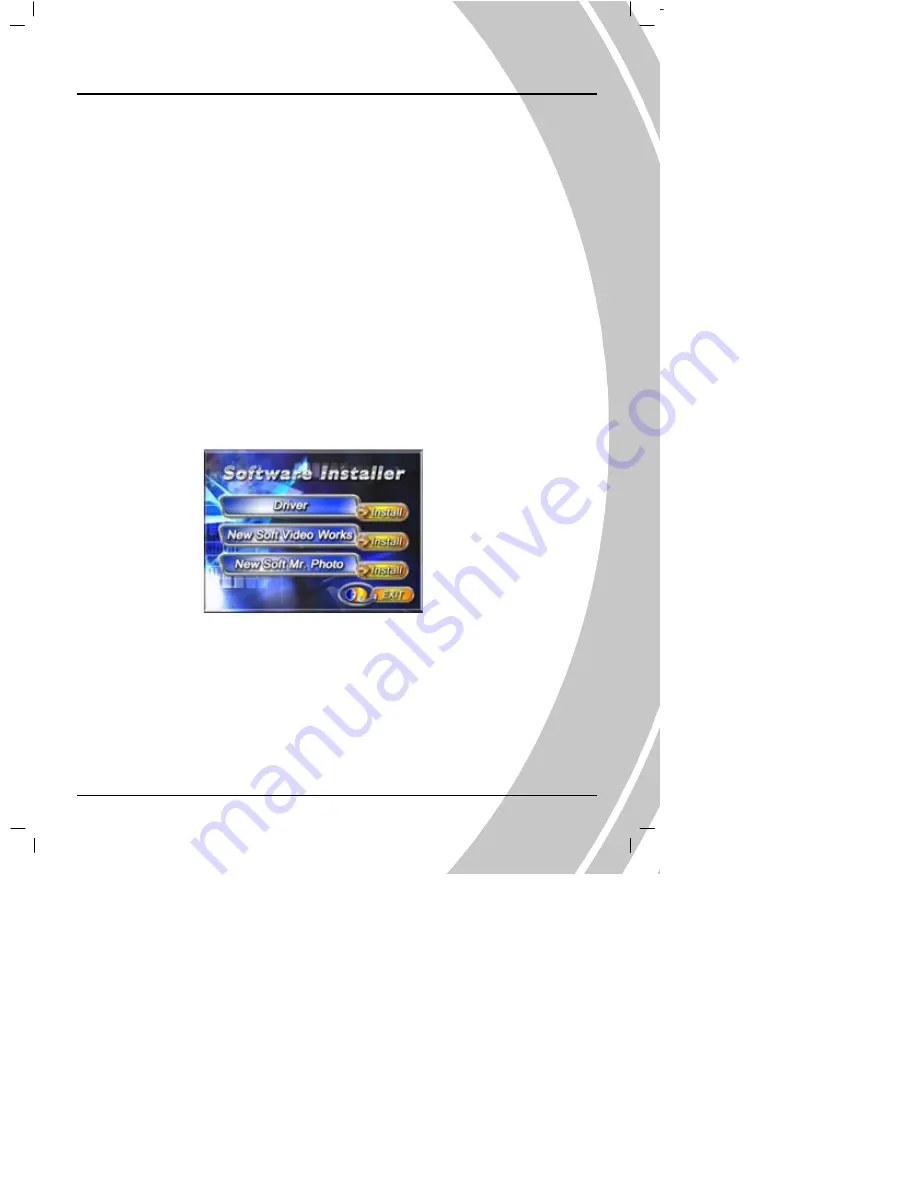
The following screen is displayed. 


3.


Click the install button to install the driver. 

4.


Follow the on-screen instructions. 

5.


Click Finish to restart the computer and finish the video camera driver installation.


Summary of Contents for DXG Digital Camera

Page 1: ......

Page 2: ......

Page 3: ...SD card 11 2 2 Inserting the battery 12 2 3 Charging the battery 13 2 4 Turning on for the first time 14 2 5 Changing modes 14 2 6 Before you start 15 2 6 1 Setting the date and time 15 2 6 2 Setting the language 16 2 7 Taking pictures 16 2 7 1 Taking your first still picture 16 2 7 2 Taking pictures 17 2 8 Video recording 20 2 8 1 Video 20 2 8 2 Video playback 20 2 9 Audio or voice recording 22 2...

Page 4: ... 29 3 2 Video recorder mode 30 3 2 1 Icons 30 3 2 2 Setting the size 31 3 2 3 Quality 31 3 2 4 White Balance 31 3 2 5 Color effect 31 3 2 6 File format 31 3 3 Audio or Voice Recording mode 32 3 3 1 Icons 32 3 4 Setup mode 32 3 4 1 Setting the date and time 33 3 4 2 Setting the beep function 33 3 4 3 Setting the language 33 3 4 4 Auto Display Off 33 3 4 5 Auto Power Off 34 3 4 6 Format 34 3 4 7 TV ...

Page 5: ...o viewer mode 42 3 8 1 Operation instructions 43 3 9 Game mode 44 3 9 1 Boxman 44 3 9 2 Tetris 45 3 9 3 Memory game 46 3 9 4 Gobang 47 4 Recording TV programs 48 4 1 Operation instructions 48 5 Installing software and drivers 49 5 1 Drivers 49 5 1 1 Mass Storage 49 5 2 Presto Video Works 6 50 5 3 Presto Mr Photo 3 50 5 4 XviD codec for PC 51 6 Troubleshooting 54 6 1 Problems and remedies 54 Append...

Page 6: ...ntents and the manufacturer reserves the right to make changes without notice If the accessories don t match the actual items in the package please take the actual items as the standard Copyright Copyright 2005 All rights reserved No part of this publication may be reproduced transmitted transcribed stored in a retrieval system or translated into any language or computer language in any form or by...

Page 7: ... the life of electronic devices damage batteries and warp or melt certain plastics Do not store the product in cold areas When the product warms up to its normal temperature moisture can form inside this may damage the electronic circuits Do not attempt to open the casing Do not drop or knock the product Rough handing may damage the internal components Do not use harsh chemicals cleaning solvents ...

Page 8: ...AM or higher Standard USB 1 1 port or higher 4 x speed CD ROM drive or higher At least 200 MB of available disk space Note A USB 1 1 port will enable you to transfer files to and from your host PC but transfer speeds will be much faster with a USB 2 0 port 1 2 Features The camera offers a variety of features and functions including Digital still camera max 12 0 Mega pixels Digital camcorder Movie ...

Page 9: ...era package If any item is missing or appears damaged contact your dealer immediately User Manual Digital Camera Camera Pouch CD ROM Driver and Application software AV Cable Wrist Strap Li ion Bettery USB Cable Earphones DC IN 5VAdapter Changer Stand DC IN Connector ...

Page 10: ... to familiarize yourself with the buttons and controls of the camera 1 4 1 Front view 1 4 2 Top view 1 4 3 Back view Microphone AV IN jack USB AV OUT jack DC IN jack Browse OK Earphones jack LCD screen Joystick Mode Button Power Status LED Deleted Deleted ...

Page 11: ...9 Speaker Lens Wrist Strap Buckle Stand Battery Cover Flash Deleted ...

Page 12: ...ecting moving up down left right z Adjust EV value and self capturing time zoom and flash charging in Photo mode z Adjust EV value and zoom in Video mode OK z Use this button with joystick and Mode button to finish the related selection and setup z Press to capture in the Photo mode z Press to start stop recording video sound in the Video Sound recording mode Browse button z Press this button in t...

Page 13: ...n off and initial setup See later chapters for details about advanced functions 2 1 Inserting an SD card An SD card can be installed in the camera to provide additional storage space for still images video MP3 or other files 1 Open the battery compartment as shown 2 Insert an SD card as shown Make sure the gold contacts are facing down as shown 3 Close battery compartment as shown ...

Page 14: ...eable Li ion battery Note Install the battery exactly as described here Installing the batteries incorrectly could cause damage to the camera and possibly start a fire 1 Open the battery compartment as shown 2 Insert the battery as shown 3 Close the battery compartment ...

Page 15: ...e charger as shown and connect the power supply to the charging unit and the mains supply The indicator on the charger will turn into red It will take about five hours to completely charge the battery When battery is full the indicator will turn into green ...

Page 16: ...2 5 Changing modes The camera can operate in nine modes Photo mode FM Radio mode Game mode Music player mode Photo viewer mode Setup mode Video mode Sound recording mode Movie player mode Press the mode button to display modes Use the joystick to select a mode and press the OK to enter when selected Power key OK Joystick Mode Button Deleted Deleted ...

Page 17: ...and use joystick Left Right button to System icon and then press OK 2 Use joystick Up Down button to select the Date Time option Press the OK and the submenu flashes 3 Use the joystick Left Right button to select the field and then use the joystick Up Down button to adjust the value When finishing changing use the OK to confirm 4 Press the joystick ENTER button or Mode button to leave the menu ...

Page 18: ... Press the joystick ENTER button or Mode button to leave the menu 2 7 Taking pictures 2 7 1 Taking your first still picture 1 Turn the camera on and use joystick Left Right button to scroll until you reach Camera and then press OK to enter the Photo mode 2 Use the LCD screen to frame the picture 3 Press the OK to take a still picture 4 The picture will automatically be saved with a unique file nam...

Page 19: ...s 10 seconds 30 second Press the OK to start self capturing after selecting Flash setting Please refer the section 3 1 2 Setting the flash 2 7 2 Taking pictures 1 Press the Browse to go to the picture playback mode and the last files will display on the LCD screen 2 Use the joystick Up Down button to select the previous next picture Press the OK to enlarge zoom in ratio 1 0 8 0 Press the joystick ...

Page 20: ... the OK to confirm 2 Use the joystick Up Down button to select the Protect option Use the joystick Left Right button again to select Protect One Protect All or Cancel and press the OK to confirm If selecting Protect All shown as above then use the joystick left right button to select to Lock All or not Press the OK to confirm If selecting Cancel shown as above then use the joystick left right butt...

Page 21: ...utton again to select Setup One Select All or Select Print Date and press the OK to confirm 5 Use the joystick Up Down button to select the Direct Print option Use the joystick Left Right button again to select Direct Print One Direct Print all or Print Date or not and press the OK to confirm If selecting Print One or Print All photos directly the screen appears as above If selecting Print Date us...

Page 22: ...t Right button to scroll through Video icon and then press the OK to enter the Video mode 2 Use the LCD screen to frame your video 3 Press the OK in this mode and the camera starts recording 4 Press the OK button again to stop recording 5 The video is automatically saved with a unique file name 6 Use the joystick Left Right button to erase the display of part or all the icons on the screen Note Us...

Page 23: ...when playing AVI format files Fast Forward and Fast Reverse are not supported during playback of ASF and MOV format files 6 Use the joystick first the right button then Left Right button to delete movies select to delete no and press the OK to confirm 7 Press the joystick ENTER button and the screen will appear the Setup menu under the Playback mode 1 Use the joystick Up Down button to select the ...

Page 24: ...age while using the Replay mode 2 9 Audio or voice recording 2 9 1 Audio 1 Turn the camera on and use joystick Left Right button to scroll through Audio Record icon and then press OK to enter Audio Recording mode 2 Press the OK to start recording If selecting Protect All the screen appears as above then use the joystick Left Right button to select to Lock All or not Press the OK to confirm If sele...

Page 25: ...23 3 Press the OK again to stop recording 4 The camera will save the sound file automatically with the built in file name ...

Page 26: ...he volume and press the OK again to pause playing recording file Press the Browse to stop playing recording files 4 Use the joystick first the right button then Left Right button to select to delete recording files or not select to delete but not and press the OK to confirm 5 Press the Browse again to leave the playback mode and return to Audio recording mode If there isn t any saved recording in ...

Page 27: ...age and Video Camera for the choosing to connect the computer by USB 3 Use the joystick Up Down button to select the Mass Storage item and press the OK to confirm the selection The screen turns off 4 When finishing installing the system the Mass Storage item will be added to My Computer of the system 5 You can start using the added mass storage which is the SD card reader provided by the camera Th...

Page 28: ...matically pop up two function modes Mass Storage and PC Camera for the choosing to connect the computer by USB 3 Use the joystick Up Down button to select the PC Camera item and press the OK to confirm the setting The camera starts framing 4 You can use the PC camera function provided by the camera through the software in the supplied CD ROM or other software 2 11 Connecting to a TV Use the suppli...

Page 29: ...ons and their symbols See the table below for a description of each button s function 1 Photo mode indicator 2 Display the number of saved pictures 3 Digital zoom status 4 Battery status indicator 5 Flash mode indicator 6 Image size indicator 7 Image quality indicator 8 White balance indicator indicates the settings of white balance 9 Display the date of taking pictures 10 The icon of built in mem...

Page 30: ... ENTER button to enter the Setup menu to adjust the size of the file 1 Use the joystick Up Down button to select the Size option 2 Use the joystick Left Right button to select 12M 5M 3M 1 3M or SVGA and press OK to confirm 3 Press the joystick ENTER button again to leave the menu 3 1 4 Quality The Quality option lets you setup the quality of the captured picture The larger size picture contains mo...

Page 31: ...to confirm 4 Press the joystick ENTER button again to leave the menu 3 1 6 Color effect The camera can capture standard color images black and white images or sepia tone images 1 While in Photo mode press the joystick ENTER button to enter the Setup menu 2 Use the joystick Up Down button to select the Color Effect option 3 Use the joystick Left Right button to select Color Effect W B or Sepia 4 Pr...

Page 32: ...owing picture to familiarize yourself with the Video mode icons and symbols See the table below for a description of each button s function 1 Video mode 2 Recording Timing 3 Battery status 4 Digital zoom status 5 Display the number of saved video clips 6 Image size indicator 7 Image quality indicator 8 White balance indicator indicates the settings of white balance 9 Video file formats 10 Display ...

Page 33: ...ave the menu 3 2 3 Quality Please refer to 3 1 4 Quality section 3 2 4 White Balance Please refer to 3 1 5 White Balance section 3 2 5 Color effect Please refer to 3 1 6 Color effect section 3 2 6 File format 1 While in Photo mode press the joystick ENTER button to enter the Setup menu to adjust the file format 2 Use the joystick Up Down button to select the File Format option 3 Use the joystick L...

Page 34: ...ption of each button s function 1 Display the number of saved files 2 Battery status 3 Sound recording icon 4 Recording status 5 Recording Timing 3 4 Setup mode You can finish some special settings in this mode This mode contains two menu pages They are system menu 1 2 and system menu 2 2 Turn the camera on and use the joystick Left Right button to system setup unit shown as the picture below and ...

Page 35: ...fer to the section 2 6 2 Setting the language 3 4 4 Auto Display Off Use the auto power off function to set a period of inactivity after which the camera will switch the LCD screen off 1 Turn the camera on and use joystick Left Right button to System icon and then press OK to enter Setup mode 2 Use the joystick Up Down button to select the Auto Display Off option The screen appears as below 3 Use ...

Page 36: ...use joystick Left Right button to System icon and then press OK to enter Setup mode 2 Use joystick Up Down button to select the Auto Power Off option The screen appears as below 3 Use the joystick Left and right button to select 1Min 3Min OFF and press the OK to confirm 4 Press the joystick ENTER button or mode button to leave the menu 3 4 6 Format Use the option to format the current storage medi...

Page 37: ...l settings to the factory default 1 Turn the camera on and use joystick Left Right button to System icon and then press OK to enter Setup mode 2 Use the joystick Up Down button to select the Default 選option and the screen appears as below Press the OK to use the joystick Left Right button to select or 3 Press the OK to confirm 4 Press the joystick ENTER button or mode button to leave the menu 3 4 ...

Page 38: ... icon and then press OK to enter Setup mode 2 Use joystick Up Down button to select the Frequency option The screen appears as below 3 Use the joystick Left Right button to select 50Hz or 60 Hz and press the OK to confirm 4 Press the joystick ENTER button or Mode button to leave the menu Note Press the Mode button and the camera system will switch to mode selection interface in any mode ...

Page 39: ...self with the FM Radio mode icons and symbols See the table below for a description of each button s function 1 Recording time 2 Battery status 3 FM radio mode icon 4 Recording status 5 Volume 6 Channel display 7 Manual search 8 Receiving Station 3 5 2 Operation instructions 1 Turn the camera on and use joystick Left Right button to scroll through Radio icon and then press OK to enter FM radio mod...

Page 40: ...utton and the current channel is 0 1 4 Choose the station you want to receive Press the OK to start recording and press the OK again to stop recording To listen to your FM recording please refer to section 2 9 3 Playing the audio file found on page 23 5 Use the joystick Up Down button to increase or decrease the volume Press the joystick Up button and the current volume increases Press the joystic...

Page 41: ...nction 1 Playing time 2 Battery status 3 Music Player mode icon 4 Repeat mode 5 Volume 6 Audio mode 7 Display the sequence number of the song 3 6 2 Operation instructions 1 Turn the camera on and use joystick Left Right button to the music player unit and then press OK to enter Music Player mode 2 Use the joystick first left or right and then left right button to select to delete all music files s...

Page 42: ... EQ Standard Pop Classical Rock and Bass Short press the joystick ENTER button to switch the repeat modes for playing music Play in Order Repeat One Repeat All Shuffle 6 While playing the music use the joystick Left Right button to switch to the previous next song Press the OK to pause playing and press the Browse to return to the playlist 7 Press and hole the Browse to lock all the buttons of the...

Page 43: ...ng time 4 Movie file name 5 Repeat mode 6 Volume 3 7 2 Operation instructions 1 Turn the camera on and use joystick Left Right button to the movie player unit and then press OK to enter Movie Player mode 2 Use the joystick first left or right and then left right button to select to delete all movie files select to delete all movie files select to cancel deleting or select to delete single movie fi...

Page 44: ... fast rewind forward 2x 4x 8x Press the OK to pause playing and press the Browse to return to the menu for selecting movies Note Fast Forward and Fast Reverse is only supported when playing AVI format files Fast Forward and Fast Reverse are not supported during playback of ASF and MOV format files 7 Press the Mode button and the camera system will switch to mode selection interface Note Convert th...

Page 45: ...o cancel deleting Press the OK to confirm deleting all picture files or single selected picture file 3 In this mode use the joystick Up Down button to select the picture you want to view and press the OK to enter the playback mode Note the picture file name can just display numerals and letters the other symbols will display as random codes 4 When viewing pictures use the joystick Up Down button t...

Page 46: ...camera or the picture viewer can t find the picture files 3 9 Game mode Use the Game mode to operate the four built in games in this camera Boxman Tetris Memory Gobang Turn the camera on and use joystick Left Right button to scroll through the game show as below and then press OK to enter Game mode 3 9 1 Boxman Boxman game is also called pushing the box It s designed to let the player push the box...

Page 47: ...enu 6 While playing the game please use the joystick Left Right Up Down to move the figure and push the box If you walk the wrong step you can press the OK to undo the previous action When you push all the boxes to the locations marked with a little ball you win The screen will appear Next map and then enter the next map 7 Press the Mode button and the camera system will switch to mode selection i...

Page 48: ... games screen will appear the score you get When the score of each level reaches 1500 the screen will appear Next level and then enter the next level the falling speed of the blocks become faster 7 Press the Mode button and the camera system will switch to mode selection interface 3 9 3 Memory game The memory game trains your memory ability by opening two of the same objects continuously 1 Use the...

Page 49: ...enu mode use the joystick Up Down button to select Start option and press OK to enter the game Press the Browse to return to the Gobang menu 4 Under the Gobang menu mode use the joystick Up Down button to select Exit option and press OK to exit the Gobang menu to return to Game Menu 5 Use the joystick Left Right Up down button to move the light mark while playing games Press the OK to put the blac...

Page 50: ...rd programs or not select to record but not and press the OK to confirm 3 The display of pictures by the screen and the playing of the sound by the speaker are synchronized with the external audio video Press the OK and the camera will start recording 4 Press the OK again to stop recording 5 The setting of the function and replaying is the same as that the Photo mode 6 Press the Mode button to ret...

Page 51: ... require a driver to be manually loaded When the driver has been installed and the camera is connected the camera memory and any installed mini SD card will appear as Mass Storage in Windows Explorer Files can be dragged and dropped in the same way as on an ordinary disk To install drivers please follow the instructions below 1 Insert the supplied CD ROM in the CD ROM drive 2 If the CD ROM doesn t...

Page 52: ...splayed 3 Click the Install button to begin the installation process follow the instructions on screen More information about Presto Video Works 6 can be found in the help files when the application is started 5 3 Presto Mr Photo 3 Presto Mr Photo 3 is an advanced photo editing software application To install Presto Mr Photo 3 1 Insert the supplied CD ROM in the CD ROM drive 2 If the CD ROM doesn ...

Page 53: ... supplied software CD ROM in the CD ROM drive 2 Double click the My Computer icon on the desktop Then double click the CD ROM drive icon and then click the setup file of Xvid in the root directory 3 Click XviD exe to start the installation The setup screen appears Click Next to continue 4 Click I accept the agreement to accept the conditions of Software License Agreement and click Next to continue...

Page 54: ...e folder location and click Next to continue 7 Click Next to continue from the additional tasks setup screen 8 Press Install to continue from the main program setup screen 9 Press Cancel if you want to stop setup during installation ...

Page 55: ...53 10 The following screen will appear after the installation is completed Click Finish to complete the installation ...

Page 56: ...t Print mode The error prompt displays when entering the Direct Print mode Please unplug the USB connector from the camera and check to see if the printer is normal and the battery is full and then restart the camera Connect to the printer with proper operation procedures to start printing The camera is down while removing the card Do not remove the memory card while operating The camera could fai...

Page 57: ...Still image Formats JPEG EXIF DPOF Direct Print DPS Resolution SVGA 1 3M 3M 5M 12M firmware interpolation Quality Fine Normal Basic Movie clips MPEG 4 AVI MOV ASF 640 x 480 30 fps 320 x 240 30 fps Audio Support for audio playback Zoom 4x digital zoom TFT screen 2 5 inch LTPS Flash Auto Off Force White balance Auto Sunny Cloudy Tungsten fluorescent EV compensation 2 0 EV 2 0 EV Self timer Off 5 sec...

Page 58: ...format NTSC PAL Shutter 1 4 1 500 second Auto power off Off 1 or 3 minutes user definable Power supply Single rechargeable Li ion battery Dimension 120 L x 56 W x 23 H mm Weight 129g with batteries 102g without batteries ...

Page 59: ......

Page 60: ...w dxgusa com for any product updates or special announcements You can also check out our online support desk where you can register your product send emails to our technical support and find a list of frequently asked questions FAQs DXG USA ...

Reviews: