en
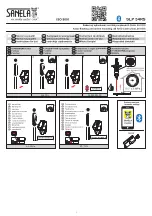
Mounting instructions
Please read the pre-installation information sheets prior to the
installation. These are available to download on the Internet at
www.pro.duravit.com.
An installation video of the complete shower toilet is available
at www.duravit.com/mnt_sewa_starck_f.
Simply use this QR code
2
Installation with DuraSystem
®
The water connection to the SensoWash
®
shower toilet can
be made via a permanent connection (see diagram 2) or
via ductwork in the cistern (generally on a pre-assembled
DuraSystem
®
element, except #WD1010, #WD1009,
#WD1007, #WD1005)
> Use an additional installation kit, see
www.pro.duravit.com.
4
Installing the noise reduction gasket
> If the noise reduction gasket is included in the delivery,
the z thickness must also be taken into consideration:
z + 50 mm.
> Install the noise reduction gasket.
20
Choosing and installing mounting clip
The delivery contains two mounting clips.
> Choose clip according to cable diameter.
25
-
26
Installing interface with actuator plate (optional)
> Install Interface Set for functional interface with
DuraSystem
®
actuator plate A2.
44
+
58
Testing
> Connect the power and water supply.
> Confirm that the product functions properly according
to the operating instructions.
52
Install anti-theft protection
> To fix the remote control permanently to the wall holder
go to step 54.
57313_Mounting_SeWa_Starckf_EU/20.01.2
9
Summary of Contents for SensoWash Starck f
Page 1: ...SensoWash Starck f 650000 01 2 00 4320 650001 01 2 00 4310 ...
Page 6: ...100 57313_Mounting_SeWa_Starckf_EU 20 01 2 650001 01 2 00 4310 650000 01 2 00 4320 ...
Page 8: ...15 Nm 1 2 L N PE 102 57313_Mounting_SeWa_Starckf_EU 20 01 2 22 21 20 19 18 17 16 15 14 13 ...
Page 12: ...1 2 M2x8 106 57313_Mounting_SeWa_Starckf_EU 20 01 2 58 57 56 55 54 ...
Page 13: ......


