7
SILICONE
CAULKING
Figure 5
INTERIOR STRAIGHT INSTALLATION - SINGLE FLOOR (CONT’D)
2
NOTE: DIAGRAMS & ILLUSTRATIONS ARE NOT TO SCALE.
Step 6: Place the square-to-round collar around the
chimney on top of the RCS support. Make sure
it completely covers the top of the support. This
will help to prevent construction debris or attic
insulation from falling within the support.
Step 7: Stack the next chimney length on the first
length. Be sure that the male and female threads
are not in line when putting the lengths together.
Turn the chimney clockwise to lock it in place.
Continue until the required chimney height is
reached. You may add a self tapping screw to
prevent accidental unlocking.
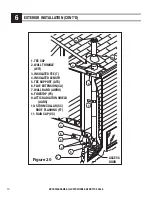
Step 8:
ROOF FLASHING INSTALLATION
Put the roof flashing in place. Seal the joint
between the roof and the flashing with
roofing compound. For sloping roofs, place
the flashing under the upper shingles and on
top of the lower shingles. Nail the flashing
to the roof. Place the storm collar around
the chimney and slide down on top of the
flashing. Tighten it with the bolt supplied and
make sure the joint is properly caulked (see
Figure 5).
Step 9: Attach the rain cap to the top of the chimney.
(see page 3, Cap removal/maintenance)


