background image

26

T C - 1 5   T R E E   C H I P P E R                        


O P E R A T I N G   I N S T R U C T I O N S

3.15 Transporting the TC-15 TREE CHIPPER

1.  Make sure towing vehicle hitch is properly equipped for the hitch of the TC-15 TREE CHIPPER.

2.  Properly attach the chipper to the towing vehicle and install safety pins.  Securely attach safety chains to 

the towing vehicle.

3.  Check tire pressure and wheel rims for fatigue or loose bolts.

4.  Hook up electrical connections and make sure all taillights and turn signals function properly.

5.  Raise tongue jack to transport position.

6.  Clean infeed of all debris.

7.  Point discharge chute toward the hitch for transport.

8.  Remove wheel blocks and check machine for any loose items that might get lost during transport.

Section 4:  Engine Maintenance

Engine oil level, engine coolant level, air filters, and fan belt tension should be checked daily.  All debris and 

combustible or ignitable material should be cleared from the engine compartment daily or more often as conditions 

warrant. When cleaning the engine compartment, pay particular attention to the top of the engine.  Follow the engine 

manufacturer’s recommendations for the replacement of parts and fluids, and follow the manufacturer’s recommended 

maintenance schedule.  Engine specifications should be found in the Operation and Maintenance manual for the engine.

Summary of Contents for TC-15

Page 1: ...stries International Inc PO Box 1940 Jamestown ND 58402 1940 Tel 701 252 4601 Fax 701 252 0502 www duratechindustries net www haybuster com TC 15 Tree Chipper Manual I Operating Instructions and Parts...

Page 2: ...Clearing the Way for a Better Tomorrow...

Page 3: ...m time to time Even in the event of such updates you should still find this manual to be appropriate for the safe operation and maintenance of your unit This manual as well as materials provided by co...

Page 4: ...Clearing the Way for a Better Tomorrow...

Page 5: ...ation and maintenance of your machine This manual as well as materials provided by component suppliers to DuraTech Industries are all considered to be part of the information package Every operator is...

Page 6: ...ngine Control Panel 16 2 3 Other controls 17 Section 3 Operation 19 3 1 Pre starting inspection instructions 19 3 2 Normal shut down procedure 19 3 3 Emergency stopping 20 3 4 Safety bumper bars 21 3...

Page 7: ...6 5 11 Changing knives 37 6 0 Troubleshooting the TC 15 38 6 1 General trouble shooting 38 6 2 Troubleshooting the feed control and electronic monitoring system PLC 39 Appendix A WARRANTY 43 Appendix...

Page 8: ...HYDRAULIC PUMP ASSEMBLY CAT ENGINE 89 SEQUENCE VALVE ASSEMBLY 90 FEEDWHEEL HYDRAULIC MOTORS 91 DISCHARGE HYDRAULICS 92 HYDRAULIC CYLINDER ASSEMBLY 94 GATHERING WINCH HYDRAULICS OPTION 96 5700991 HPTO...

Page 9: ...1 T C 1 5 T R E E C H I P P E R O P E R A T I N G I N S T R U C T I O N S TC 15 TREE Chipper Part 1 Operating Instructions TM...

Page 10: ...e shooting section that may help in case of problems in the field Any information not covered in this manual may be obtained from your dealer SPECIAL NOTE When reference is made as to front rear left...

Page 11: ...ach part identified A key on the facing page contains a description of the part and the quantity used Operator responsibilities The operator is responsible for his own safety The operator is responsib...

Page 12: ...C 15 TREE CHIPPER Decals are illustrated in Part 2 Parts Reference The safety decals located on your machine contain important and useful information that will help you operate your equipment safely T...

Page 13: ...ates a potentially hazardous situation that if not avoided may result in minor or moderate injury It may also be used to alert against unsafe practices DANGER INFORMATION CAUTION WARNING This manual u...

Page 14: ...t at all times Clothing must be sturdy and snug fitting but allow complete freedom of movement Avoid loosefitting jackets scarfs neckties jewelry flared or cuffed pants unconfined long hair or anythin...

Page 15: ...BER WAIT FOR ALL MOVEMENT TO STOP BEFORE SERVICING UNLOADING OR INSPECTING MACHINE DANGER OBJECTS THROWN BY MACHINE DO NOT OPERATE WITHOUT WEARING SAFETY GLASSES AND A HARD HAT KEEP UNAUTHORIZED PERSO...

Page 16: ...STARTING FLUID WITH ENGINE PREHEATER DANGER NEVER REACH INSIDE INFEED CHUTE 6500040 WARNING FOR YOUR PROTECTION KEEP ALL SHIELDS IN PLACE AND SECURED WHILE MACHINE IS OPERATING MOVING PARTS WITHIN CA...

Page 17: ...TC 15 TREE CHIPPER Check hydraulic oil level 6500339 WARNING PINCH POINT STAY BACK WARNING CHECK FOR FIRES CLEAN OFF DEBRIS SWITCH OFF BATTERY NEVER LEAVE THIS MACHINE UNATTENDED UNTIL ALL POTENTIAL...

Page 18: ...le Make no modifications to the machine unless specifically recommended or requested by DuraTech Industries Check periodically for breaks or unusual wear and make necessary repairs Do not wear torn or...

Page 19: ...panel is pressed Feed reverse will still function after the safety bumper is activated Never reach into the infeed hopper area The feedwheels are designed to pull trees and shrubs into the machine and...

Page 20: ...tructed differently in this manual Never work on or near the TC 15 TREE CHIPPER unless engine is shut off Check periodically and tighten any loose bolts or connections Use only replacement parts that...

Page 21: ...n or reaction Do not operate the TC 15 TREE CHIPPER indoors Make sure wheels are always blocked before running the chipper 1 6 Towing road transport Discharge spout needs to be in transport position p...

Page 22: ...the controller determines how the HPTO unit will function during start up The Power LED illuminates to notify the operator that the controller is receiving switched power from the engine ignition swi...

Page 23: ...ed as failed start attempts They are The engine speed goes to zero and the engine stalls while the clutch is engaging The operator attempts to increase engine speed while the clutch is engaging The op...

Page 24: ...panel is located on rear of the engine compartment Controls and gauges on the control panel include the key switch fuel gauge safety bar reset and the engine management screen and controls Left side c...

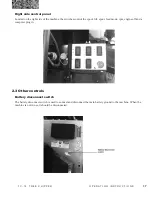
Page 25: ...ht side of the machine the switches control the spool lift spout feed mode rpm engine off and a computer plug in 2 3 Other controls Battery disconnect switch The battery disconnect switch is used to c...

Page 26: ...e RPM recovers feed forward will reengage If engine RPM does not recover in 10 seconds feed forward will not reengage until RPM s recover and feed forward switch is pressed Disc access safety switch T...

Page 27: ...can be invisible and have enough force to penetrate the skin When searching for a suspected leak use a piece of wood or cardboard rather than your hands If injured seek medical attention immediately...

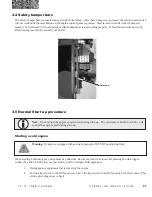
Page 28: ...o stop turning Note Chipper disc rotation can be checked by looking at the end of the shaft on the side of the chipper housing 3 3 Emergency stopping Notice Emergency shutoff controls are for EMERGENC...

Page 29: ...nsult your dealer Safety bar 3 5 Normal Start up procedure Note Do not adjust the engine speed control during start up The electronic control Unit ECU will control the engine speed during start up Sta...

Page 30: ...tart within 30 seconds release the starter switch or button and wait two minute to allow the starting motor to cool before attempting to start the engine again 3 Allow the key switch to return to the...

Page 31: ...to help the engine RPM recover 3 10 Feed Forward Reverse Located on either control panel the switch labeled FEED will start the feed wheels when pressing FWD or REV If the light bars were contacted t...

Page 32: ...limbs and branches 3 13 Unplugging Procedure Always run the chipper at full engine speed Dull knives can create chunks and slivers causing the engine to lug This also contributes to the chipper plugg...

Page 33: ...er stop to engage winch clutch and make sure handle is in the lock position 3 Using the SPOOL switch on the left or right control panel pull the wood material to the chipper 4 Unhook cable from the wo...

Page 34: ...f all debris 7 Point discharge chute toward the hitch for transport 8 Remove wheel blocks and check machine for any loose items that might get lost during transport Section 4 Engine Maintenance Engine...

Page 35: ...mage the drive train bearings or hydraulic components Clamp the ground cable from the welder to the component that will be welded Place the clamp as close as possible to the weld This will help reduce...

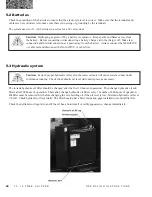
Page 36: ...TIVE cable last and disconnect the NEGATIVE cable first 5 3 Hydraulic system Caution Lack of proper hydraulic oil level in the reservoir tank will cause system to heat under continuous running Check t...

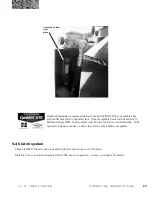
Page 37: ...fluids include Mobil 423 Farmland Super HTB Conoco Hydroclear Power Tran Fluid or similar fluids If the hydraulic tank does not have a decal then all the above fluid is acceptable 5 4 Clutch system C...

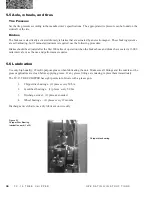
Page 38: ...n when the brake shoes and drums have seated at 3 000 mile intervals or as the use and performance requires 5 6 Lubrication Use only high quality 2 multi purpose grease when lubricating the unit Make...

Page 39: ...P E R O P E R A T I N G I N S T R U C T I O N S Chipper disc bearing Figure 5 2 Chipper Disc Bearing lubrication zerk 2 of 2 Figure 5 3 Feedwheel Bearings lubrication zerks Feedwheel bearings 1 of 2...

Page 40: ...N S T R U C T I O N S Figure 5 4 Discharge Swivel lubrication point Discharge swivel 5 7 Wear parts The feedwheel slide has friction pads and wear pads that will need to be replaced from time to time...

Page 41: ...Tension when slipping Never apply belt dressing as this will damage the belt and cause early failure 6 Make sure tension belt does not slip at start up 7 Verify sheave alignment by laying a straight e...

Page 42: ...n the engine mount 3 Using the Tensioning Procedure adjust belt tension using the tensioner rod on the tension assembly 4 Retighten the 6 engine mounting bolts 5 Close belt cover Torques for sheave bo...

Page 43: ...ount of tension on the top feedwheel 1 Spring tension can be increased by tightening jam nuts on the bottom spring hook assembly 2 Higher spring tension provides greater grip force 5 9A Torquing the f...

Page 44: ...o the access hole 3 Using a feeler gauge check the clearance between the knife anvil and the cutting edge of each knife Anvil is set to the knife that is located closest to the anvil 4 Inspect anvil e...

Page 45: ...ough hole in chipper housing and hole in disc that allows access to knives to be changed 2 Loosen nuts and remove bolts and knife Either rotate knife and replace or insert new replacement knife insert...

Page 46: ...k bearing 3 Disc is not properly set on shaft 3 Disc should have min 11 16 clearance to housing on feed side Slide disc on shaft Chipper makes poor quality chips or does not feed properly 1 Knives los...

Page 47: ...Feed roller reverse input will turn on feed roller reverse output to a fixed speed Feed Roll Raise Feed roll raise input will turn on feed roll raise output Clutch This input will tell the controller...

Page 48: ...ne rpm will have to be raised above the programmable adjustable set point and the feed roll forward switch will need to be pressed to start operation Safety Bar If safety bar is pressed or disconnecte...

Page 49: ...41 T C 1 5 T R E E C H I P P E R O P E R A T I N G I N S T R U C T I O N S...

Page 50: ...42 T C 1 5 T R E E C H I P P E R O P E R A T I N G I N S T R U C T I O N S...

Page 51: ...hich originally sold the product and all warranty adjustments must be made through same This warranty does not apply to tires or bearings or any other trade accessories not manufactured by DuraTech In...

Page 52: ...uel capacity 40 gallon 152 L Hydraulic oil capacity 25 gallon 95 L Lights Clearance and Directional Transmission PT Tech HPTO Chipping capacity 15 38 1 cm Infeed hopper opening 40 x 64 102 cm x 163 cm...

Page 53: ...TC 15 Tree Chipper Part 2 Parts Reference T C 1 5 T r e e C h i p p e r P A R T S R E F E R E N C E 45 T M...

Page 54: ...46 T C 1 5 T r e e C h i p p e r P A R T S R E F E R E N C E T R A I L E R A S S E M B L Y...

Page 55: ...17 WASH LOCK 3 8 17 5000053 2 WASH LOCK 1 18 5700202 6 LAMP GRMMT 2 1 2KIT W PLUG 19 5700725 1 SWITCH BRAKE BREAKAWAY 20 5700861 2 LAMP CL 12VDC 2 1 2ROUND RED SEALED 21 5701015 4 LAMP CL 12VDC 2 1 2...

Page 56: ...48 T C 1 5 T r e e C h i p p e r P A R T S R E F E R E N C E C A T E N G I N E A S S E M B L Y F O R S N U P T O 0 0 1 0...

Page 57: ...16 19 5000098 4 WASH FLAT 7 8 20 5000106 4 WASH LOCK 7 8 21 5700682 1 SNSR MAG HPTO12 3 8 DIA 22 5700957 1 SWITCH PRESS 295 NO 23 5700970 1 VALVE CLTCH SOL 24V 770 DEUTSCH 24 6200061 1 KEY SQ 1 2X2 1...

Page 58: ...50 T C 1 5 T r e e C h i p p e r P A R T S R E F E R E N C E C A T E N G I N E A S S E M B L Y T I E R 3 F O R S N 0 0 1 1 A N D U P...

Page 59: ...1 2 NC 17 4900142 1 NUT TPLCK 5 16 NC 18 5000022 2 WASH LOCK 5 16 19 5000098 4 WASH FLAT 7 8 20 5000106 4 WASH LOCK 7 8 21 6300212 1 GUARD PLLY END WELD 22 6300229 1 MNT ENG CAT_C4 4 T3 CHIP 23 63002...

Page 60: ...52 T C 1 5 T r e e C h i p p e r P A R T S R E F E R E N C E D I S C A S S E M B L Y...

Page 61: ...512 1 BRG PB 3 2BOLT E DODGE 6 2900170 1 CAP END BRG 3 PB E 7 4800567 3 BOLT HEX 5 8X5 NC GR8 8 4800628 16 BOLT HEX 1 2X1 1 4 GR8 NC 9 4801204 12 SCR CSK ALN 1 2X3 NC 10 4900019 12 NUT HEX 1 2 GR8 NC...

Page 62: ...54 T C 1 5 T r e e C h i p p e r P A R T S R E F E R E N C E I N F E E D A S S E M B L Y V I E W 1...

Page 63: ...NUT HEX 3 4 NC 19 4900009 16 NUT HEX 1 4 NC 20 4900014 6 NUT TPLCK 1 2 NC 21 4900040 16 NUT FLG SERR 1 4 NC 22 4900046 8 NUT JAM 1 2 NC 23 5000001 4 WASH FLAT 3 8 24 5000003 3 WASH LOCK 5 8 25 5000006...

Page 64: ...56 T C 1 5 T r e e C h i p p e r P A R T S R E F E R E N C E I N F E E D A S S E M B L Y V I E W 1 D E T A I L S A B C...

Page 65: ...4900004 2 NUT HEX 3 4 NC 19 4900009 16 NUT HEX 1 4 NC 20 4900014 6 NUT TPLCK 1 2 NC 21 4900040 16 NUT FLG SERR 1 4 NC 22 4900046 8 NUT JAM 1 2 NC 23 5000001 4 WASH FLAT 3 8 24 5000003 3 WASH LOCK 5 8...

Page 66: ...58 T C 1 5 T r e e C h i p p e r P A R T S R E F E R E N C E I N F E E D A S S E M B L Y V I E W 2 F O R S N U P T O 0 0 1 0...

Page 67: ...8 NC 7 4900030 2 NUT NYLCK 3 8 NC 8 4900084 2 NUT TPLCK 1 4 NC 9 5000006 4 WASH LOCK 1 2 10 5000019 6 WASH LOCK 3 8 11 5000114 4 WASH FLAT 5 8 EXTRTHK GR8 12 6300125 1 COVER CLEANOUT HSG DISC ASSY 13...

Page 68: ...60 T C 1 5 T r e e C h i p p e r P A R T S R E F E R E N C E I N F E E D A S S E M B L Y V I E W 2 F O R S N 0 0 1 1 A N D U P...

Page 69: ...K 3 8 8 5000114 4 WASH FLAT 5 8 EXTRTHK GR8 9 5700202 2 LAMP GRMMT 2 1 2KIT W PLUG 10 5700861 2 LAMP CL 12VDC 2 1 2ROUND RED SEALED 11 5701155 4 REFL RD 2 375 RED ADHESIVE 12 6300140 1 DEFL SPOUT DISC...

Page 70: ...62 T C 1 5 T r e e C h i p p e r P A R T S R E F E R E N C E I N F E E D A S S E M B L Y V I E W 3...

Page 71: ...1 2X2 1 2 NC 4 4800634 6 BOLT HEX 1 2X1 1 2 GR8 NC 5 4800662 6 SCR CAP ALN 1 4X3 4 NC 6 5000006 10 WASH LOCK 1 2 7 6300014 1 ARM R ROCKER RLLR FEED 8 6300102 1 MNT MTR FEED SLIDE 9 6300168 1 HSG DISC...

Page 72: ...64 T C 1 5 T r e e C h i p p e r P A R T S R E F E R E N C E I N F E E D A S S E M B L Y V I E W 4...

Page 73: ...X3 4 NC 9 4900003 6 NUT HEX 5 16 NC 10 4900104 2 NUT JAM 3 4 NC 11 4900127 1 NUT TPLCK 1 NC 12 5000003 8 WASH LOCK 5 8 13 5000022 6 WASH LOCK 5 16 14 5700680 1 SNSR MAG 15 6100024 2 SPG COMP 1 125OD 1...

Page 74: ...66 T C 1 5 T r e e C h i p p e r P A R T S R E F E R E N C E D I S C H A R G E A S S E M B L Y V I E W 1...

Page 75: ...4900076 8 NUT FLG SERR 3 8 NC 19 4900141 2 NUT TPLCK 5 8 GR8 NC 20 5000001 7 WASH FLAT 3 8 21 5000002 2 WASH FLAT 5 8 22 5000006 6 WASH LOCK 1 2 23 5000019 6 WASH LOCK 3 8 24 5000022 8 WASH LOCK 5 16...

Page 76: ...68 T C 1 5 T r e e C h i p p e r P A R T S R E F E R E N C E D I S C H A R G E A S S E M B L Y V I E W 2...

Page 77: ...4900076 8 NUT FLG SERR 3 8 NC 19 4900141 2 NUT TPLCK 5 8 GR8 NC 20 5000001 7 WASH FLAT 3 8 21 5000002 2 WASH FLAT 5 8 22 5000006 6 WASH LOCK 1 2 23 5000019 6 WASH LOCK 3 8 24 5000022 8 WASH LOCK 5 16...

Page 78: ...70 T C 1 5 T r e e C h i p p e r P A R T S R E F E R E N C E R I G H T H A N D C O N T R O L P A N E L A S S E M B L Y...

Page 79: ...T FLG SERR 1 4 NC 5 4900096 10 NUT HEX 8 NC 6 5000092 5 WASH LOCK 8 7 5700028 2 SWITCH MAINT PB RED MUSH 8 5700328 9 SWITCH RCKR MNT PNL SNGL 9 5700542 8 SWITCH RCKR DPDT 24VUNLIT 15A MOMNTRY W RASED...

Page 80: ...72 T C 1 5 T r e e C h i p p e r P A R T S R E F E R E N C E L E F T H A N D C O N T R O L P A N E L A S S E M B L Y...

Page 81: ...FLG SERR 1 4 NC 5 4900096 10 NUT HEX 8 NC 6 5000092 5 WASH LOCK 8 7 5700028 2 SWITCH MAINT PB RED MUSH 8 5700328 9 SWITCH RCKR MNT PNL SNGL 9 5700542 8 SWITCH RCKR DPDT 24VUNLIT 15A MOMNTRY W RASED B...

Page 82: ...74 T C 1 5 T r e e C h i p p e r P A R T S R E F E R E N C E S H R O U D A S S E M B L Y V I E W 1...

Page 83: ...0133 7 NUT FLG 1 2 NC 14 5000001 4 WASH FLAT 3 8 15 5000003 6 WASH LOCK 5 8 16 5000019 4 WASH LOCK 3 8 17 5000024 4 WASH LOCK 1 4 18 5700090 2 CLAMP CUSH HD 16 1 19 5700202 2 LAMP GRMMT 2 1 2KIT W PLU...

Page 84: ...76 T C 1 5 T r e e C h i p p e r P A R T S R E F E R E N C E S H R O U D A S S E M B L Y V I E W 2...

Page 85: ...0133 7 NUT FLG 1 2 NC 14 5000001 4 WASH FLAT 3 8 15 5000003 6 WASH LOCK 5 8 16 5000019 4 WASH LOCK 3 8 17 5000024 4 WASH LOCK 1 4 18 5700090 2 CLAMP CUSH HD 16 1 19 5700202 2 LAMP GRMMT 2 1 2KIT W PLU...

Page 86: ...78 T C 1 5 T r e e C h i p p e r P A R T S R E F E R E N C E F U E L A N D H Y D R A U L I C O I L T A N K A S S E M B L Y...

Page 87: ...X1 1 16FOR 10GPM 8 4400112 1 FLTR HYD RET 15GPM TTF 9 4704786 1 GUARD SENSOR TANK FUEL 10 4704787 1 CVR SENSOR TANK FUEL 11 4800503 2 BOLT HEX 1 4X5 8 NC 12 4800592 3 BOLT HEX 1 2X3 1 4 13 4900001 3 N...

Page 88: ...80 T C 1 5 T r e e C h i p p e r P A R T S R E F E R E N C E G A T H E R I N G W I N C H A S S E M B L Y O P T I O N...

Page 89: ...3 8 9 5800032 1 HOOK SLIP 5 16 GR70 LATCH 10 5800035 1 WINCH HYD 9000 11 5800036 1 FAIRLEAD RLLR ASSY 12 5800041 1 LOCK HMMR CHAIN WINCH 9 32 13 5800331 1 CABLE 1 4 ASSY CHIPPER 14 6300107 1 SUPPORT C...

Page 90: ...82 T C 1 5 T r e e C h i p p e r P A R T S R E F E R E N C E 4 0 0 0 4 0 3 M A N I F O L D V A L V E A S S E M B L Y...

Page 91: ...WAY 4 4000350 1 VALVE HYD CART PILOT 110P 4 Seal 4000358 VALVE SEAL KIT SZ10 2 3 OR 4 WAY 5 4000351 2 VALVE HYD CART RELIEF 1000 5Seal 7501370 SEAL KIT VLV SZ8 2WAY 6 4000352 1 VALVE HYD CART PROPOR 6...

Page 92: ...84 T C 1 5 T r e e C h i p p e r P A R T S R E F E R E N C E M A N I F O L D V A L V E H Y D R A U L I C A S S E M B L Y...
Page 93: ...A R T S R E F E R E N C E 1 3800477 3 FTG 3 4MORX3 4MJIC ST 2 3800527 1 FTG 7 8MORX1 1 16MJIC ST 3 3800537 2 FTG 3 4MORX3 4MJIC 90 4 3800631 4 FTG 9 16MORX9 16MJIC ST 5 4000403 1 VLV MANIFOLD ASSY CH...

Page 94: ...86 T C 1 5 T r e e C h i p p e r P A R T S R E F E R E N C E H Y D R A U L I C T A N K A S S E M B L Y...

Page 95: ...1 1 16FJICSX1 1 16FJIC90 FROM VALVE T TO FILTER 5 3800279 1 FTG 1 1 16MORX1 1 16MJIC 90 6 3800453 1 FTG 3 4MORX9 16MJIC 90 7 3800484 1 FTG 3 4FJICSX3 4MJICX3 4MJIC RUN TEE 8 3800490 1 FTG 3 4MOR PLUG...

Page 96: ...S ITEM PART QTY PART DESCRIPTION 1 O900150 1 CLUTCH HPTO8 CHIPPER 2 3700997 1 HOSE HYD 1 2X26 3 4FJICSX3 4FJIC90 FROM SEQUENCE T TOP TO CLUTCH TOP 3 3700998 1 HOSE HYD 1 2X62 3 4FJICSX3 4FJIC90 FROM...

Page 97: ...E 1 3700996 1 HOSE HYD 1 2X23 3 4FJICSX3 4FJIC45 FROM PUMP TO SEQUENCE T FRONT 2 3701514 1 HOSE HYD 3 4X60 1 1 16FJICSX1 1 16FJIC90 FROM TANK OUT TO PUMP IN 3 3800277 1 FTG 1 1 16MORX1 1 16MJIC ST 4...

Page 98: ...3 4FJIC90 FROM SEQUENCE T TOP TO CLUTCH TOP 3 3700999 1 HOSE HYD 1 2X48 3 4FJICSX3 4FJIC90 FROM SEQUENCE SIDE TO TANK T 4 3701513 1 HOSE HYD 1 2X87 3 4FJICSX3 4FJIC90 FROM SEQUENCE REAR TO VALVE P 5 3...

Page 99: ...TOR FEED BOTTOM TOP PORT 2 3701009 1 HOSE HYD 1 2X48 3 4FJICSX3 4FJIC90 VALVE E TO MOTOR FEED TOP TOP PORT 3 3701010 1 HOSE HYD 1 2X36 3 4FJICSX3 4FJIC90 MOTOR FEED BOTTOM BOTTOM PORT TO MOTOR FEED TO...

Page 100: ...3 8X39 3 4FJICSX9 16FJIC90 FROM VALVE A TO MOTOR SPOUT RH 2 3701003 1 HOSE HYD 3 8X39 3 4FJICSX9 16FJIC90 FROM VALVE B TO MOTOR SPOUT LH 3 3800631 2 FTG 9 16MORX9 16MJIC ST 4 3800675 2 FTG 7 8MORX3 4...

Page 101: ...93 T C 1 5 T r e e C h i p p e r P A R T S R E F E R E N C E Clearing the Way for a Better Tomorrow...

Page 102: ...94 T C 1 5 T r e e C h i p p e r P A R T S R E F E R E N C E H Y D R A U L I C C Y L I N D E R A S S E M B L Y...

Page 103: ...6FJICSX9 16FJIC90 VALVE D TO CYLINDER BOTTOM LIFT 2 3700653 1 HOSE HYD 3 8X336 9 16FJICSX9 16FJIC90 VALVE C TO CYLINDER TOP LIFT 3 3800453 2 FTG 3 4MORX9 16MJIC 90 4 3800631 2 FTG 9 16MORX9 16MJIC ST...

Page 104: ...96 T C 1 5 T r e e C h i p p e r P A R T S R E F E R E N C E G A T H E R I N G W I N C H H Y D R A U L I C S O P T I O N...

Page 105: ...T I O N 1 3701007 1 HOSE HYD 1 2X35 3 4FJICSX3 4FJIC90 FROM VALVE H TO MOTOR WINCH FRONT 2 3701008 1 HOSE HYD 1 2X37 3 4FJICSX3 4FJIC90 FROM VALVE G TO MOTOR WINCH REAR 3 3800328 2 FTG 7 8MORX3 4MJIC...

Page 106: ...98 T C 1 5 T r e e C h i p p e r P A R T S R E F E R E N C E 5 7 0 0 9 9 1 H P T O W I R I N G H A R N E S S F O R S N U P T O 0 0 1 0...

Page 107: ...99 T C 1 5 T r e e C h i p p e r P A R T S R E F E R E N C E 5 7 0 1 1 4 3 E N G I N E C O N T R O L P A N E L F O R S N 0 0 1 1 A N D U P...

Page 108: ...100 T C 1 5 T r e e C h i p p e r P A R T S R E F E R E N C E 5 7 0 1 0 2 4 M A C H I N E W I R I N G H A R N E S S...

Page 109: ...101 T C 1 5 T r e e C h i p p e r P A R T S R E F E R E N C E E L E C T R I C A L S C H E M A T I C 1 F O R S N U P T O 0 0 1 0...

Page 110: ...102 T C 1 5 T r e e C h i p p e r P A R T S R E F E R E N C E E L E C T R I C A L S C H E M A T I C 1 F O R S N 0 0 1 1 A N D U P...

Page 111: ...103 T C 1 5 T r e e C h i p p e r P A R T S R E F E R E N C E E L E C T R I C A L S C H E M A T I C 2...

Page 112: ...104 T C 1 5 T r e e C h i p p e r P A R T S R E F E R E N C E E L E C T R I C A L S C H E M A T I C 3...

Page 113: ...105 T C 1 5 T r e e C h i p p e r P A R T S R E F E R E N C E Clearing the Way for a Better Tomorrow...

Page 114: ...C h i p p e r P A R T S R E F E R E N C E D E C A L S 6500040 6500082 6500118 6500123 6500221 6500224 6500245 6500339 6500373 6500404 6500405 6500445 6500446 6500447 6500448 6500449 6500516 6500455 65...

Page 115: ...00339 2 DECAL WARN PINCH POINT 6500373 1 DECAL INFO BATT DISC 6500404 1 DECAL PNL CNTRL LEFT CHIPPER 6500405 1 DECAL PNL CNTRL RIGHT CHIPPER 6500425 2 DECAL WARN FIRE PREVENT 6500445 2 DECAL DNGR CHUT...

Page 116: ...108 T C 1 5 T r e e C h i p p e r P A R T S R E F E R E N C E D E C A L L O C A T I O N S 6500449 6500118 6500373...

Page 117: ...09 T C 1 5 T r e e C h i p p e r P A R T S R E F E R E N C E D E C A L L O C A T I O N S 6500425 6500448 6500455 6500447 6500373 6500118 6500221 6500224 6500082 6500446 6500339 6500516 6500040 6500478...

Page 118: ...110 T C 1 5 T r e e C h i p p e r P A R T S R E F E R E N C E D E C A L L O C A T I O N S 6500425 6500118 6500123 6500516 6500339 6500040 6500082 6500446 6500455...

Page 119: ...___________________________________________________________________ ____________________________________________________________________ _______________________________________________________________...

Page 120: ...112 T C 1 5 T r e e C h i p p e r P A R T S R E F E R E N C E Send your comments to DuraTech Industries International Inc P O Box 1940 Jamestown ND 58402 1940...

Page 121: ...113 T C 1 5 T r e e C h i p p e r P A R T S R E F E R E N C E A P P E N D I X C S C H E M A T I C F O L D O U T S A P P E N D I X C F O L D O U T S...

Page 122: ...114 T C 1 5 T r e e C h i p p e r P A R T S R E F E R E N C E Clearing the Way for a Better Tomorrow...

Page 123: ...FO 1 T C 1 5 T r e e C h i p p e r P A R T S R E F E R E N C E 5 7 0 0 9 1 2 M A I N H A R N E S S F O R S N U P T O 0 0 1 0...

Page 124: ...FO 2 T C 1 5 T r e e C h i p p e r P A R T S R E F E R E N C E 5 7 0 1 1 4 3 M A I N H A R N E S S F O R S N 0 0 1 1 A N D U P...

Reviews: