background image

IB-DVD1002 (AT)-WM-E-032706

SAFETY INSTRUCTIONS

TO PREVENT FIRE OR SHOCK HAZARD, DO NOT USE THE PLUG WITH AN EXTENSION CORD,
RECEPTACLE OR OTHER OUTLET UNLESS THE BLADES CAN BE FULLY INSERTED TO PREVENT
BLADE  EXPOSURE.  TO  REDUCE  THE  RISK  OF  FIRE  OR  ELECTRIC  SHOCK,  DO  NOT  EXPOSE
THIS  APPLIANCE  TO  RAIN  OR  MOISTURE.  TO  PREVENT  ELECTRICAL  SHOCK,  MATCH  WIDE
BLADE PLUG TO WIDE SLOT, FULLY INSERT.

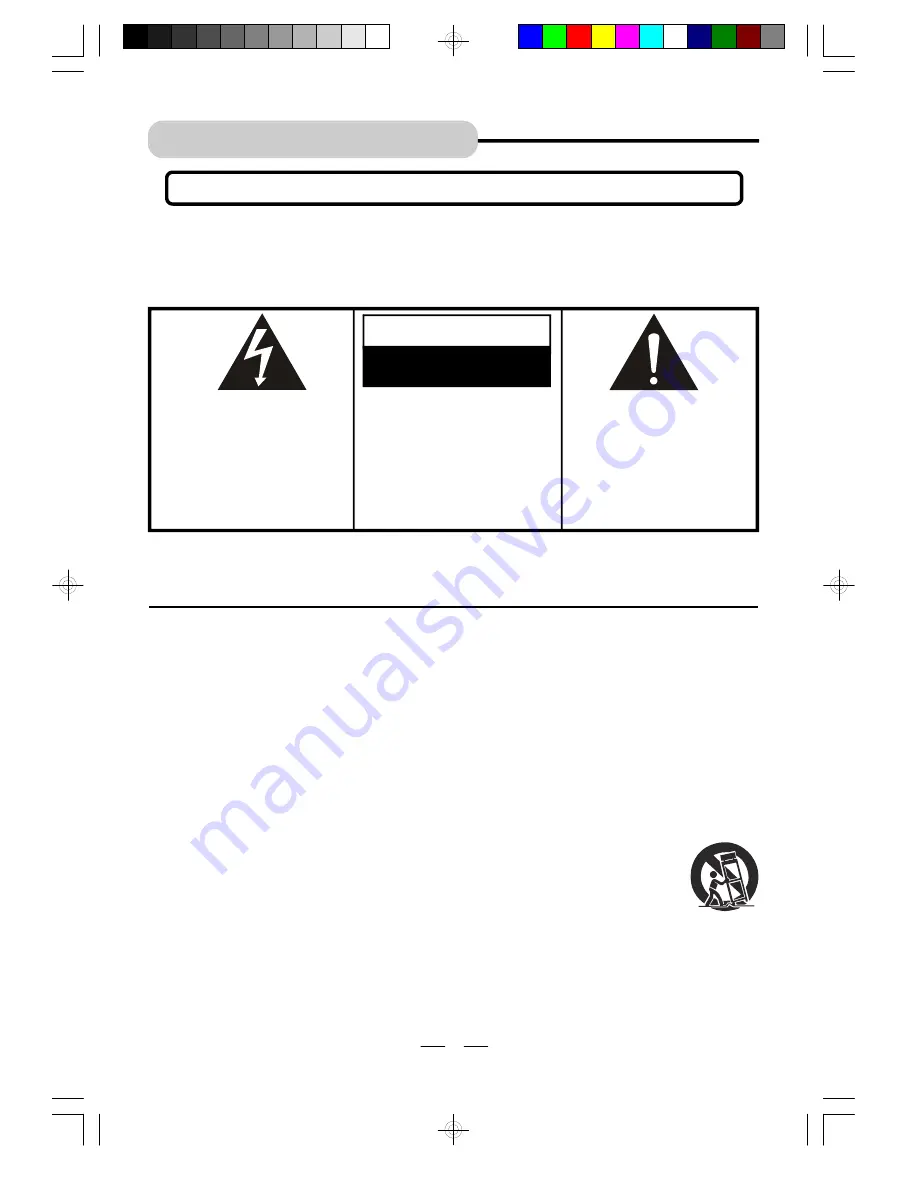
WARNING

The  lightning  flash  with

arrowhead  symbol,  within  an

equilateral triangle, is intended

to alert the user to the presence

of  uninsulated 

dangerous

voltage

  within  the  product

s

enclosure  that  may  be  of

sufficient 

magnitude 

to

constitute  a  risk  of  electric

shock  to  persons.

CAUTION

RISK  OF  ELECTRIC  SHOCK

DO  NOT  OPEN

WARNING:  TO  REDUCE  THE
RISK  OF  ELECTRIC  SHOCK,
DO NOT REMOVE COVER (OR
BACK). 

NO 

USER

SERVICEABLE  PARTS  INSIDE.
REFER 

SERVICING 

TO

QUALIFIED 

SERVICE

PERSONNEL.

The exclamation point within
an  equilateral  triangle  is
intended  to  alert  the  user  to
the  presence  of  important
operating  and  maintenance
(servicing) instructions in the
literature  accompanying  the
appliance.

IMPORTANT SAFETY INSTRUCTIONS

1

S3152A

13.Unplug  this  apparatus  during  lightning  storms  or  when  unused  for  long  periods  of  time.
14. Refer  all  servicing  to  qualified  service  personnel.  Servicing  is  required  when  the  apparatus  has

been damaged in any way, such as power-supply cord or plug is damaged, liquid has been spilled
or  objects  have  fallen  into  the  apparatus,  the  apparatus  has  been  exposed  to  rain  or  moisture,
does  not  operate  normally  or  has  been  dropped.

15. This  appliance  shall  not  be  exposed  to  dripping  or  splashing  water  and  that  no  object  filled  with

liquid  such  as  vases  shall  be  placed  on  the  apparatus.

Rating  plate  and  caution  marking  are  marked  on  the  bottom  enclosure  of  the  apparatus.


1. Read  these  instructions.

  2. Keep  these  instructions.
  3. Heed  all  warnings.
  4. Follow  all  instructions.
  5. Do  not  use  this  apparatus  near  water.
  6. Clean  only  with  dry  cloth.
  7. Do  not  block  any  ventilation  openings,  install  in  accordance  with  the  manufacturer

s  instructions.

  8. Do not install near any heat sources such as radiators, heat registers, stoves, or other apparatus

(including  amplifiers)  that  produce  heat.

  9. Do not defeat the safety purpose of  the polarized or grounding-type plug. A polarized plug has

two  blades  with  one  wider  than  the  other.  A  grounding  type  plug  has  two  blades  and  a  third
grounding prong. The wide blade or the third prong are provided for your safety. If the provided
plug  does  not  fit  into  your  outlet,  consult  an  electrician  for  replacement  of  the  obsolete  outlet.

10.Protect  the  power  cord  from  being  walked  on  or  pinched  particularly  at  plugs,  convenience

receptacles,  and  the  point  where  they  exit  from  the  apparatus.

11. Only  use  attachments/accessories  specified  by  the  manufacturer.
12.Use only with the cart, stand, tripod, bracket, or table specified by the manufacturer,

or sold with  the  apparatus.  When  a  cart  is  used,  use  caution  when moving  the
cart/apparatus  combination  to  avoid  injury  from  tip-over.

IB-DVD1002(AT)-WM-E-032706.pmd

7/5/2006, 10:24 AM

2

Summary of Contents for DVD-1002

Page 1: ...GRESSIVE SCAN PLAY FOR TVS WITH APPROPRIATE INPUT JACKS PLAYS DVD VIDEOS PLAYS ALL AUDIO CDS PLAYS MP3 RECORDED DISCS PLAYS CD R CD RW DISCS PLAYS JPEG PHOTO DISCS PLEASE READ CAREFULLY BEFORE USE IB DVD1002 AT WM E 032706 pmd 7 5 2006 10 24 AM 1 ...

Page 2: ...e apparatus the apparatus has been exposed to rain or moisture does not operate normally or has been dropped 15 This appliance shall not be exposed to dripping or splashing water and that no object filled with liquid such as vases shall be placed on the apparatus Rating plate and caution marking are marked on the bottom enclosure of the apparatus 1 Read these instructions 2 Keep these instructions...

Page 3: ... measures Reorient or relocate the receiving antenna Increase the separation between the equipment and receiver Connect this equipment into an outlet on a circuit different from that to which the receiver is connected Consult the dealer or an experienced radio TV technician for help NOTE This product incorporates copyright protection technology that is protected by method claims of U S patent numb...

Page 4: ...ge Setup OSD Audio Subtitle Menu 13 Audio Setup Setting the Digital Audio out 13 Setting the Downmix Audio out 14 Video Setup 14 Basic Operation 1 Basic Play 15 2 Using the Search Skip Functions 16 3 Repeat Play 16 4 Programmed Play 17 5 Search for Preferred Play 18 6 Zoom Play 18 7 Slow Motion Play 19 8 Viewing from a Desired Angle 19 9 Selecting Audio Mode 19 10 Change Subtitle Language 19 11 Di...

Page 5: ...o cables not included and the supplied audio cables red white to your TV if your TV has component video inputs Pb Pr IMPORTANT The progressive scan video quality is available only when using component video inputs Pb Pr Y and a progressive scan TV Compared to interlaced video progressive scan video effectively doubles the scanning rate of the picture and offers higher picture resolution and qualit...

Page 6: ... this connection you can enjoy the dynamic and realistic sound of Dolby Digital Surround through your home theater system NOTE This player is equipped with copy protection technology Do not connect this player to your TV via a VCR using AV cables as the picture from this player will not appear properly on your TV This player may also not be compatible with some combination TV VCRs for the same rea...

Page 7: ...NEXT SKIP button Skips to the next chapter forwards 7 PREVIOUS SKIP button Skips to the previous chapter backwards 2 1 3 4 5 6 7 PREVIOUS NEXT STOP PLAY PAUSE ON STANDBY 6 FRONT PANEL 1 POWER indicator The indicator lights up when the player is on 2 STANDBY indicator The indicator lights up when the player is in standby mode off 3 PLAY indicator The indicator lights up when the disc starts playing...

Page 8: ... TV s volume 11 ON STANDBY button Press to turn the set ON or STANDBY 12 SETUP button In STOP mode press to display the DVD player s setup menu 13 DISPLAY P SCAN button Press this button to view the elapsed time title or chapter information and the track numbers during play Press to set Progressive Scan function This only works when disc door is in the open mode 14 STOP button Stops play press twi...

Page 9: ...ery door Tips on Battery Use Reversing polarities will damage the batteries and possibly your REMOTE Be sure to follow polarity and as indicated Do not mix different types batteries together Alkaline Carbon Zinc Nickel Cadmium etc or old batteries with new ones When not in use for an extended period of time over 60 days remove the batteries to prevent possible acid leakage or corrosion resulting i...

Page 10: ...uter software discs and game discs Data part of CD Extras DVD ROMs DVD Audio discs DIVX MPEG 4 DVD discs HD layer on SACDs or discs recorded in another format such as SECAM and regions other than your region This set will also not play damaged scratched or dirty discs NOTE A hand symbol may appear on the TV screen when pressing some buttons A means that the operation is not permitted by the DVD pl...

Page 11: ...with a soft cloth slightly moistened with a very mild detergent solution or a plain damp cloth Do not use any type of abrasive pad scouring powder or solvent such as alcohol or benzine Operation If the player is brought directly from a cold to a warm location or is placed in a very damp room moisture may condense on the lens inside Should this occur the player may not operate properly In this case...

Page 12: ...the SETUP button on the remote control System Setup is selected 2 Press button to highlight TV SYSTEM 3 Press button and use buttons to highlight your preferred option 4 Press the OK button to confirm 5 Press the SETUP button to exit the SETUP mode 1 In STOP mode press the SETUP button on the remote control System Setup is selected 2 Press button and use button to highlight SLEEP CONTROL 3 Press b...

Page 13: ...m long and thin or wider than normal If you play a disc recorded in 4 X 3 format on a widescreen TV the left and right side of the screen will appear black Press STOP and SETUP buttons to change to 4 3 ratio or match the type of TV you have 16X9 Widescreen 1 In STOP mode press the SETUP button on the remote control System Setup is selected 2 Press button and use button to highlight TV TYPE 3 Press...

Page 14: ...SET PRESS TO QUIT PRESS THEN SETUP OK A B OSD LANGUAGE AUDIO LANG SUBTITLE LANG MENU LANG SPANISH ENGLISH FRENCH LANGUAGE SETUP EXIT SETUP AUDIO SETUP RAW The coaxial output on the rear panel is connected with a receiver that accepts Dolby Digital MPEG or other signals It works for most of the coaxial connections PCM The coaxial output on the rear panel is connected with a receiver that accepts PC...

Page 15: ...SS THEN SETUP OK A B LT RT AUDIO SETUP DIGITAL OUT STEREO EXIT SETUP DOWNMIX Downmix audio output setup allows you to select LT RT or STEREO audio output mode LT RT Select this item when the disc supporting Pro Logic Dolby Stereo is played You have the opportunity to hear a program s soundtrack in the most accurate and realistic presentation possible STEREO For 5 channel output the left and right ...

Page 16: ...nce the display will show PRE STOP if you press the STOP button the second time the display will show STOP and now your system is in the full STOP mode 7 To resume playback press the button 8 To skip to another track chapter press the buttons repeatedly during playback 5 Some discs will start playing automatically and others will display the Disc Contents Menu on TV screen If the menu is presented...

Page 17: ...e next chapter track press the previous SKIP button on the REMOTE CONTROL it moves to the beginning of the previous chapter track 3 REPEAT PLAY Allows you to repeat the current track chapter title a chosen section A B or all of the disc Each time you press the REPEAT button repeatedly the repeat mode changes as follows A B CANCEL SHOWS AND NORMAL PLAY RESUMES REP CHAPTER REP TITLE REP REP ALL REP ...

Page 18: ...PROG 1 _ _ _ _ 5 _ _ _ _ 9 _ _ _ _ 13_ _ _ _ 2 _ _ _ _ 6_ _ _ _ 10 _ _ _ _ 14_ _ _ _ 3 _ _ _ _ 7 _ _ _ _ 11 _ _ _ _ 15_ _ _ _ 4 _ _ _ _ 8 _ _ _ _ 12 _ _ _ _ 16_ _ _ _ PLAY CLEAR 3 After programming move the direction buttons to select PLAY then press the OK button the player will start to play the disc in the programmed order 4 To skip to the next programmed track press the NEXT button 5 To stop p...

Page 19: ...DVD for searching by title chapter time DVD TT 01 02 CH 002 013 00 02 03 time you want to jump to Press SEARCH for MP3 input the second you want to jump to input the minute you want to jump to MP3 TRK 0016 154 00 01 21 track you want to jump to 6 ZOOM PLAY 1 Press the ZOOM SLOW button repeatedly to enlarge or reduce a picture The display will show as follows ZOOM 2 ZOOM 3 ZOOM 4 ZOOM 1 2 ZOOM1 3 Z...

Page 20: ...ailable on some DVDs If it is not available on your DVD a hand will show in the top left corner 9 SELECTING AUDIO MODE If a DVD disc contains a Multi Audio soundtrack feature you can select the desired audio language by pressing the AUDIO button repeatedly during play playback status will be displayed on the TV s screen Note 2 This DVD player does not support DTS decoding For DTS disc please selec...

Page 21: ...t the title remaining time The information display goes off For CD CD TRK 2 12 00 01 03 CD TRK 2 12 C 00 02 42 CD TRK 2 12 T 00 10 49 CD TRK 2 12 T 00 40 35 OFF The information about the current track elapsed time The information about the current track remaining time The information about the total track elapsed time The information about the total track remaining time The information display goe...

Page 22: ... the current directory will be displayed consecutively in a slide show presentation 12 MP3 DISC OPERATION 1 Load your recorded MP3 disc into the player a menu will show on the screen 2 Select the desired file by pressing the or button 3 Press OK button to open the file and start playing 4 Select the desired track by pressing the or button 5 Press OK button to start playback 6 You may use the PREVI...

Page 23: ...etc 3 Check if the proper AV input is selected on your TV set video inputs some TV sets have 3 or 4 different inputs You may have to press the VIDEO button on your TV 4 Make sure both the TV and DVD player are on Remedy TROUBLE SHOOTING Symptom No power Play fails to start even when OK is pressed Play starts but then stops immediately No picture No sound Distorted sound 1 Picture is distorted duri...

Page 24: ...nnot be changed This function is dependent on the DVD disc Even if a disc has a number of angles recorded these angles may be seen only on specific scenes General Images appear distorted 1 Buy a newer TV with these jacks 2 You may try using your VCR s jacks but the color may be distorted due to macrovision licensed DVD protection against copying discs 3 Your dealer can sell you an RF Modulator whi...

Page 25: ...TV set Video Input This is a jack which accepts the picture portion of a signal In order to use this DVD player your TV set must have an S Video better or Video input standard jack PAL Phase Alternation Line a video standard used in Europe YUV A video standard it can optimize the translation of the Video Y means Luminance U and V mean chrominance PROGRESSIVE SCAN Progressive scan creates a picture...

Page 26: ... is in the standby mode Signal system 2 Vrms 1 kHz 0dB Pickup Wave length 650nm 660nm Laser power Class 1 Power consumption AC 100 240V 50 60Hz 25 PROTECT YOUR FINE FURNITURE WE RECOMMEND A PROTECTIVE MATERIAL BE PLACED UNDER THE SET WHEN PLACING IT ON SURFACE WITH A NATURAL OR LACQUER FINISH We reserve the right to make design and specification changes for product improvement The descriptions and...

Page 27: ...broken cord or cabinet UNDER NO CIRCUMSTANCES WILL LENOXX ELECTRONICS CORP BE LIABLE FOR ANY INCIDENTAL OR CONSEQUEN TIAL DAMAGES Some states do not allow the exclusion or limitation of incidental or consequential damages so the above limitations or exclusions may not apply to you This warranty gives you specific legal rights and you may also have other rights which vary from state to state The fo...

Reviews: