background image

17

MGH20

 OPERATION

• iPod touch (4th generation)
• iPod 

nano (

6th generation)

• iPod touch (3rd generation)
• iPod nano (5th generation)
• iPod touch (2nd generation)
• iPod nano (4th generation)
• iPod classic
• iPod touch (1st generation)
• iPod nano (3rd generation) 
• iPod nano (2nd generation)
• *iPod nano (1st generation)
• *iPod with video
• iPhone 4
• iPhone 3GS
• iPhone 3G
• iPhone
• iPhone4s
• iPhone5 
• iPhone5c
• iPhone5s 

*These devices are not compatible with 'basic' control mode.

Made for

Device Compatibility

Operation of iPod/iPhone

Summary of Contents for MGH20

Page 1: ...INSTALLATION OWNER S MANUAL AM FM Gauge Hole Receiver MGH20 Front and Rear Inputs ...

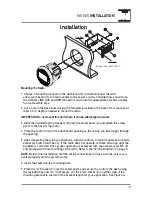
Page 2: ...sing the metal mounting bracket If the bracket needs to be shortened remove the appropriate number of breakaway segments using a pair of pliers Fuse When replacing the fuse make sure new fuse is the correct type and amperage Using an incorrect fuse could damage the radio Tip When a suitable ground wire is not present in the vehicle wiring harness connect the black ground wire to the vehicle chassi...

Page 3: ...rd opening so the wiring can be brought through the opening 5 After completing the wiring connections turn the radio on to confirm operation vehicle accessory switch must be on If the radio does not operate recheck all wiring until the problem is corrected Once proper operation is achieved turn the accessory switch off and proceed with final mounting of the radio Refer to the Wiring Diagram on pag...

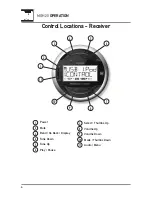
Page 4: ...PERATION Control Locations Receiver 4 6 1 2 3 5 7 8 9 10 11 Select Thumbs Up Volume Up Volume Down Mode Thumbs Down Audio Menu 1 2 3 4 5 6 7 8 9 10 11 Power Mute Band Go Back Display Tune Down Tune Up Play Pause ...

Page 5: ...eset 6 Folder Up Display Mute Preset 5 Folder Down Preset 4 Play Pause Preset 1 Repeat Band Go Back Tune Track Down 1 2 3 4 5 6 7 8 9 10 11 12 13 14 15 16 17 Mode Volume Up Power Select Tune Track Up Volume Down Audio Menu Preset 3 Intro Preset 2 Random 15 13 14 16 17 12 ...

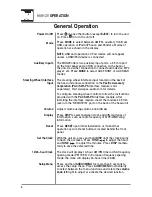
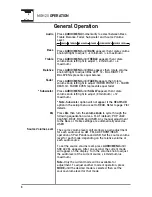
Page 6: ... interface module insert the module s 3 5mm jack into the REMOTE IN port on the back of the head unit Adjust volume using volume knob 00 46 Press DISP to select between clock and different types of information such as radio frequency or MP3 WMA song information Press RESET upon initial installation or if abnormal operation occurs Reset button is located behind the front panel With the unit on pres...

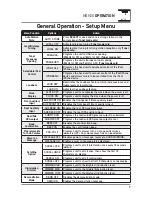
Page 7: ... Enables the front panel 3 5mm auxiliary input AUX FRONT OFF Disables the front panel 3 5mm auxiliary input Rear Auxiliary Input AUX REAR ON Enables the rear RCA auxiliary input AUX REAR OFF Disables the rear RCA auxiliary input Rear Sub RCA output SUBWFR ON Programs the rear sub RCA preamp output to subwoofer SUBWFR OFF Programs the rear sub RCA preamp output to rear Beep Confirmation BEEP OFF Di...

Page 8: ...r to page 7 for details Press EQ then turn the volume knob to cycle through the following equalization curves FLAT default POP JAZZ CLASSIC BEAT ROCK and USER Any manual adjustment to the Bass or Treble settings are automatically saved as USER The source volume level control allows a gain adjustment for each audio source AM FM AUX FRONT REAR operation of iPod Pandora and USB Set the source volume ...

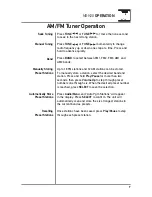
Page 9: ... Up to 18 FM stations and 12 AM stations can be stored To manually store a station select the desired band and station Press and hold Play Pause for more than two seconds then press Volume Up to step through preset numbers one through six When the desired preset number is reached press SELECT to save the selection Press Audio Menu and Auto Pgm Stations will appear in the display Press SELECT to co...

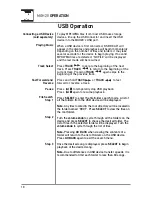
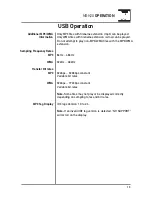
Page 10: ...II again to resume playback Press SELECT to enter the file folder search mode A list of all the folders from the USB device will be displayed Note Any files located in the root directory will be located in the folder named ROOT Press SELECT to view the files on the root folder Turn the volume knob to cycle through all the folders on the device and press SELECT to choose the desired folder The list...

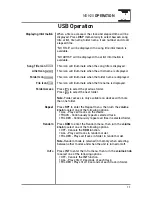
Page 11: ...h more than one folder Press RPT to enter the Repeat menu then turn the volume knob to select one of the following options ALL Plays all tracks on the device TRACK Continuously repeats selected track FOLDER Continuously repeats all files in selected folder Press RDM to enter the Random menu then turn the volume knob to select one of the following options OFF Cancels the RDM function ALL Plays all ...

Page 12: ...evice and begins in the root folder Any empty folders or folders that do not include MP3 WMA files are skipped Depending on your software the playback order may vary Maximum number of files 50 000 Maximum number of folders 255 plus the root directory Maximum number of files in each folder and root 50 000 Note If the number of files folders exceeds the maximum outlined above the additional files fo...

Page 13: ... 48kHz 32kHz 48kHz 32kbps 320kbps constant Variable bit rates 32kbps 192kbps constant Variable bit rates Note Some files may not play or be displayed correctly depending on sampling rates and bit rates ID3 tags Version 1 0 to 2 4 Note If an invalid ID3 tag version is detected NO SUPPORT will scroll on the display Additional MP3 WMA Information Sampling Frequency Rates MP3 WMA Transfer Bit rates MP...

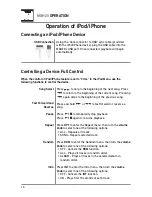
Page 14: ...ing of the previous song Press and hold ll or nn to fast forward or reverse a song Press l II to temporarily stop playback Press l II again to resume playback Press RPT to enter the Repeat menu then turn the volume knob to select one of the following options ALL Repeats all tracks SONG Repeats selected track Press RDM to enter the Random menu then turn the volume knob to select one of the followin...

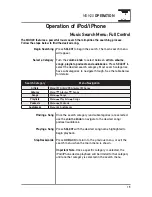
Page 15: ...s have subcategories to navigate through See the table below for details Once the search category and subcategories are selected use the volume knob to navigate to the desired song podcast audiobook Press SELECT with the desired song name highlighted to begin playback Press GO BACK to return to the previous menu or exit the search menu when the main menu is shown Important Note Once a specific cat...

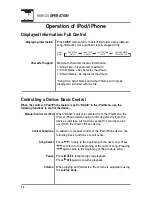
Page 16: ...of the current song Pressing nn again skips to the beginning of the previous song Press l II to temporarily stop playback Press l II again to resume playback When playing an iPod device the volume is adjustable using the volume knob Manual Control for iPod Control Functions Song Select Pause Volume Displayed Information Full Control Displaying Information Character Support Press DISP momentarily t...

Page 17: ...tion iPod nano 4th generation iPod classic iPod touch 1st generation iPod nano 3rd generation iPod nano 2nd generation iPod nano 1st generation iPod with video iPhone 4 iPhone 3GS iPhone 3G iPhone iPhone4s iPhone5 iPhone5c iPhone5s These devices are not compatible with basic control mode Made for Device Compatibility Operation of iPod iPhone ...

Page 18: ...d station is highlighted and playback will begin Note Stations must be created on your account prior to connecting your iPod iPhone device to the head unit Press SELECT to display the Stations Menu Choose Shuffle from the stations menu to shuffle songs from all of your stations Press ll to skip the current song Press l II to temporarily stop playback Press l II again to resume playback Press to te...

Page 19: ...rom each other and chassis ground Unit blows fuses Yellow or red wire touching chassis ground Check for pinched wire Speaker wires touching chassis ground Check for pinched wire Incorrect fuse rating Use fuse with correct rating PROTECT appears on display The WMA file is copy protected by DRM Digital Rights Management Write files using WMA files that are not copy protected NO FILE appears on displ...

Page 20: ...rn shipment of the product Specific license conditions and copyright notices for the software can be found via www dualav com What to do 1 Before you call for service check the troubleshooting guide in your owner s manual A slight adjustment of any custom controls may save you a service call 2 If you require service during the warranty period you must carefully pack the product preferably in the o...

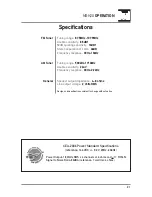
Page 21: ...710kHz Usable sensitivity 22uV Frequency response 30Hz 2 2kHz Speaker output impedance 4 8 ohms Line output voltage 2 Volts RMS Design and specifications subject to change without notice FM Tuner AM Tuner General CEA 2006 Power Standard Specifications reference 14 4VDC 0 2V 20Hz 20kHz Power Output 18 Watts RMS x 4 channels at 4 ohms and 1 THD N Signal to Noise Ratio 80dBA reference 1 watt into 4 o...

Page 22: ...e received including interference that may cause undesired operation Warning Changes or modifications to this unit not expressly approved by the party responsible for compliance could void the user s authority to operate the equipment Note This equipment has been tested and found to comply with the limits for a Class B digital device pursuant to Part 15 of the FCC Rules These limits are designed t...

Reviews: