background image

23

Months

 2

*weeks

3

12

Kilometers

*200

1000

5000

10000 25000

Engine

Check for loose parts and bolts

ü

ü

Tighten engine bolts

ü

ü

Steering

Check for loose parts

ü

ü

Check steering alignment

ü

ü

Check for loose parts in hub-

bearing front wheels

ü

ü

Front

Suspension

 Visual check of suspension

 rubber

ü

ü

 Visual check of rubber support

tightening bolt

ü

ü

 Grease bottom suspension

**axis

ü

ü

 Check for loose parts - bottom

axle front suspension

ü

ü

 Replace slip bearings front

suspension

ü

Rear

Suspension

 Visual check of suspension

rubber

ü

ü

 Visual check of rubber support

tightening bolt

ü

ü

 Grease bottom suspension

**axis

ü

ü

Replacing slip bearings rear

Suspension

ü

Controllers  Visual check: base, connections,

cleanliness, clasps

ü

ü

 Check that wiring is intact, with

no ruptures or scratches

ü

ü

Battery

 Visual check: base, connections,

cleanliness, clasp

ü

Battery enclosure check

ü

ü

Battery replacement (AT AU-

(?THORIZED CENTER

ü

* A first inspection should be conducted by an authorized DSRaider service center, 2 weeks or 200 km 

(whichever comes first) following delivery of the EZRaider.  Only one such service center inspection is 

required. The rest of the maintenance activities should be conducted at the intervals specified in the table.
** The suspension axis should be greased following every drive through water.

Summary of Contents for EZRaider

Page 1: ...eration and maintenance of the EZRaider This manual is an inseparable part of the EZRaider and should be reviewed carefully by any person making use of the vehicle Please follow all of the instruction...

Page 2: ...6 Driving 7 Charging the Battery 9 Towing 10 Storage 10 Cleaning 10 Maintenance 11 Troubleshooting 13 Using the EZRaider Cart 15 Introduction 15 Identifying the Cart 16 Cart Use Safety Instructions 1...

Page 3: ...olded EZRaider Steering column folding lock Main switch Controls Front brake lever Parking brake Rear brake lever Parking brake Handlebar Throttle Steering column Front suspension Rear supension Stand...

Page 4: ...ing brake lever 4 Driving mode selector 1 Reduced power 0 Normal 2 Maximum power 5 Light switch 0 Off 1 On 6 Reverse gear switch 7 Rear parking brake lever Warning EZRaider is equipped with an electri...

Page 5: ...o stand in a stable manner 5 Ensure that the handlebar folding mechanism is locked and does not enable freedom of movement 6 Check the planned route in advance to ensure that it is suited for use of t...

Page 6: ...ontrol and brake cables are intact and that their shielding is not torn frayed or missing Check the soundness of the electrical connectors 7 Steering Make sure that the steering column is locked in an...

Page 7: ...your body in order to turn left 7 Braking Releasing the throttle while in motion engages the regenerative braking function which slows the EZRaider while charging the drivetrain battery In order to co...

Page 8: ...e turned very gently Fast rotation of the handlebar in these conditions can cause control loss and rolling over 4 In wet and muddy conditions the braking system performance is impaired When a decrease...

Page 9: ...lithium based battery and a matched charger Do not use batteries and chargers that are not supplied by DSRaider 4 The charger is enclosed in an aluminum box which helps dissipate excess heat To preven...

Page 10: ...e to clean the EZRaider Use water only to clean the vehicle 4 Wipe the EZRaider with a soft wet towel dipped in clean water 5 Dry the EZRaider using a soft dry towel Warnings 1 Do not use pressure bas...

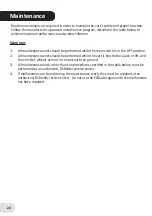
Page 11: ...switch is in the OFF position 2 All maintenance work should be performed while the EZRaider is hoisted on a jack or lift and the vehicle s wheels are not in contact with the ground 3 All maintenance w...

Page 12: ...parts Check steering alignment Check for loose parts in hub bearing front wheels Front Suspension Visual check of suspension rubber Visual check of rubber support tightening bolt Grease bottom suspens...

Page 13: ...at impacts user safety contact an authorized DSRaider service center or contact our customer service department at service DSRaider com Warnings 1 Do not detach the standing platform Platform detachme...

Page 14: ...not use the vehicle 6 EZRaider does not slow down as usual when releasing the throttle Controller malfunction Contact the service center Throttle stuck in FULL mode Grab both brake levers firmly Rele...

Page 15: ...s will be lower in accordance with field conditions Using the EZRaider Cart Introduction 1 Main switch OFF ON 2 Battery voltage indicator The indicator display provides a continuous indication of batt...

Page 16: ...d before contacting the DSRaider customer service department Warning The E Cart is equipped with an electrical drivetrain operating at 60 volts Handling disassembly and maintenance of the EZRaider s d...

Page 17: ...drugs or any other substance which inhibits the operator s level of awareness 7 Do not use the cart at first to tow heavy loads over difficult terrain Begin with an empty cart at low speeds on an eas...

Page 18: ...maged and that the payload materials are securely fastened to the platform 5 Chassis and rack Check the soundness of the cart s chassis and rack components Ensure that there are no cracks or significa...

Page 19: ...ng correctly Perform a short test ride with no payload in the cart NOTE When connecting the E Cart to the EZRaider make sure that the voltage differential between the battery voltage of the E Cart and...

Page 20: ...brake using the brake levers 1 Make sure the parking brake is engaged 2 Make sure the main switch is OFF 3 Open the charging port cover 4 Insert the charging plug into the charging socket located on...

Page 21: ...turn green make sure that the charger is powered on and that the EZRaider E Cart charging plug is well inserted into the charger outlet If these steps do not correct the problem contact your DSRaider...

Page 22: ...n switch is in the OFF position 2 All maintenance work should be performed while the cart is hoisted on a jack or lift and the vehicle s wheels are not in contact with the ground 3 All maintenance wor...

Page 23: ...support tightening bolt Grease bottom suspension axis Replacing slip bearings rear Suspension Controllers Visual check base connections cleanliness clasps Check that wiring is intact with no ruptures...

Reviews: