Drayton DIGISTAT+2RF Installation & User Manual Download Page 21

Client

Drayton

File Name

7542 Drayton LP10RF & D2RF 06515086001 ISSC

Artworker

-

Proof Stage

PRINT

Finished Size

A5 148x210mm

Creative Director

Mike Lane

Artwork %

100%

Modification Date

21/08/15 2:56PM

Bleed

3mm

User Guide 

D2RF Room Thermostat

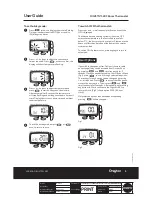
Battery Change

How do I know when to change the batteries. 

When the batteries start to run low a battery icon will 

flash in the display, to indicate “low battery” during this 

time the Digistat will function normally. 

Replace with 2 x 1.5V (AA) Alkaline batteries. 

When the battery icon alone is shown in the display, the 

batteries are completely exhausted and the Digistat will 

cease to function. Re-activate by replacing the batteries

The RF link will automatically be re-established. 

How to replace the batteries 

Remove the battery cover using a coin. Replace the spent 

batteries with 2 x 1.5V (AA) Alkaline batteries ensuring 

correct orientation. Replace the battery cover pressing 

fully home.

If you wish to change any User Options (shown in table 1) they
can be accessed from Auto or Man by pressing < and >
simultaneously for 3 seconds. Once you have accessed the User
Options Menu (Fig 4) press > to scroll through selectable options.
The settings for each option can be changed by pr or -
as required. Press > to accept the change and move to the next
option. To exit press < and > simultaeously for 3 seconds.
Alternatively, not pressing any buttons for 2 mins will cause the
Di2RF

to return to Auto. (Fig 5) shows option 01 24 (24

hour clock).
Only selected options that have been accepted by pressing >
will be changed.

(Fig 4)

(Fig 5)

To set holiday mode:

1. Press 

twice, the display 

shows time flashing
Time periods between 1 to 
23(Hr)hours and 1 to 
199(d)days can be set.

2. Press + or - buttons to 

adjust the count down time 
as required. Press 

once 

to confirm, the display will 
show temperature flashing.

User Options

3. Press + or - buttons to 

adjust temperature and press 

to start holiday count 

down time. Alternatively after
10 seconds the temperature 
will stop flashing and holiday 
count down time will start. 
Display shows count down 
time and ambient room 
temperature. 

4. To exit the holiday  mode 

press the 

or 

once, to return to auto.

User
options What is it

Min

Max

Default

01

Change 12h or 24h clock

12

24

24

02

Change to another 
pre-set programme

1

3

1

03

Change the number of 
programme events per day

2, 4 or 6

6

04

Switch on/off automatic 
summer/winter time change

On

Off

On

05

Adjust date and time

Factory Set

06

Change temperature offset

0

C

-5

5

0

07

Restore pre-set programme

On

Off

Off

08

To disable Off function

On

Off

On

09

Access protection lock

On

Off

Off

(Table 1)

(Option 03) 

How to change the number of program events per day.

Enter user options, select option 03 and use + and – keys to

select desired option. 2 = 2 time / temp events per day, 4 = 4

time / temp events per day and 6 = 6 time / temp events per day.

Press > to accept desired change.

(Option 04)
How to switch on/off the automatic summer / winter time 

change.

Twice a year the actual time is automatically changed to keep it in

line with the summer / winter time change. Default setting is On.

If you wish to disable / enable this feature enter user options,

select option 04 and press – or + key to display Off or On as

desired. Press > to accept desired change.

(Option 01) 
How to change from 24hr to 12hr clock.

Enter user options, select option 01 and use + and – keys to select

desired option, 12 = 12hr and 24 = 24hr. Press > to accept change.

(Option 02) 
How to change to another predefined program 1, 2 or 3.

Enter user options, select option 02 and use + and – keys to 

select desired program 1, 2 or 3. 1 = program 1, 2 = program 2

and 3 = program 3. Press > to accept desired change.

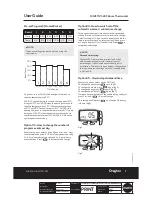
Preset programs 2 and 3 are shown below:

Event

1

2

3

4

5

6

Time

6:30

8:30

12:00

14:00

16:30

22:30

Temperature

21.0

16.0

21.0

16.0

21.0

10.0

*The above settings can be understood using the chart below

1

2

3

4

5

6

25ºC

20ºC

15ºC

10ºC

5ºC

06:30 08:30 12:00 14:00 16:30 22:30

Time Period

Room

Temp

Event

1

2

3

4

5

6

Time

6:00

8:30

12:00

14:00

17:30

22:30

Temperature

21.0

19.0

21.0

19.0

21.0

16.0

*The above settings can be understood using the chart below

1

2

3

4

5

6

25ºC

20ºC

15ºC

10ºC

5ºC

06:00 08:30 12:00 14:00 17:30 22:30

Time Period

Room

Temp

Pre-set Program 2. (Home for Lunch)

Pre-set Program 3. (Home Worker)

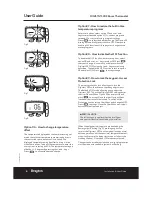
Date and time setting.

Di2RF comes with a pre-set clock, which also

automatically adjusts for summer/winter time changes. It is

activated automatically on 1st installation. There should be no

need to change these settings, however, should you wish to, it

can be done in Option 05.

(Option 05) 
How to adjust date and time.

Enter user options, select option 05 (fig 6)

To change the year press > once (fig 7)

To change the month press > again (fig 8)

To change the day press > again (fig 9)

To change the time press > again (fig 10)

Once you have selected your required display, to adjust press

+ or -  and > to accept change.

To select option 06 press > until option 06 display is shown 

(fig 11)

(Option 06)
How to change temperature offset.

The temperature displayed on the thermostat may not match

that of other temperature measuring devices in the controlled

space, because of its location. The displayed temperature may

be offset to bring it in line with other devices. To adjust the

temperature, enter the user options, select option 06. The

temperature may be offset by +/- 5 degrees by pressing the

+ and – keys. Press > to accept the desired change.

(Option 07)
How to restore the built in time temperature programs.

Enter user options, select option 07 and use + and – keys to

select desired option. Off = current programs retained. On =

restore factory program settings. Press > to select the desired

change. The Option 07 display automatically reverts back to

OFF. Please note enabling this function will lose any user

changes to the preset programs.

(Option 08)
How to disable the OFF function.

To disable the OFF  function, enter user options, select option

08 and use + or – keys to select Off. Press > to accept change.

It is now not possible to switch the D2RF OFF using the

+ and- keys as previously described. To enable the OFF

function return to option 08 and select ON. Press > to accept

change.

(Fig 10)

(Fig 9)

(Fig 8)

(Fig 7)

(Fig 6)

(Fig 11)

As you can see, at 06:30, the heating will come on to raise the
temperature to 21°C.
At 08:30, the temperature set point is dropped to 16°C, it stays at
16°C until 12:00 when the heating comes on to raise the
temperature to 21°C. The temperature stays at 21°C until 14:00
when it drops to 16°C. At 16:30 the heating comes on to raise the
temperature to 21°C where it stays until 22:30 when the
temperature drops down to a setback temperature of 10°C until
06:30 when the cycle repeats the next day. 

As you can see, at 06:00, the heating will come on to raise the
temperature to 21°C.
At 08:30, the temperature set point is dropped to 19°C, it stays at
19°C until 12:00 when the heating comes on to raise the
temperature to 21°C. The temperature stays at 21°C until 14:00
when it drops to 19°C. At 17:30 the heating comes on to raise the
temperature to 21°C where it stays until 22:30 when the
temperature drops down to a setback temperature of 16°C until
06:00 when the cycle repeats the next day. 

To switch OFF the thermostat:
Press the + and – simultaneously for 5 seconds until the OFF is
displayed. 
The thermostat and heating system will now be OFF unless the
temperature in the controlled space falls below 7°C, the frost
protection set point. Please note this does not affect the
operation of the domestic hot water where provided.
To switch ON the thermostat, press any key to return to auto mode.

(Option 09)
How to lock the key pad - Access Protection Lock.
The access protection lock allows you to lock the Di2RF so
that it cannot have any adjustments.
The default is OFF mode allowing you to adjust the Di2RF.
To Lock the Di2RF settings enter the User Options Menu
Option 09 and select On and press > to accept.
Once the User Options Menu is exited all buttons will be locked.
To switch off the Protection Lock enter the User Menu and change
to OFF. Press > to accept.
Once the User Menu is exited all buttons will be free to adjust.

Special Note:

The following only applies when the Intelligent delayed start
feature is enabled by the installer.

When the delay period is operating indicated by the flame symbol
flashing (Fig12), pressing any button returns the Di2RF to
auto mode allowing normal button operation until the next time/
temperature event, when it will resume the delay start mode or
follows the Holiday, Manual, Override or Off modes as selected.
Changes to the installer options and pre-set programmes must be
made with the flame symbol not flashing. 

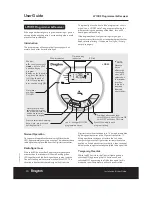
What is Intelligent delayed start?

Intelligent Delayed Start (Energy saving feature)
The Intelligent Delayed Start is an energy saving feature which
automatically reduces the warm up time for the heating system. As
the weather becomes milder, Intelligent Start will delay the heating
start times so that the fuel is not wasted bringing the room up to
temperature earlier than necessary.

(Fig 12)

06490097001 IssA 24-1-07  13/2/07  11:59  Page 2

Fig 9

What is Intelligent delayed start? 

Intelligent Delayed Start  

(Energy saving feature)

The Intelligent Delayed Start is an energy saving feature 

which automatically reduces the warm up time for 

the heating system. As the weather becomes milder, 

Intelligent Start will delay the heating start times so 

that the fuel is not wasted bringing the room up to 

temperature earlier than necessary.

19

LP10RF & D2RF

06

51

5086

0

0

1 I

SS

C

Summary of Contents for DIGISTAT+2RF

Page 1: ...ication Date 21 08 15 2 56PM Bleed 3mm LP10RF DIGISTAT 2RF Radiofrequencycontrolledprogrammableroom thermostatwithdomestichotwaterprogrammer PartnumberRF560DR Installation UserGuide ForGREENSTARCDi GREENSTARiJUNIORandGREENSTARSiMODELSalso GREENSTARiSYSTEMandGREENSTARCDiSYSTEMMODEL onlywhenusedwith theoptionalintegraldiverter SparesPartnumber22090 SparesPartnumber22589DR ...

Page 2: ... Celsius Centigrade IP IngressProtection V Volt m metre mA milliAmpere Definitions DLS BST Summertimebegins LastSundayinMarchat 1 00amGMT Clocksareputforwardby1hour Summertimeends LastSundayinOctoberat 2 00amBST Clocksareputbackby1hour Protectyourenvironment Properbatteryrecycling Electronicdevicesandbatteries rechargeableornot shouldnotbedisposedofintoordinaryhouseholdwaste Instead theymustberecy...

Page 3: ...m Tableofcontents TechnicalData 2 InstallationGuide 3 LP10RFInstallation 4 WirelessCommissioning SignalStrength 5 6 SignalStrength 7 InstallerOptions 8 9 UserGuide 10 DIGISTAT 2RFRoomThermostat 11 ControlsandDisplayLayout 12 BasicSettings 13 15 UserOptions 15 19 BatteryChange 19 LP10RFProgrammer Receiver 20 TheStandardProgram 21 ChangingtheProgram 22 25 Maintenance 25 1 LP10RF DIGISTAT 2RF 0651508...

Page 4: ... Batterylife withalkalinebatteries approx 2years N A Batterybackuptimeanddate 10yearsmin 10yearsmin Shortestswitchingperiod 1minute 1minute Hotwaterpre heatsettings 3ON 3OFF Centralheatingsettings 6perday EnergyClass IV 2 Acc EU811 2013 812 2013 813 2013 814 2013 PollutionClass 2 2 SoftwareClass A A Ballpressuretest 90 C 90 C TechnicalData RelevantECDirectives 2006 95 ECLowVoltageDirective 2004 10...

Page 5: ... DIGISTAT 2RF06515086001ISSC Artworker Proof Stage PRINT Finished Size A5 148x210mm Creative Director Mike Lane Artwork 100 Modification Date 21 08 15 2 56PM Bleed 3mm InstallationGuide LP10RF DIGISTAT 2RF 3 LP10RF DIGISTAT 2RF 06515086001 ISSC ...

Page 6: ...singbefore switchingontheelectricalsupplyandboiler J Switchboileronwhencompleted CAUTION Isolatethemainselectricitysupply beforestartinganyworkandobserve allrelevantsafetyprecautions Observeelectro staticdischarge precautions donottouchthepcb circuit DANGER 230voltsdonottouchtheelectrical componentsorcircuits F InstallationGuide LP10RFProgrammer Receiver Clips Cover panel Tab Blanking plate Tab Co...

Page 7: ...secondsthedisplaywillshow rF whichindicates thattheDIGISTAT 2RFiscontinuouslysendinga signaltotheLP10RF receiver Thereceiverdisplaywillnowshowthe learnt transmittercodeandtheantenna aswellasthe signalstrengthasindicatedbythechevronsonthe righthandsideofthedisplay J Placethetransmitterinthedesiredfinalposition andreturntotheboilertocheckthereceiver display Theidealtransmitterpositionwillresult inth...

Page 8: ...suitablewallplugsand screws 3 Replacethefrontcoverbylocatinginpositionand pushingfullyontothebackcover Digistat 2RF Digistat 2RF Digistat 2RF Digistat 2RF Digistat 2RF Digistat 2RF Digistat 2RF Digistat 2RF Digistat 2RF Digistat 2RF Digistat 2RF Digistat 2RF Digistat 2RF Digistat 2RF Digistat 2RF Digistat 2RF Digistat 2RF Digistat 2RF Digistat 2RF Digistat 2RF Digistat 2RF Digistat 2RF Digistat 2R...

Page 9: ... buttononthetransmitter whilere insertingthebatteriesandkeepthebutton depresseduntilthedisplayshows rF 6 30 OFF 6 30 OFF 6 30 OFF 6 30 OFF LEDIndication Chevrons RFStrength Green 4 Verystrong Amber 3 Strong Red 2 Weak None 1 Veryweak Tocancelsignalstrengthmode 1 Removethebatteriesfromthetransmitterto canceltheconstanttransmission 2 Afterafewsecondsthereceiverdisplaywillshow 3 Press OK onthereceive...

Page 10: ...ait until next change in the pre set program temperature shown flashing 3 Once the temperature has been set press to confirm and move to the next time and temperature periods to be adjusted confirming changes by pressing button max 6 periods 4 To exit press or until you return to auto mode with the bottom arrow pointing to auto as shown Drayto n Digist at 2RF Digist at 2RF Drayto n Drayto n Drayto...

Page 11: ...iodisoperatingindicatedbythe flamesymbolflashing pressinganybuttonreturnsthe Digistattoautomodeallowingnormalbuttonoperation untilthenexttime temperatureevent whenitwill resumethedelaystartmodeorfollowstheHoliday Manual OverrideorOffmodesasselected Changestotheinstalleroptionsandpre setprogrammes mustbemadewiththeflamesymbolnotflashing Option10 ValveProtection Insomeheatingsystemstheremaybearequir...

Page 12: ...UserGuide LP10RF DIGISTAT 2RF 10 Installation UserGuide 06515086001 ISSC ...

Page 13: ... Room Thermostat Wireless 24 Hour Model RF700 22090 Power Supply Battery Thermostat Mains Digistat SCR The Digistat 2RF thermostat is a programmable thermostat 24 Hour product the same program for every day of the week which allows you to set up to 6 time and temperature events per day Clock Setting Your Digistat 2RF is fitted with a real time clock which is pre set at the factory You will not hav...

Page 14: ...left hand button moves the pointer to the left for selection Holiday Manual Auto Day Program Pointer mode indicator Time Flame shows when calling for heat Pointer day Days Temperature NOTE Temperaturedisplayedisactualroomtemperature unlessadjustingthe or buttonwhenitdisplays thesettemperature Onceadjustmentiscomplete andafter5secondsthiswillreturntoactualroom temperature UserGuide DIGISTAT 2RFRoom...

Page 15: ...ame program for every day of the week and allows you to set 6 time and temperature events per day Digistat 2RF Pre set Program Your Digistat 2RF comes with the following default settings pre programmed for your convenience Pre set Program 1 9 til 5 The above settings can be understood using the chart below 25ºC 20ºC small 1 in lower half of screen shows which time period is being set e g 1 1st per...

Page 16: ...gistat 2RF Alkaline batteries play the batteries will cease to tteries Drayton To set a constant room temperature Manual mode 1 Press once the display shows temperature flashing example 20 0 C 2 Press or buttons to adjust the temperature as required The temperature will stop flashing after 5 seconds and start controlling at this temperature 3 To exit manual mode press once to return to auto To cha...

Page 17: ...0 the tem 19 C until 12 00 w temperature to 21 when it drops to temperature to 21 temperature drop 06 00 when the cy To switch OFF the thermostat Press the and simultaneously for 5 seconds until the OFF is displayed The thermostat and heating system will now be OFF unless the temperature in the controlled space falls below 7 C the frost protection set point Please note this does not affect the ope...

Page 18: ... temperature Set temperature shown flashing 2 After 5 seconds will start controlling at selected set point but displays actual room temperature 2 chrevons indicates override mode 3 To exit override press once or wait until next change in the pre set program 2 Once the time has been set press to confirm and use the or button to adjust required temperature temperature shown flashing 3 Once the tempe...

Page 19: ...or a short ging the temperature in to your new temperature t which time it will revert perature you are setting ure is set the unit will ure The indicator will ned on Event 1 2 3 4 5 6 Time 6 30 8 30 12 00 14 00 16 30 22 30 Temperature 20 0 16 0 16 0 16 0 21 0 7 0 The Digistat 2RF thermostat is a programmable thermostat 24 Hour the same program for every day of the week and allows you to set 6 tim...

Page 20: ...rt below 1 2 3 4 5 6 25ºC 20ºC 15ºC 10ºC 5ºC 06 30 08 30 12 00 14 00 16 30 22 30 Time Period Room Temp As you can see at 06 30 the heating will come on to raise the temperature to 20ºC At 08 30 the temperature set point is dropped from 20ºC down to16ºC it stays at 16ºC throughout the day until 16 30 when the temperature increases to 21ºC The temperature then drops down to a night setback temperatu...

Page 21: ...bol flashing Fig12 pressing any button returns the Digistat 2RF to auto mode allowing normal button operation until the next time temperature event when it will resume the delay start mode or follows the Holiday Manual Override or Off modes as selected Changes to the installer options and pre set programmes must be made with the flame symbol not flashing What is Intelligent delayed start Intellige...

Page 22: ...imingsforyou your programmerwillworkwithastandardprogramthathas beensetatthefactory Ifthisdoesn tsuityou it svery easytochangeit NormalOperation Duringnormaloperationthereceiverwillflashthered LED approximatelyeveryfiveminutes Thisindicatesthata radiosignalisbeingreceivedfromtheDigistattransmitter RadioSignalLoss IftheredLEDdoesnotflashapproximatelyeveryfive minutesthenthereceiverwillshowaflashing...

Page 23: ...together forthreesecondsor longer torestorethedefaultprogramtimestothose showninthetableopposite Switching Weekdays Weekends HW HW 1stON startoffirsttimedperiod 6 30am 7 00am 1stOFF endoffirsttimedperiod 8 30am 9 00am 2ndON startofsecondtimedperiod 12 00pm 12 00pm 2ndOFF endofsecondtimedperiod 12 00pm 12 00pm 3rdON startofthirdtimedperiod 4 30pm 4 00pm 3rdOFF finalswith offoftheday 10 30pm 11 00pm...

Page 24: ...RI 8 30 6 30 UserGuide LP10RFProgrammer Receiver ChangingtheProgram Repeatoperations4to7tosetthesecondandthirdON OFFtimes NOTE Afterpressingset forthethirdhotwaterpre heat OFFtimethedisplayshowsSETMON Settingindividualweekdays NOTE Ifyoudonotrequireindividualweekdaytimes thenpressset untilSETSAT SUNaredisplayed andcontinueonthenextpage Ifyoudonotwish tochangethesettingforthedaydisplayed then press...

Page 25: ...0 PROG SAT SUN SAT SUN SAT SUN PROG PROG PROG 9 00 PROG OFF HW HW ON 9 00 6 30 NOTE Speedupthedisplaybyholdingdownthe or buttons Repeatoperations3to6tosetthesecondandthirdON OFFtimes NOTE Afterpressingset forthethirdhotwaterpre heat offtimeforSAT thedisplaywillshowSETSUN Press OKtosetSUNorpressset untilthedisplayreturns tonormalmode Settingindividualweekenddays NOTE Ifyoudonotrequireindividualweek...

Page 26: ...ndtime 1 Presstheset buttonuntilSETandCLOCK are showninthedisplay 2 PressOKtodisplay24hrandON 3 Press toswitchbetween24hrand12hrdisplay 4 Decidebetween24houror12hourdisplayand pressset toselect nowthehourswillflash 5 Press or tosetthecorrecthour 6 Whenthecorrecthourhasbeenselected press set toselect nowtheminuteswillflash 7 Press or tosetthecorrectminutes 8 Whenthecorrectminuteshavebeenset pressse...

Page 27: ...orrectdayhasbeenchosen pressset toselect nowdLSwillbedisplayedandONwill flash 9 Press or toswitchbetweenONorOFF Ifyou chooseONthentheclockwillautomaticallyadjust thetimeforDaylightsaving IfyouchooseOFF thenthetimewillnotchangetotakeaccountofthe DaylightSavingtimechangetwiceayear J Pressset twicetoreturntothenormaldisplay NOTE dLS DayLightSavingstime DATE DATE DATE MON 36 DATE DATE DATE DATE MON 36...

Page 28: ...06515086001ISSC Support Sales 44 0 845 1305522 Technical 44 0 845 1307722 customer care draytoncontrols co uk www draytoncontrols co uk DraytonHeating DraytonControls ...

Reviews: