background image


9

3

3

.

.

2

2


W

W

a

a

l

l

l

l

-

-

M

M

o

o

u

u

n

n

t

t

e

e

d

d


I

I

n

n

s

s

t

t

a

a

l

l

l

l

a

a

t

t

i

i

o

o

n

n


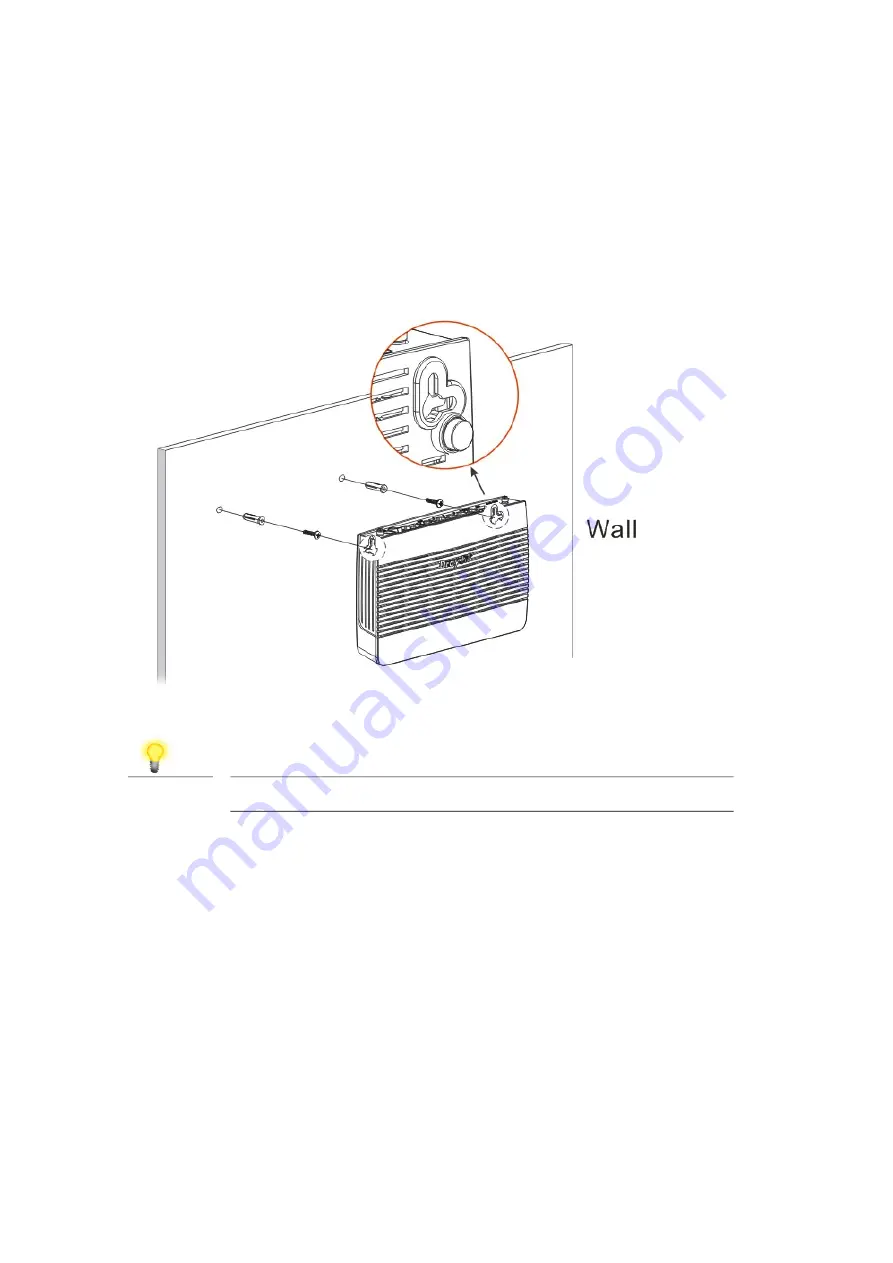
Vigor has keyhole type mounting slots on the underside.   
1.


A template is provided on the Vigor packaging box to enable you to space the screws 

correctly on the wall. 

2.


Place the template on the wall and drill the holes according to the recommended 

instruction. 

3.


Fit screws into the wall using the appropriate type of wall plug. 


Note 

The recommended drill diameter shall be 6.5mm (1/4”).


4.


When you finished about procedure, the router has been mounted on the wall firmly. 


Summary of Contents for Vigor 2762 Series

Page 1: ...i...

Page 2: ...tion outdoor to prevent electronic shock hazards Keep the package out of reach of children When you want to dispose of the router please follow local regulations on conservation of the environment War...

Page 3: ...l E Ex xp pl la an na at ti io on n 2 3 3 H Ha ar rd dw wa ar re e I In ns st ta al ll la at ti io on n 8 3 3 1 1 N Ne et tw wo or rk k C Co on nn ne ec ct ti io on n 8 3 3 2 2 W Wa al ll l M Mo ou un...

Page 4: ...nt te en nt t Take a look at the package content If there is anything missed or damaged please contact DrayTek or dealer immediately Vigor Router Quick Start Guide RJ 45 Ethernet Cable RJ 11 Cable 2x...

Page 5: ...ted and active Blinking The data is transmitting DSL Orange On The DSL link up waiting for the Internet connection Blinkin g Slowly The DSL connection is ready for training Quickly The DSL connection...

Page 6: ...When you see the ACT LED begins to blink rapidly than usual release the button Then the router will restart with the factory default configuration USB1 USB2 Connector for a USB device for 3G 4G USB Mo...

Page 7: ...een The wireless access point is ready Blinking Green The data is transmitting via wireless connection based on the rate of 5GHz Blinking Orange Blinks with one second cycle for two minutes The WPS fu...

Page 8: ...more than 2 seconds to wait for client s device making network connection through WPS Factory Reset Restore the default settings Usage Turn on the router ACT LED is blinking Press the hole and keep f...

Page 9: ...reless access point is turned off Wireless LAN On Off WPS On Green The wireless access point is ready Blinking Green The data is transmitting via wireless connection based on the rate of 5GHz Blinking...

Page 10: ...client s device making network connection through WPS Factory Reset Restore the default settings Usage Turn on the router ACT LED is blinking Press the hole and keep for more than 5 seconds When you...

Page 11: ...line cable 2 Connect one port of 4 port switch to your computer with a RJ 45 cable This device allows you to connect 4 PCs directly 3 Connect detachable antennas to the router 4 Connect one end of th...

Page 12: ...or packaging box to enable you to space the screws correctly on the wall 2 Place the template on the wall and drill the holes according to the recommended instruction 3 Fit screws into the wall using...

Page 13: ...the Quick Start Wizard via Web Configurator 1 Make sure your PC connects to the router correctly Note You may either simply set up your computer to get IP dynamically from the router or set up the IP...

Page 14: ...1 3 Now the Main Screen will pop up 4 Click Wizards Quick Start Wizard 5 Enter the login password on the field of New Password and retype it on the field of Confirm Password Then click Next to continu...

Page 15: ...ck Next to go to the following page You have to select the appropriate Internet access type according to the information from your ISP For example you should select PPPoE mode if the ISP provides you...

Page 16: ...Different types of connection modes will have different summary Click Finish and then restart the router Afterward you will enjoy surfing on the Internet 5 5 C Cu us st to om me er r S Se er rv vi ic...

Reviews: