
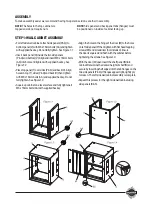


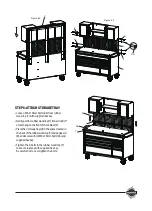
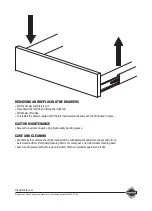
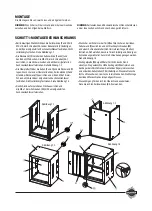


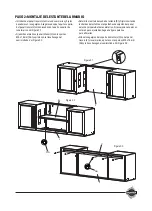


STEP 3: ATTACH CABINET HANDLE
NOTE:
There are holes to mount handle on either side of cabinet, but only one handle comes with this cabinet.
• Position the cabinet handle (A) over the holes
on the cabinet (X).
• Attach with M6 x 16mm bolts (AA) and tighten
with supplied hex key.
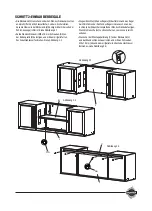
STEP 4: ATTACH PEGBOARD
• Position the backwalls (E) over the holes on
the cabinet (X).
• Secure with (4) M8 x 20mm bolts (BB), spring washers
(CC) and flat washers (DD) per backwall (E) and tighten
with supplied hex key or 12mm wrench/socket (not
included). Do Not fully tighten bolts at this time.
See Figure 5.1
• Align the connecting brace (D) holes to
upper holes of backwall (E), tighten with (6)
M6 x 16mm bolts (AA) and supplied hex key. Do
Not fully tighten bolts at this time. See Figure 5.2
• Position each piece of pegboard (B) over the holes
on backwalls (E). Please note the grommet position
in the left and right pegboard panels in Figure 5.2
• Secure the pegboard panels (B) with (10) M6 x 16mm
bolts (AA) and tighten with supplied hex key.
• Once the pegboard panels (B) are secured
and squared, go back and tighten all hardware
in this step.
AA
X
A