Installing internal Hard Disk (optional)
4
a
c
b
d
e
g
f
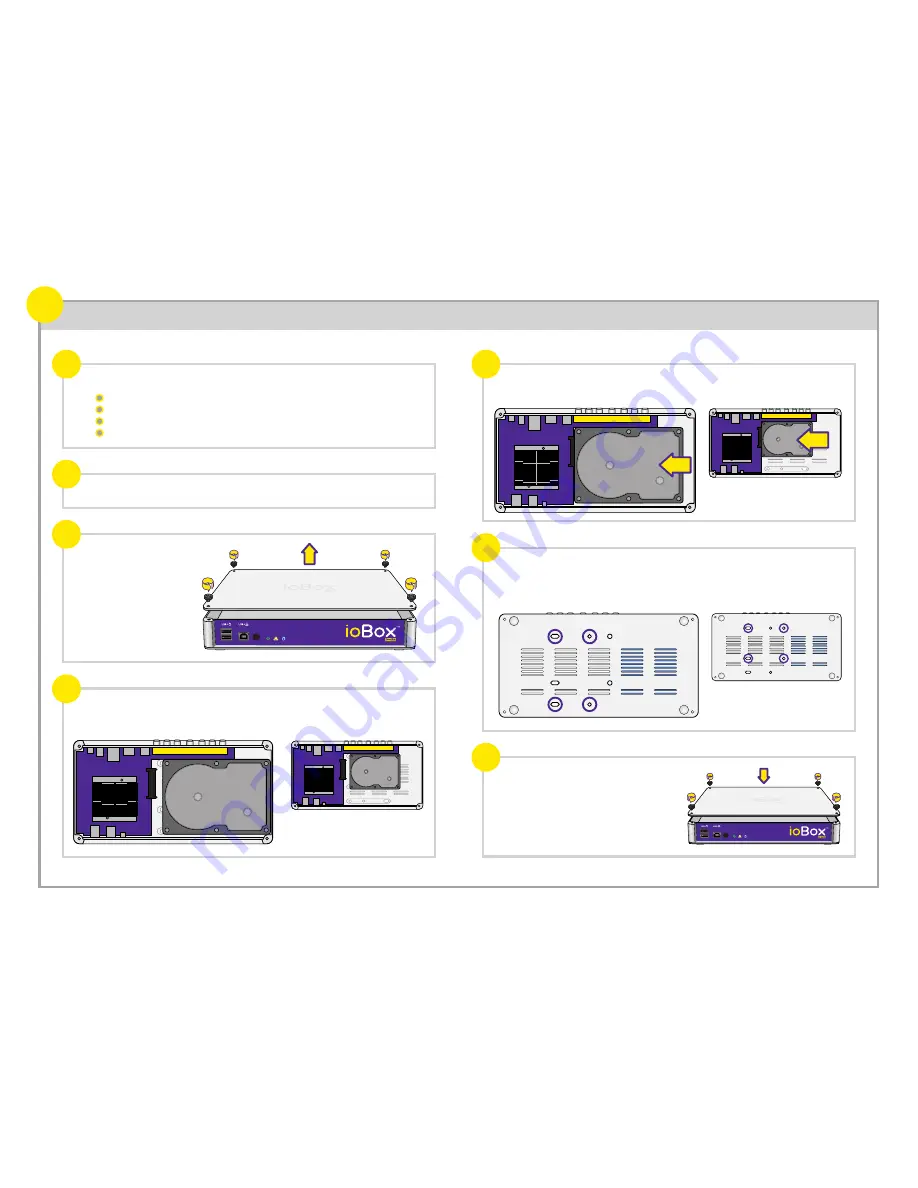
Before installation, please make sure you have all the following items:
Remove the 4 screws
shown in the diagram and
lift off the top cover.
Make sure all the cables, including power cord, have been disconnected from the
ioBox-100HD.
Place your hard disk onto the base of ioBox-100HD in the space provided, with the
label side of the hard disk facing towards you, and the SATA connector of the hard
disk facing towards the SATA adapter on the system board.
Align the disk's SATA connector with the SATA adapter of the system board and
push the hard disk towards it until the disk's SATA connector has been fully inserted
into the SATA adapter.
Carefully support the weight of the hard disk and turn over the case with a finger
firmly pressing the hard disk. Now, the four screw holes on the bottom should align
with the four screw holes of the hard disk.
Fasten the 4 screws provided through the baseplate and into the disk (the smaller
screws are for a 2.5" HDD)
Reinstall the top cover and screws to finish.
3.5" HDD
2.5" HDD
3.5" HDD
2.5" HDD
A flat, clear space to work on, free of dust, dirt and moisture.
Philips screwdriver
4 HDD screws (provided)
A 3.5" or 2.5" SATA hard disk
1
2
3
4
2.5" Hard Disk Drive
2.5" Hard Disk Drive
2.5" Hard Disk Drive


