06
07
②
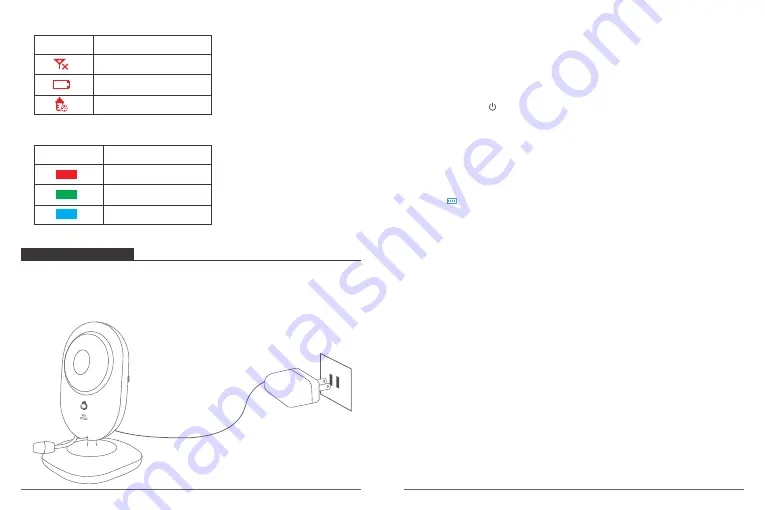
Notifications Icons Overview
Icon
Description
Feeding Notification
Low battery
No Signal
②
Notifications Icons Overview
Light Colour
Description
Volume Level Indicator
Working Indicator
Charging Indicator
GETTING STARTED
1. Powering Camera Unit
Connect the Camera Power Adapter to the Camera Unit.
Position your Camera Unit no less than 3 feet away from your baby`s crib. Ensure the
power cord is not within reach of your baby.
3. When Charging
①
During power OFF, when adapter is plugged in, the Charging LED indicator will
illuminate red to indicate charging, then the Charging LED indicator turn off to indicate
that the battery is fully charged.
②
During power ON, when adapter is plugged in, the battery icon on the screen’s top
right corner will show that the battery is charging. The Charging LED Indicator will also
illuminate red to indicate charging, then turn green to indicate the battery is fully
charged.
2. Charging and Powering the Monitor Unit
For best results, charge the Monitor Unit before use. After the initial charge, recharge
normally as required. The Monitor Unit can be operated normally with power adapter
plugged into the unit.
①
Plug the USB Output adapter into the electrical outlet. Connect the small end of the
USB Power Cable to the USB DC Jack of the Monitor Unit.
②
Press and hold the Power On/Off/Menu Button for 2 seconds to turn ON the
Monitor Unit. The Power LED indicator will illuminate green to indicate the unit is ON.
③
Once both the Camera and Monitor Units are switched on, the display on the Monitor
Unit will show the video captured by the Camera Unit.
④
If there is no connection or you are out of range, the video display will go off and the
unit will also beep. Move the Monitor Unit closer to the Camera Unit until the link is
re-established.
Note:
The battery icon turns red on the LCD screen to indicate that the battery is low,
and it gives a beep periodically. The battery needs to be recharged. Fully charging the
battery takes about 5 hours.
Summary of Contents for DT40
Page 1: ...USER MANUAL Dragon Touch DT40 Babay Monitor...
Page 2: ...CONTENTS V1 1 81 100 01 20 21 40 61 80 41 60 101 120...
Page 58: ...Dragon Touch DT40 FQA 102 103 103 106 111 120 120 101...
Page 59: ...1 3 1m 2 3 3 4 AC 5 6 7 8 9 10 11 12 13 AC 14 15 16 1 102 103 DT40 DT40 PAIR 4 1 2 3 5 6 8 7 9...
Page 61: ...106 107 1 3 3 LED LED LED 2 USB USB USB DC 2 LED LCD 5...
Page 62: ...108 109 4 5 LED LED LED...
Page 63: ...DRAGON TOUCH DT40 1 110 111 OK 3 2 OK 4 3 LCD CAM 1 28 C OK OK 4 3 LCD CAM 1 28 C...


