


15
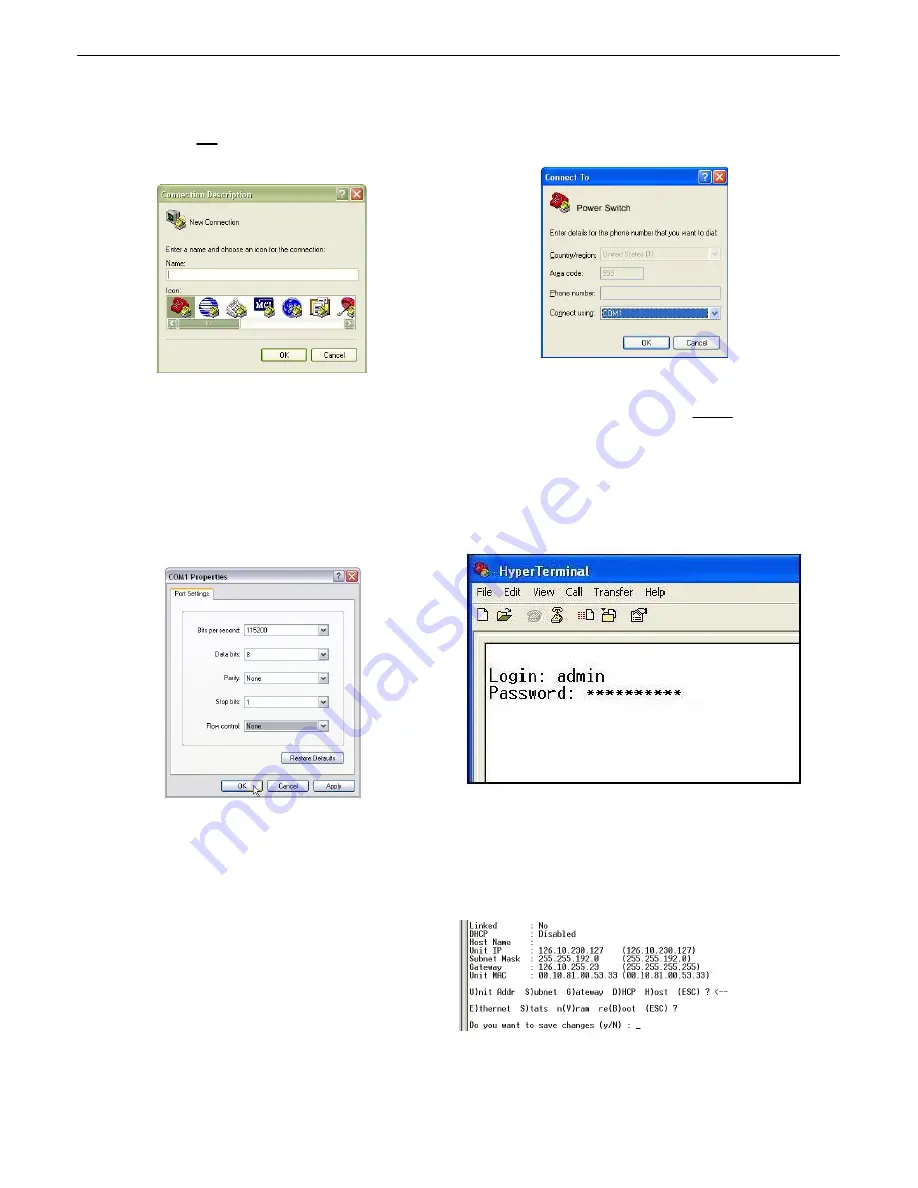
3. At the Connection Description screen, enter a name
for this connection. You may also select an icon. The
name and icon do not affect your ability to connect to the
unit.
4. At the Connect To screen, select Com port you'll
be using from the drop down and click OK. (COM1 is
the most commonly used.)
5. Select the following COM port options:
• Bits per second: 9600
• Data bits: 8
• Parity: None
• Stop bits: 1
• Flow control:
None
Once connected, you will see a blank, white
HyperTerminal screen. Press Enter to activate the
configuration menu.
6. When prompted, enter the default user name
admin
and password
dpstelecom
. NOTE
:
If you
don't receive a prompt for your user name and
password, check the Com port you are using on your
PC and make sure you are using the cable provided.
Additional cables can be ordered from DPS Telecom:
Part number
D-PR-045-10A-04
7. The Remote Power Switch (DC)'s main menu will
appear. Type
C
(config), then
E
(ethernet) to reach the
ethernet menu. Use the arrow keys to move your cursor
to the right fields and configure the unit's IP address,
subnet mask, and default gateway.
8. ESC to the main menu. When asked if you'd like to
save your changes, type Y for Y)es. Reboot the
Remote Power Switch (DC) to save its new
configuration.


