DoorBird Connect
Divus
SIP Proxy:
the IP address or URL of your SIP-PBX server or SIP-PBX service provider,
SIP User:
the SIP ID of your DoorBird’s SIP-PBX account,
SIP Password:
the password of your DoorBird’s SIP-PBX account.
4. Go back to the main administration area and tap on
“SIP Calls”
, then tap
“Add”
.
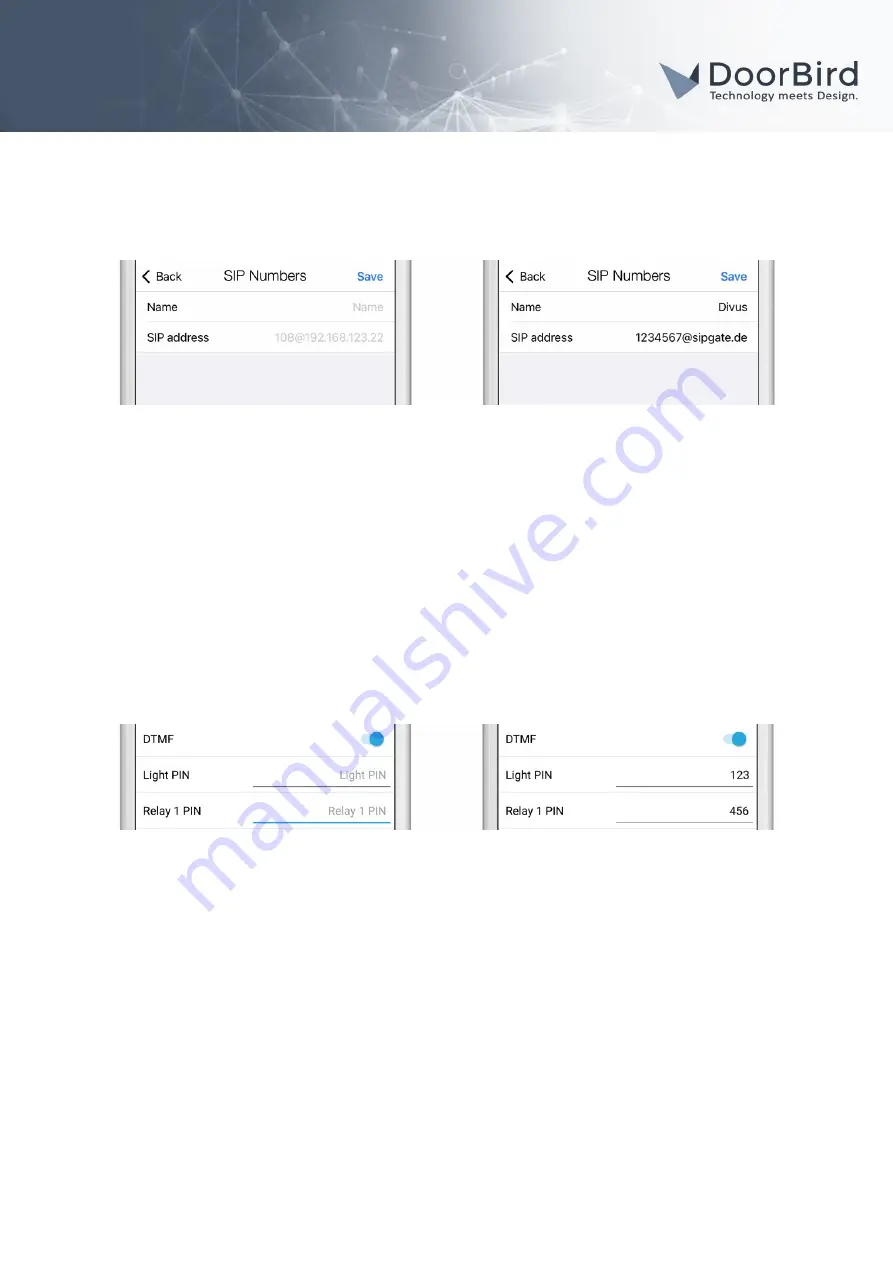
5. In the subsequent screen, enter an arbitrary name in the
“Name”
field, e.g.
“Divus”
. For the SIP address,
enter the SIP-ID of your Divus Touchpanel’s SIP-PBX account followed by an
“@”
and the IP address or
URL of your SIP-PBX server or SIP-PBX service provider, e.g.
.
If you want to make use of the DTMF-functionality of the DoorBird IP Video Door Station in order to control the built-
in light and door relay of the DoorBird IP Video Door Station using your Divus Touchpanel, do the following:
1. In the main administration area, choose
“SIP Settings”
.
2. Toggle the
“DTMF”
switch on, and set the
“Light PIN”
and
“Relay 1 PIN” to
arbitrary PIN numbers of your
preference.
Make sure to terminate these PIN numbers with a
“#”
symbol when entering them on your Divus
Touchpanel.
Note:
The transmission of DTMF signals only happens during an active call between the DoorBird IP
Video Door Station and the Divus Touchpanel.
For calls from the DoorBird IP Video Door Station to be forwarded to the Divus Touchpanel, a
schedule for the doorbell needs to be properly set up. Depending on the model of the DoorBird IP
Video Door Station, choose one of the following options:
A)
For all devices with a single door chime (e.g. D10x, D20x, D2101V etc.) find the settings in question under
“Schedule for doorbell”
. From this screen, tap the bell symbol in the upper left corner, choose
“SIP call”
and fill
out the schedule per your requirements.
B)
For all devices with multiple door chimes (e.g. D2102V, D2103V, etc.) find the settings in question in the
administration area under
“Key Configuration”
from the settings menu. Select the appropriate button and
tap
“Schedule for actions”
. From this screen, tap the bell symbol in the upper left corner, choose
“SIP call”
and
fill out the schedule per your requirements.
C)
For all devices outfitted with a keypad (e.g. D21DKV) find the settings in question in the administration area
under
“Keypad”
in the settings menu. Select the appropriate key combination and go to
“Schedule for
actions”
. From this screen, tap the bell symbol in the upper left corner, choose
“SIP call”
and fill out the
schedule per your requirements.
Hint: by tapping the button in the upper right corner it is possible to fill or clear the entire schedule.
All companies, logos and product names are registered trademarks of the respective companies.
Errors and omissions excepted – Last Update 02/2021 - Copyright © 2021 - Bird Home Automation GmbH – www.doorbird.com
2


