background image

Removing and replacing of shelves (General)

The number of shelves and position may vary between refrigerator models.

Put a screwdriver into the slot of the shelf lock.
Turn the screwdriver counterclockwise.
Remove the shelf locks from the wire shelf.

Slide the wire shelf to the left.
The right-hand side of the shelf will come loose.

Insert the ends of the wire shelf on the left-hand
side at the desired position.

Slide the shelf into the holes on the right-hand
side.

Lower the right-hand side of the wire shelf and
let the left-hand side slide out of the holes in the

wall.

Slide the plastic plugs into the holes of the wall.
Snap the shelf locks onto the wire shelf.

14

Summary of Contents for rm 2352

Page 1: ...additional information consult a qualified installer service agency or the gas supplier Contents Page Installation 4 Operating Instructions 9 Maintenance Service 1 1 AVIS Cet appareil doit Qtre repar...

Page 2: ......

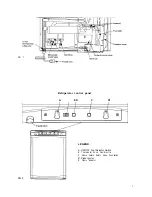
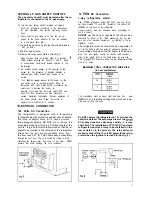
Page 3: ...FIG 1 Refrigerator control panel A ED C B FIG 2 LEGEND A ON OFF Fuel Selector Switch B Thermostat Knob Gas Electric C Flame Failure Safety Valve Push button D Piezo Igniter E Flame Indicator 3...

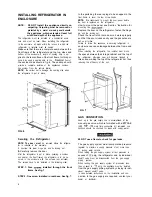
Page 4: ...installation shall be made in such a manner as to separate the combustion system from the living space of the mobile home or recreational vehicle Openings forairsupplyorforventing of combustion produc...

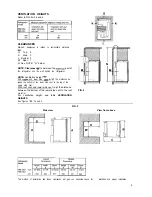
Page 5: ...frigerator NOTE Ventilation height N With umer and lower side vd is N the distances be tween the bottom of the lower side vent to the top of the upper side vent With roof vent and lower side vent is N...

Page 6: ...gs to be snapped in the front frame to cover the four screw heads NOTE We recommend to mount the door panel before the door is replaced on the refrigerator How to mount the panel see Section Instructi...

Page 7: ...d therefore recommended that the re ceptacle be located to the left side of the refrigerator viewed from the rear and approximately46 inches from the floor see FIG 8 This allows easy accessibility thr...

Page 8: ...e When mounting the panel proceed as follows Slide the panel from the bottom of the door into the grooves on the vertical edges of the door Push the panel upwards take the two plastic panel stops from...

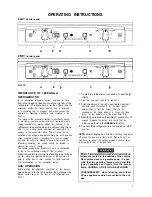
Page 9: ...rolling and pitching movement of the vehicle will pass to either side of level keeping the liquid ammonia from accumulating in the evaporator tubing GAS OPERATION Before starting the refrigerator chec...

Page 10: ...tored in any part of the compartment This compartment is not designed for deep or quick freezing of food Meat or fish whether raw or prepared can be stored in the frozen food storage compartment provi...

Page 11: ...6 9 10 11 12 13 14 Remove some insulation wool so that the heater is accessible Turn and lift the heater out of its pocket Fit the new heater into the pocket Reconnect the heater leads at the top Res...

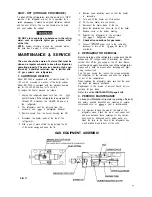
Page 12: ...e burner mounting screw and remove the burner assembly See FIG 11 Lift out the wire and flue baffle from the top of flue tube Clean the flue from the top using a flue brush Blowing compressed air into...

Page 13: ...ns are to be followed closely The refrigerator is quality guaranteed However we are not responsible for any failures caused by improper adjust ments and unfavorable installation conditions Contact ser...

Page 14: ...he wire shelf Slide the wire shelf to the left The right hand side of the shelf will come loose Insert the ends of the wire shelf on the left hand side at the desired position Slide the shelf into the...

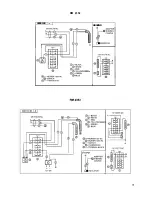
Page 15: ...RM 2352 2933129 I4 1 GROUND EEN GROUND...

Page 16: ...MO F0 0044...

Reviews: