EN
HC302D, HC502D
Installing and connecting the refrigerator
19
6.4
Connecting the refrigerator to the power supply
A
➤
Connect the plug of the connection cable into the mains.
✓
The green power LED lights up (fig.
2
2, page 4).
➤
Press the
button.
✓
The display turns on.
For the first two seconds the display will not show temperature values; it shows
“
--.-
”. Then the temperature read from the sensor is shown.
6.5
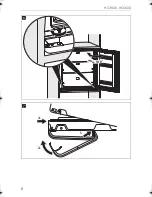
Mounting and removing the door handle
➤
Mount the handle as shown (fig.
7
, page 6).
➤
Remove the handle as shown (fig.
8
, page 7).
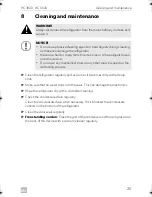
NOTICE!
•
Connect the device to a separate circuit to prevent malfunctioning
due to problems with other electrical equipment. Never connect the
device to a single socket with other electrical equipment by means
of a multi-socket.
•
UK only:
The refrigerator is supplied with a plug fitted with 3 A fuse.
In case this fuse has to be to changed, a 3 A ASTA approved
(BS 1362) fuse must be used.
HC302D-502D-IO-WEST.book Seite 19 Freitag, 17. März 2017 2:15 14
Summary of Contents for HC302D
Page 2: ......
Page 3: ...HC302D HC502D 3 2 1 5 7 8 6 HC302DFS HC502DFS HC302DBIU HC502DBIU 3 3 4 1...
Page 4: ...HC302D HC502D 4 5 6 7 8 4 3 1 2 2 1 2 1 1 1 2 2 2 A D C B 3...
Page 5: ...HC302D HC502D 5 50 mm 4 50mm 5...
Page 6: ...HC302D HC502D 6 min 100 6 1 2 3 7...
Page 7: ...HC302D HC502D 7 4 1 1 3 2 8 1 2 3 4 1 2 3 4 9...
Page 8: ...HC302D HC502D 8 C D A B 0 820 422 FS 450 BIU 440 540 580 HC302D a...
Page 9: ...HC302D HC502D 9 HC502D 948 486 FS 494 BIU 484 552 592 b...

