EN
PerfectView CAM60ADR
Mounting the camera
29
To prevent damage to the cables, when laying them ensure that there is
sufficient distance to hot or moving vehicle components (exhaust pipes,
drive shafts, light systems, fans, heater etc.). Use corrugated piping or
other protective materials to protect against mechanical wear.
Screw on the plug connections of the connecting cables to protect against
water penetration (fig.
e
, page 7).
When laying electric connections, ensure that
– They are not kinked or twisted
– They do not rub on edges
– They are not laid in sharp edged ducts without protection (fig.
3
,
page 4)
Attach the cables securely in the vehicles to prevent tripping hazards.
Use cable binders, insulating tape or glue the cables in place.
Protect every through-hole made in the bodywork against water pene-
tration, e.g. by using a cable with a sealant and by spraying the cable and
the the cable sleeve with sealant.
I
8
Mounting the camera
8.1
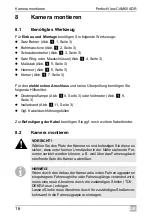
Tools required
For
installation and assembly
you will require the following tools:
Drill bit set (fig.
1
1, page 3)
Drill (fig.
1
2, page 3)
Screwdriver (fig.
1
3, page 3)
Set of ring or open-ended spanners (fig.
1
4, page 3)
Measuring ruler (fig.
1
5, page 3)
Hammer (fig.
1
6, page 3)
Centre punch (fig.
1
7, page 3)
NOTE
Do not start sealing the through-holes until all installation work
has been finished for the camera, and the required cable lengths
have been established.
Summary of Contents for WAECO 9102000024
Page 3: ...PerfectView CAM60ADR 3 1 2 3 4 9 6 8 5 7 10 11 12 1...
Page 4: ...PerfectView CAM60ADR 4 2 3 4 5...
Page 5: ...PerfectView CAM60ADR 5 1 2 3 16 mm 6 3 1 2 7...
Page 6: ...PerfectView CAM60ADR 6 90 8 9 0 a b c...
Page 7: ...PerfectView CAM60ADR 7 50 d 2 1 1 e f A B g...
Page 8: ...PerfectView CAM60ADR 8 h...
Page 157: ...RU PerfectView CAM60ADR 157 1 5 3 5 1 3 2 A...
Page 158: ...RU PerfectView CAM60ADR 158 30 15 31 L R 31...
Page 159: ...RU PerfectView CAM60ADR 159 A...
Page 160: ...RU PerfectView CAM60ADR 160 A IP69K 50 4 4 5 4...
Page 162: ...RU PerfectView CAM60ADR 162 6 7 7 1 A 7 5 1 6 2 3...
Page 163: ...RU PerfectView CAM60ADR 163 e 7 3 4 I...
Page 164: ...RU PerfectView CAM60ADR 164 8 8 1 1 1 3 1 2 3 1 3 3 1 4 3 1 5 3 1 6 3 1 7 3 1 8 3 1 9 3 1 11 3...
Page 165: ...RU PerfectView CAM60ADR 165 8 2 I 8 6 2 4...
Page 166: ...RU PerfectView CAM60ADR 166 I 9 6 0 6 A 4 5 x 20 a 6 A 4 5 1 5...
Page 167: ...RU PerfectView CAM60ADR 167 6 x 20 b 6 I A 16 A M3 x 8 c 6 50 d 7 A 16...
Page 168: ...RU PerfectView CAM60ADR 168 I e 7 I g 7 M3 x 8 h 8 161 f 7...


