


50
51
6.4 Calibration and measurement function, editing
The programme makes it possible to adapt images taken with the help of the calibration
template supplied so that exact measurements can be taken and entered in them. At
the same time, the exact determination of the current magnification factor is carried
out in the display of the programme.
Calibration
- First, make sure that the crosshairs are switched on (see menu “Options”).
- Then, place the calibration template under the microscope and focus on a section
of the millimetre scale, as shown in the following image, until the image appears
sharp on the PC monitor. Make sure that the lines are exactly parallel/rectangular
to the crosshairs in the PC image.
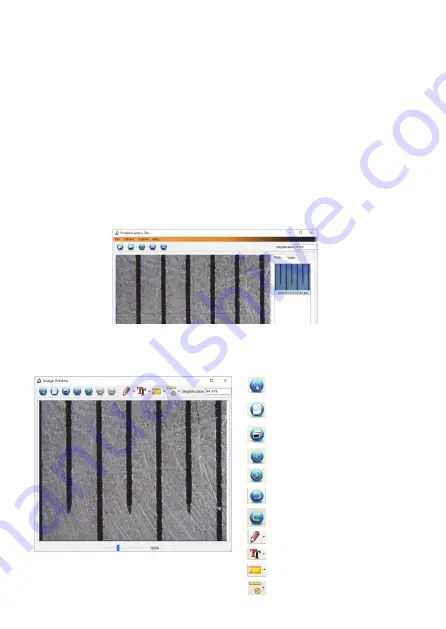
- Click on the photo symbol; now the picture appears in the image list on the right.
- Load this image into the measuring and editing interface by double-clicking on it
in the image list, which opens in a second window:
31
1. Focus microscope on the attached calibration ruler
and then adjust the magnification till the picture
is clear. Take a picture for the selected area when the
dial is parallel to the crossing as below.
2. Double-click on the picture to enter into measurement
interface as below.
31
1. Focus microscope on the attached calibration ruler
and then adjust the magnification till the picture
is clear. Take a picture for the selected area when the
dial is parallel to the crossing as below.
2. Double-click on the picture to enter into measurement
interface as below.
Save edited image
Save image to clipboard
Copy image
Previous image from clipboard
Next image from clipboard
Undo
Redo
Draw in picture
Insert text into image
Measuring tool
Calibrate


