background image

  9


4.7.4 PVR Configure 

[Record Device]: Select the disk for the record. 
[Format]: Format the selected disk. 
 

5. User Interface of DVD Playback 

Press the SOURCE button on the remote control under DVB showing mode,   
the unit will go to the DVD playing mode, then press the SETUP button on the   
remote control, the SETUP MENU will be displayed. 

After accessing the setup menu, press the direction buttons for up and down   
movement to select an item desired, then press the OK button to confirm.   
Press LEFT direction button return to the menu of upper level.   

To exit the setup, press the SETUP button again. In the SETUP MENU, you may   
choose any of the following options as you like.   
 

5.1 LANGUAGE SETUP 

Select Language in the setup menu, and 
display the Language submenu: 
(1).OSD Language 

Use this item to select the language of the 
setup menu and screen display. 
(2).Subtitle 

This  option  provides  the  preset  subtitle 
language. 
(3).MPEG4 Subtitle(optional) 

Select different MPEG4 subtitle encoding option. 
Note: Not all players support this item. 
(4).Audio 

Select the built-in disc dubbing language options. 
(5).DVD Menu 
This option provides the film's menu language options. 
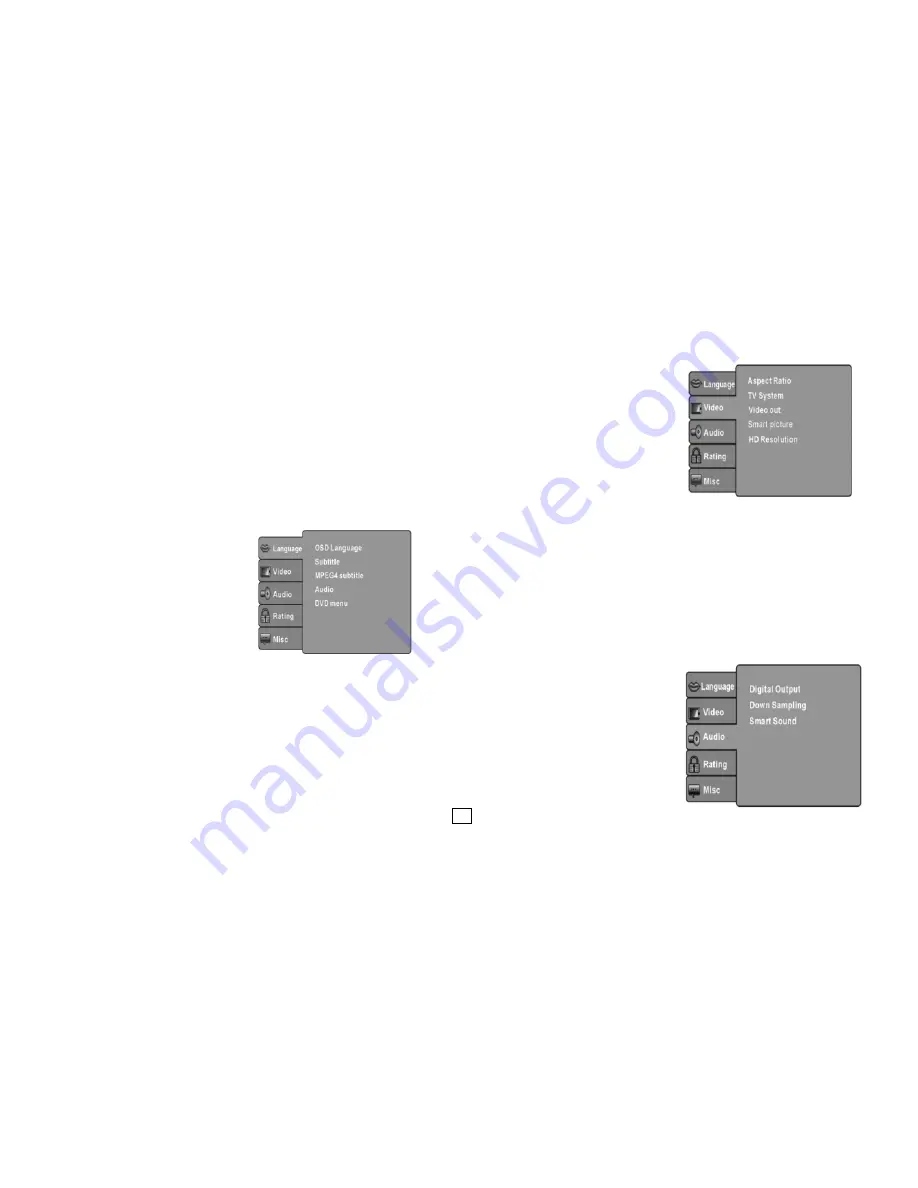


5.2 VIDEO SETUP 

Select Video in the setup menu, and display the Video submenu: 
(1).Aspect Ratio 
Select the aspect ratio. 

Notes: The image display ratio is related to 
the recorded disc format.   
Some disc can not display images in the 

aspect ratio you choose.   
If you play a disc recorded in 4:3 format on 
a wide screen TV, black bars will appear   

on the left and right side of the screen.   
You must adjust the screen setting 
depending on the type of the television you 

have. 
(2).TV System 
Select the different TV system. 

Note: The DVD player setting should be matched to your TV set. For more information of 
output format, refer to the instructions or your TV set. 
(3).Video Out 

Select the video output format wanted. 
Note: Only HDMI DVD 

player has “HD” selection. 

(4).HD Resolution (optional) 

After you set the video output to HD output, you can choose the resolution of HDMI output. 
Note: Only HDMI DVD player has this item. 


5.3 AUDIO SETUP 

Select  Audio  in  the  setup  menu,  and 
display the Audio submenu. 
(1).Digital output (Optional) 

Adjust the audio output on Coaxial ports to 
work in harmony with the audio   
equipment (e.g. receiver, amplifier) 

connected to the player.   
Off Digital audio output is disabled. 
PCM Transfer stereo 2 channels signals 

Summary of Contents for S9040DVD

Page 1: ...User Manual DVD DVB S2 Combo Player with HDMI output Please read this User Manual carefully to ensure proper use of this product and keep this manual for future reference S9040DVD ...

Page 2: ...h as lighted candles should be placed on the apparatus 17 Attention should be drawn to the environmental aspects of battery disposal 18 The use of apparatus in moderate climate 19 The apparatus shall not be exposed to dripping or splashing and that no objects filled with liquids such as vases shall be placed on the apparatus WARNING To reduce the risk of fire or electric shock do not expose this a...

Page 3: ...ecifications 12 1 Front and Rear Panel 1 1 Front Panel 1 CABIN DOOR In DVD mode 2 POWER Used to turn on off the main power supply 3 OPEN CLOSE BUTTON Used to open or close the disc tray in DVD mode 4 PLAY PAUSE Used to pause or playback the program being viewed 5 STANDBY INDICATOR LIGHT Used to visually show power state of the set top box the red will show if turned on the set top box power on 6 R...

Page 4: ...ct in the special DVD disc In DVB mode the color key used to operate different functions in Text screen or other menu 17 RECORD Used to record the program manually and select the record duration if pressed it again 18 TV RADIO Used to switch between TV channels and Radio stations 19 MUTE Used to turn the sound on or off 20 STANDBY Press the STANDBY button to switch between normal mode and standby ...

Page 5: ...he Remote Control will not operate if its path is blocked Sunlight or very bright light will decrease the sensitivity of the Remote Control 3 Connections Caution Make sure to check the voltage specification of the wall outlet is the same rating with the receiver To prevent the risk of electric shock do not open the cover or the back of the receiver Note When connecting the receiver to other equipm...

Page 6: ...ble favourite TV or Radio Program Press the FAVOURITE button on the Remote Control with the heart shaped symbol View Favourite Program 1 Press the Favourite button and the Favourite Menu will appear 2 Press UP DOWN to select your Favourite Programs 3 Press OK to select your favourite program Delete a TV or Radio Program 1 Select the Program and then press the BLUE button A message will appear Pres...

Page 7: ...ngs Press EXIT to exit the Menu 4 3 1 Satellite Configure the settings of satellites Satellites list Press Up Down to select a satellite whose settings will be shown at right side LNB Type Press LEFT RIGHT OK to show the list of LNB Types which is shown as frequencies of local oscillator You also can enter frequency by User Single User Dual at bottom of the list LNB Power Press LEFT RIGHT to set t...

Page 8: ...with the above settings Multi Satellites Scan Press OK to select satellites with the mark then press blue to pop the menu of scanning setting After Configuring like single satellite scan press OK to start multi satellites scan Channel Search Scan the satellites or Transponders according the configurations Blind Scan First scan the band to get the transponders which can be locked After gathering al...

Page 9: ...to off mode 4 5 Option To access the Menu press MENU and select Option The menu provides options to adjust the OSD Language Subtitle Language and Audio Language Select an option and press RIGHT LEFT to adjust the setting Press EXIT to exit the Menu 1 OSD Language Select an OSD language 2 Audio Language Select the preferred audio language for watching TV channels If the language is not available th...

Page 10: ...seconds Slide Mode adjust slide show effect as mode 0 59 or random Aspect Ratio Keep displays the picture as its original aspect Discard displays the picture in full screen mode 4 7 3 Movie Configure Subtitle Specific Small Displays the subtitle as small mode Normal Displays the subtitle as normal mode Big Displays the subtitle as big mode Subtitle BG White Displays the subtitle in white backgroun...

Page 11: ... DVD Menu This option provides the film s menu language options 5 2 VIDEO SETUP Select Video in the setup menu and display the Video submenu 1 Aspect Ratio Select the aspect ratio Notes The image display ratio is related to the recorded disc format Some disc can not display images in the aspect ratio you choose If you play a disc recorded in 4 3 format on a wide screen TV black bars will appear on...

Page 12: ... structure as shown picture above Press Direction key to choose the root directory and then press OK button to enter into the sub directory Press Direction key to choose the desired track and then press OK or PLAY to enjoy the music or movie If you want to return to the upper menu press Direction key to choose the icon and press OK button Filter Allows selecting the categories of files displayed i...

Page 13: ...ed misaligned Get Technician to Check Dish No picture or sound Viewing incorrect TV input Press the input button on your TV remote Tuned to digital teletext channel Retune to another channel Mosaic blocks in picture or picture freezes Dish LNB may be faulty Have technician Check you dish setup Scrambled channel message Channel is a Pay channel Select an alternative channel Forgotten channel lock c...

Page 14: ... your TV component Input terminals L R Analog audio L R signal COAXIAL RCA for SPDIF digital audio output HDMI Connects to HDMI in device Power Input 100 240V 50 60Hz Consumption Max 18W Display Decoder Module PAL NTSC Resolution 720X576 PAL 720X480 NTSC 720P 1080i 480i 480P 576i 576P Decoding Aspect Rate 4 3 Letterbox Pan Scan 16 9 Video MPEG2 Transport MP ML HL MPEG4 AVC H 264 HP L4 Audio MPEG2 ...

Reviews: